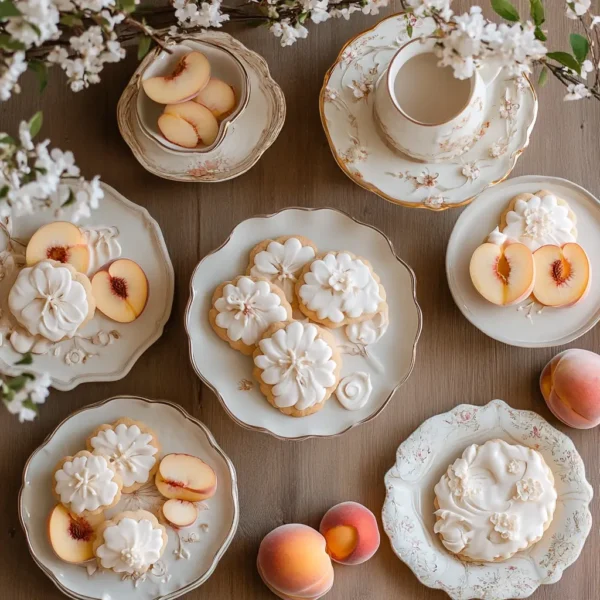

Dive into the delicious world of homemade toaster strudels—quick, customizable, and irresistible !
The Irresistible Allure of Homemade Toaster Strudel
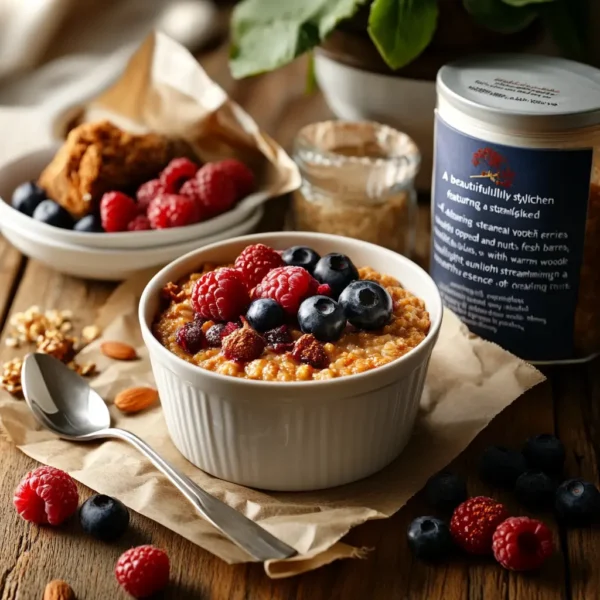
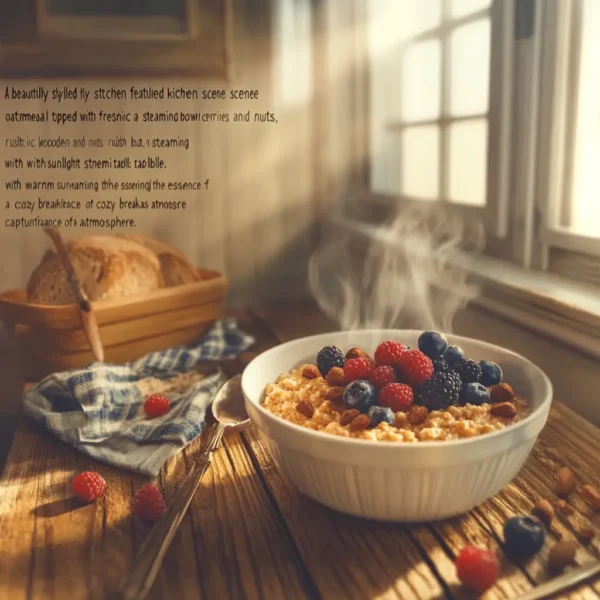
Homemade toaster strudel has become a beloved snack for many. These flaky pastries filled with fruit or cream create a satisfying treat. They provide the perfect balance of sweetness and texture, making them irresistible. Quick to prepare and delightful to eat, toaster strudels fit perfectly into busy lifestyles. Each bite brings warmth and nostalgia, making breakfast fun !
A Convenient Option for Every Meal
Toaster strudels are perfect for various occasions, fitting seamlessly into different meals. Whether it’s a quick breakfast, an afternoon snack, or a dessert after dinner, they cater to all needs. Easy to make ahead and reheat, these pastries offer convenience without sacrificing flavor. They’re a versatile food that everyone can enjoy. Discover how toaster strudels can stylize your meal routine !
Customization : Your Favorite Flavors
One of the best features of homemade toaster strudel is the ability to customize flavors. You can choose from an array of fruit fillings like berries, apples, or even chocolate. Additionally, experimenting with spices and toppings lets your creativity shine. With so many possibilities, there’s always a new combination to try. Get ready for a delicious adventure in the kitchen !
Sweet vs. Savory : Strudel for Every Craving
Homemade toaster strudels cater to both sweet and savory preferences, making them enjoyable for everyone. Sweet versions can include fruits, sweet creams, and glazes, perfect for breakfast or dessert. Savory options featuring cheeses, meats, or vegetables provide a unique twist for lunch or snacks. This versatility ensures you can indulge your cravings any time of day !
What Is a Toaster Strudel ?
A Brief History of Toaster Strudels
Toaster strudels are a delightful pastry that originated from traditional strudel recipes. Their roots trace back to Eastern European cuisine, where thin pastry dough was filled with various fillings. In the 1980s, the popular brand introduced toaster strudels as a convenient breakfast option. This innovation combined convenience with delicious flavors, making it a household favorite. Today, toaster strudels continue to delight breakfast enthusiasts everywhere !
Components of a Toaster Strudel
A classic toaster strudel consists of a flaky pastry crust and a sweet or savory filling. The pastry is typically made from enriched dough, creating a light, flaky texture when baked. Common fillings include fruit jams, cream cheese, or chocolate, providing a burst of flavor. Some people even create savory options, including cheese and meats. The strudels are often finished with a sweet glaze, enhancing their delightful taste.
Convenience and Appeal
The convenience of toaster strudels makes them a popular breakfast choice for busy individuals and families. They can be quickly heated in a toaster or oven, making them perfect for a fast meal. Furthermore, their portability allows for easy enjoyment on the go. With various flavors and options, toaster strudels cater to everyone’s tastes, appealing to both kids and adults alike.
Homemade Toaster Strudel vs. Store-Bought
While store-bought toaster strudels are convenient, homemade toaster strudel offers numerous advantages. Making your own allows for customization with fillings and toppings. You can adjust sweetness levels and choose organic or fresh ingredients. Homemade toaster ensures you know exactly what’s in your pastry while providing a warm, fresh taste. Experimenting at home can lead to delicious new creations that surpass store-bought options!
Popular Flavor Combinations for Homemade Toaster Strudel
Homemade toaster strudel comes in a variety of flavors, catering to diverse palates. Popular choices include strawberry, raspberry, and apple cinnamon. For chocolate lovers, options like chocolate hazelnut or chocolate cream are delightful. Savory variations, featuring fillings such as cheese and spinach, offer uniqueness. These flavor combinations make homemade toaster strudel suitable for anyone, satisfying sweet and savory cravings.
Nutritional Considerations for Homemade Toaster Strudel
While toaster strudels are delicious, it’s essential to consider their nutritional aspects. Many store-bought options can be high in sugars and fats. Homemade toaster strudel lets you control ingredients and healthier alternatives. You can choose whole grain pastry or reduce sweetness. Balancing enjoyment with mindful choices ensures you can relish homemade toaster strudel while maintaining a healthy lifestyle.
For a fantastic recipe, check out this link showcasing the process of making homemade toaster strudel !

Dive into the delicious world of homemade toaster strudels—quick, customizable, and irresistible !
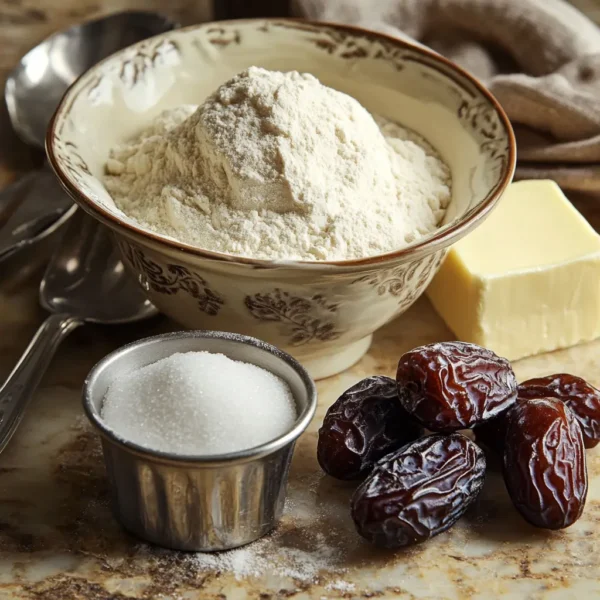
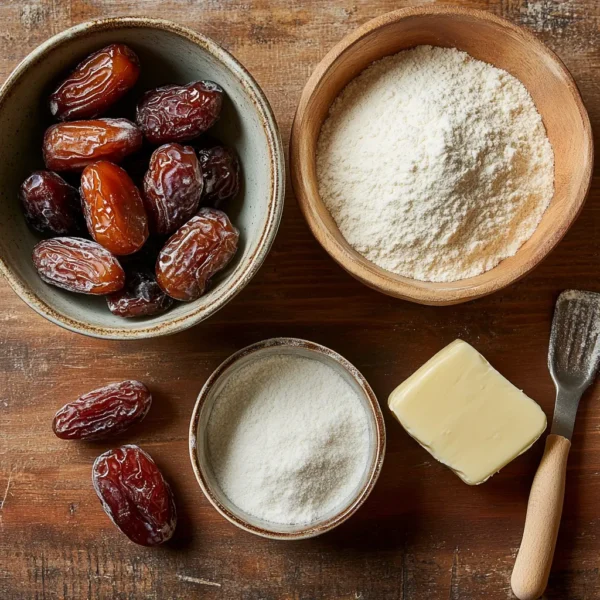
Key Ingredients for a Perfect Toaster Strudel
Flaky Pastry Dough
The foundation of any great toaster strudel is its flaky pastry dough. This dough provides the essential texture and structure for the pastry. Typically made from all-purpose flour, butter, and a bit of salt, it ensures a light and crisp texture. Cold butter is crucial to achieve flakiness, creating those delightful layers. The buttery taste of the dough wonderfully complements sweet or savory fillings.
Delicious Fillings
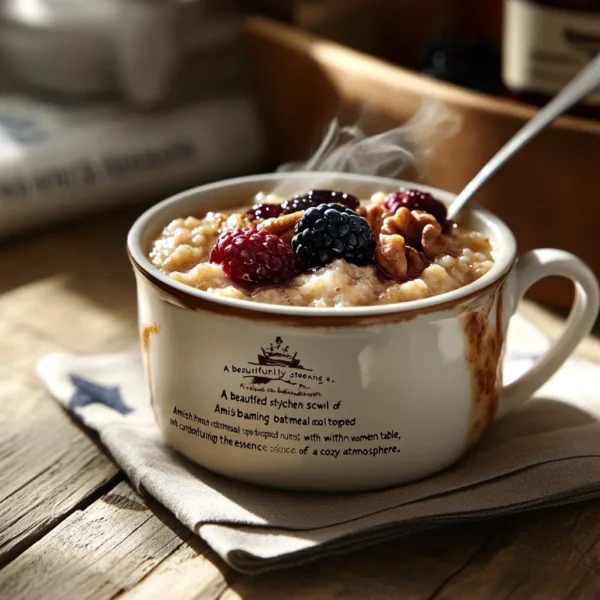
Fillings are what make toaster strudels exciting and flavorful. Traditional options include fruit jams, preserves, or creams. Popular fruits for fillings include berries, apples, or cherries. For a unique twist, consider combining fruits with spices like cinnamon or nutmeg. Savory options can incorporate cheese, spinach, or ham, providing versatile meal options. Choosing quality, fresh fillings enhances the overall flavor and satisfaction.
Sweeteners and Spices
To bring out the best in your toaster strudel, incorporate sweeteners and spices. Sweeteners like sugar, honey, and maple syrup can elevate the flavor profile. Consider adding a sprinkle of cinnamon or nutmeg for warmth and depth. These additions can turn a simple pastry into an extraordinary treat. Adjust sweetness to suit your personal preferences and dietary needs, ensuring everyone can enjoy it !
Icing and Toppings
Finishing off your toaster strudel with icing or toppings can enhance appeal and flavor. A simple glaze made from powdered sugar and milk is a classic choice. You can also experiment with flavored frostings or whipped cream for added sweetness. Fresh fruits, nuts, or chocolate drizzle can complement the pastry beautifully. This final touch not only adds taste but also presents an inviting appearance.
| Ingredients | Purpose | Flavor Suggestions |
|---|---|---|
| Flaky Pastry Dough | Provides structure and texture for the pastry | Use cold butter for flakiness |
| Fruit Fillings | Main flavor component | Berries, apples, or cherries |
| Sweeteners | Adds sweetness and enhances flavors | Brown sugar or honey |
| Spices | Provides warmth and depth in flavor | Cinnamon, nutmeg, or vanilla |
| Icing | Complements the strudel and adds sweetness | Powdered sugar glaze or frosting |
| Nuts | Adds texture and crunch | Chopped walnuts or pecans |
| Savory Fillings | Offers unique flavor combinations | Cheese, spinach, or ham |
Easy Steps to Make Homemade Toaster Strudel
Gather Your Ingredients
Before starting, gather all necessary ingredients for homemade toaster strudel. This includes flaky pastry dough, filling, sweeteners, and spices. Having everything organized makes the preparation process smoother. Ensure your ingredients are fresh for the best flavor and texture. With everything in place, you’re ready to create delicious pastries !
Prepare the Pastry Dough
To begin making the dough, combine flour, cold butter, and salt in a mixing bowl. Use a pastry cutter or fork to mix until crumbly. Then add cold water gradually, mixing until a dough forms. Be careful not to overwork the dough, as this can affect flakiness. Wrap the dough in plastic wrap and refrigerate for at least 30 minutes to chill.
Roll Out the Dough
Once chilled, remove the pastry dough from the refrigerator. On a floured surface, roll out the dough into a thin rectangle. Aim for about 1/8 inch thickness to ensure a flaky texture when baked. Cut the rolled dough into rectangles, allowing space for the filling. Using a sharp knife or pizza cutter makes this task easier and more efficient.
Fill and Assemble Your Homemade Toaster Strudel
Place your chosen filling in the center of each dough rectangle for your homemade toaster strudel. Be careful not to overfill, as this can cause spills during baking. Fold the dough over the filling and seal the edges with a fork or pinch closed. This step ensures the delicious fillings stay intact during the baking process, creating golden pockets of flavor.
Bake Your Homemade Toaster Strudel to Perfection
Preheat the oven to 375°F (190°C) while you finish assembling the strudels. Place the filled strudels on a prepared baking sheet lined with parchment paper. Brush the tops with an egg wash for a golden finish. Bake your homemade toaster strudel in the preheated oven for 20-25 minutes, or until golden brown. The aroma will fill your kitchen as they bake—enjoy the anticipation!
Cool and Serve Your Homemade Toaster Strudel
After baking, allow the toaster strudels to cool slightly on a wire rack. This helps firm up the filling and makes them easier to handle. Drizzle with icing or sprinkle with powdered sugar before serving. Enjoy warm or at room temperature, and share your homemade toaster strudel with family or friends for a delightful breakfast or snack !
Customize Your Homemade Toaster Strudel
Customization is key to making your homemade toaster strudel special. Experiment with different fillings, such as chocolate, cream cheese, or savory options like spinach and cheese. You can also alter the glaze, trying flavors like vanilla or almond instead of the standard icing. This flexibility ensures everyone gets their favorite flavor.
Storage Tips for Your Homemade Toaster Strudel
Proper storage helps maintain the freshness of your homemade toaster strudel. Store any leftovers in an airtight container at room temperature or refrigerate for later enjoyment. Reheat in a toaster or oven to restore crispness. These tips ensure you can savor your homemade toaster strudel for days to come !

Dive into the delicious world of homemade toaster strudels—quick, customizable, and irresistible !
Creative Variations and Flavor Combinations
Sweet Fruit Fillings
Sweet fruit fillings are a classic choice for homemade toaster strudel. Popular options include berries, apples, and peaches. Mixing fruits adds depth and flavor variety. Consider using fresh or frozen fruits for this delicious filling. A touch of cinnamon can enhance sweetness and complement the fruit beautifully.
Rich Cream Cheese Blend
A rich cream cheese filling creates a luscious twist on traditional toaster strudel. Combine cream cheese with powdered sugar for a sweet, creamy filling. You can also add a splash of vanilla extract for extra flavor. Use this filling alongside fresh fruits for a delightful combination. This creamy richness works wonderfully with a flaky pastry !
Decadent Chocolate Options
Chocolate lovers can indulge in decadent chocolate fillings for their toaster strudels. Melted chocolate or chocolate hazelnut spread provides a rich, sweet experience. Consider adding nuts or sea salt for an exquisite flavor contrast. This variation can satisfy any sweet tooth and create an enjoyable dessert experience. Homemade toaster strudels can become a delightful treat !
Savory Spinach and Cheese for Homemade Toaster Strudel
For those who prefer savory options, consider a spinach and cheese filling for your homemade toaster strudel. Combine cooked spinach with creamy ricotta or feta cheese for a unique flavor. Add Italian herbs or garlic for an extra flavor boost. This savory combination makes homemade toaster strudel suitable for lunch or dinner. They can be served with a side salad for a delicious complete meal !
Breakfast-Inspired Fillings for Homemade Toaster Strudel
Transform your homemade toaster strudel into a breakfast delight with egg and sausage fillings! Scramble eggs with cooked sausage or bacon for a hearty filling. Add cheese for an extra creamy texture that complements the other flavors. This breakfast-inspired variation packs a nutritional punch and is perfect for busy mornings. Enjoy these flavorful homemade toaster strudel any time of day !
Customizable Glazes and Toppings for Homemade Toaster Strudel
Don’t forget to elevate your homemade toaster strudel with customizable glazes and toppings! A simple icing made from powdered sugar and milk can create a sweet finish. Experiment with flavored glazes, like vanilla or almond, to enhance the taste. Fresh fruits, whipped cream, or chocolate sauce can be used as toppings for added appeal. These finishing touches make your homemade toaster strudel visually beautiful and irresistible !
Common Mistakes to Avoid
Skipping the Chilling Step
One of the most common mistakes when making homemade toaster strudel is skipping the chilling step. Allowing the dough to chill is essential for achieving flakiness. Chilling solidifies the butter, which creates those delightful layers. Without this step, the dough can spread too much during baking. Always plan for extra time to refrigerate your pastry!
Overfilling the Pastry
Another mistake is overfilling the toaster strudel. While it may be tempting to add more filling, this can lead to messy results. Overfilled pastries may spill during baking, ruining presentation and flavor. Stick to the recommended amount of filling to ensure even baking. A well-measured filling creates balanced flavor and prevents leaks !
Not Sealing the Edges Properly
Properly sealing the edges of your homemade toaster strudel is crucial for a successful bake. Failing to seal the edges can result in the filling leaking out during baking. Use a fork or your fingers to press the edges together firmly. This step ensures that your strudel stays intact while baking. Take a moment to seal them well !
Ignoring Oven Temperature for Homemade Toaster Strudel
Ignoring the oven temperature can lead to inconsistent baking results. Always preheat your oven to the specified temperature before baking your homemade toaster strudel. An unheated oven may cause the strudels to bake unevenly and affect texture. Use an oven thermometer if necessary to confirm accuracy. Maintaining the proper temperature is vital for achieving golden-brown strudels !
Not Checking for Doneness of Homemade Toaster Strudel
Failing to check for doneness is a common mistake that can affect your homemade toaster strudel. Baking times may vary depending on your oven and thickness of the pastry. Use a toothpick or knife to test if it’s cooked through. The strudel should be golden brown and the filling must be bubbling. Don’t rush; it ensures perfect results !

Dive into the delicious world of homemade toaster strudels—quick, customizable, and irresistible !
Chef’s Note
As you embark on making your delicious homemade toaster strudel, here are some helpful tips and insights to enhance your experience :
- Don’t Rush the Chilling Process: Allowing the dough to chill is vital for achieving that perfectly flaky texture. The cold butter needs time to firm up, so don’t skip this step!
- Experiment with Fillings: Have fun with your fillings! While traditional fruit options are popular, consider trying chocolate, cream cheese, or even savory ingredients like spinach and cheese for a unique twist.
- Add a Personal Touch: Customizing your homemade toaster strudel with unique glazes or toppings can elevate the dish. A simple icing sugar glaze or a sprinkle of powdered sugar makes it visually appealing!
- Monitor Baking Time: Every oven is different; keep an eye on your strudels as they bake. The perfect strudel should be golden brown and puffy. If you notice they are browning too quickly, reduce the temperature slightly.
- Save Leftovers Wisely: If you have any leftovers, store them in an airtight container in the refrigerator. They can be reheated in a toaster for a quick breakfast or snack.
- Involve Family and Friends: Making homemade toaster can be a fun group activity! Involve family members or friends in the process, allowing everyone to create their own personal variations.
- Enjoy Warm: For the best taste and texture, serve homemade toaster strudel warm from the oven. The flaky pastry and warm filling create a comforting experience that everyone will love!
Enjoy creating these delightful pastries and savoring each bite of your homemade toaster strudel !
By: Gastronome Recipes, february 07, 2025