Unlock the Secret to Rich German Chocolate Cupcakes

"Ingredients for homemade German chocolate cupcakes with coconut and pecans, beautifully arranged on a rustic wooden table."

A closer look at the key ingredients that define German chocolate and make these cupcakes delicious.

Defining German Chocolate

What is German Chocolate ?

German chocolate refers to a specific dark-baking chocolate with a unique flavor profile. This chocolate, known for its rich sweetness, is used in various desserts. It’s surprisingly different from the standard semi-sweet chocolate commonly found. German chocolate is milder and often labeled as “Baker’s German’s Sweet Chocolate,” highlighting its unique taste. Many enjoy it in layered cakes and decadent cupcakes for added depth.

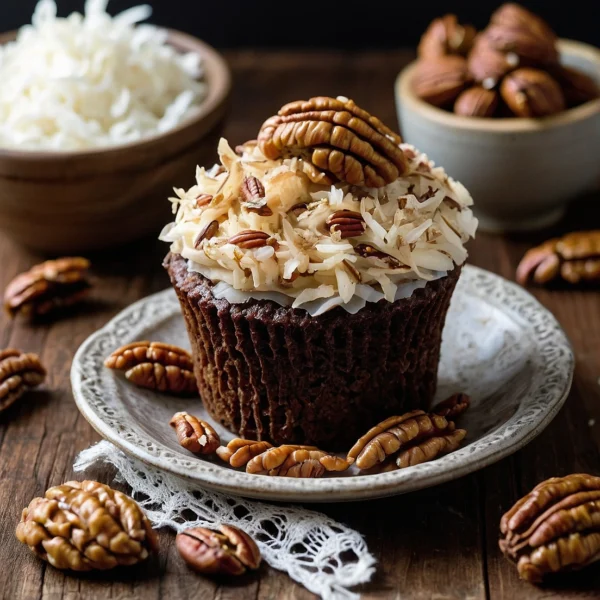
The Role of Coconut in German Chocolate Cupcakes

Coconut is a crucial ingredient, adding sweetness and texture. When baked, it adds a chewy contrast to the moist cupcake. Additionally, toasted coconut enhances the flavor profile in desserts. It’s often combined with frosting, creating a delightful experience. Using fresh versus desiccated coconut can offer different flavors in your cupcakes.

Why Pecans Matter

Pecans contribute a delightful crunch in German chocolate desserts. When they are chopped and added, they enhance flavor and texture. Toasting pecans before using brings out their nutty richness and aroma. Incorporating pecans can elevate your cupcakes’ overall taste. Their creamy flavor pairs beautifully with chocolate and coconut, creating a harmonious blend.

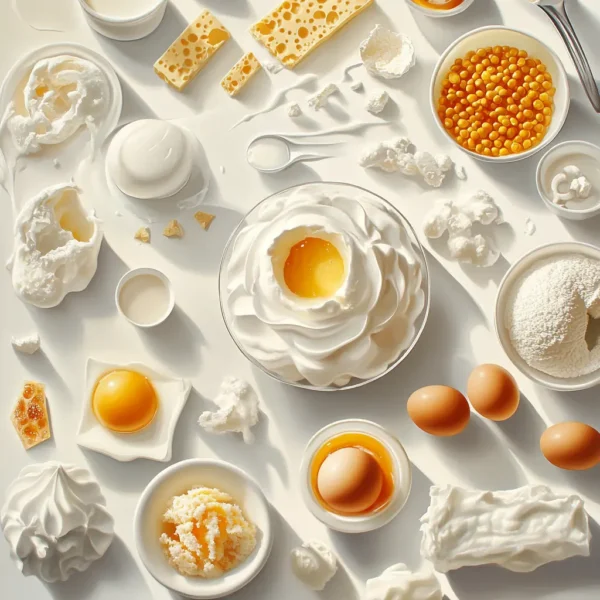
Other Key Ingredients for Success

Other essential ingredients like butter and sugar play vital roles in cupcake recipes. High-quality unsweetened cocoa powder delivers a rich chocolate flavor. Eggs provide structure, moisture, and richness to the batter for optimal texture. In addition, using vanilla extract enhances sweetness and depth. Milk is necessary for a balanced, moist blend when preparing your batter.

For a delightful recipe for German chocolate cupcakes, check out this link! Cooking Classy German Chocolate Cupcakes.

What Makes German Chocolate Cupcakes So Special ?

Unique Flavor Combination in German Chocolate Cupcakes

German chocolate cupcakes have a distinct flavor that sets them apart. The rich, sweet chocolate base has a depth that is irresistible. When combined with coconut and toasted pecans, it creates an indulgent experience. This unique flavor profile is perfect for dessert enthusiasts. The blend of these ingredients highlights a delicious balance that excites the palate.

Texture That Delights in German Chocolate Cupcakes

The texture of German chocolate cupcakes is marvelous and inviting. A moist and fluffy cupcake contrasts beautifully with the creamy frosting. Toasted coconut adds a chewy element that enhances the overall experience. The crunchy pecans bring a satisfying bite to each delicious morsel. This textural variety makes every bite of the cupcake memorable.

A Celebration of Tradition with German Chocolate Cupcakes

German chocolate cupcakes celebrate a rich culinary tradition. Originating from a recipe by Samuel German in 1852, they have historical significance. This dessert brings nostalgia and warmth to family gatherings. The time-honored combination of flavors pays homage to German heritage. Baking these cupcakes continues a legacy that many families cherish.

Versatile for Every Occasion

German chocolate cupcakes are perfect for any occasion. Their rich flavor and beautiful presentation make them crowd-pleasers. They can be served at birthday parties, weddings, and holidays. This versatility ensures they belong in every dessert repertoire. Their timeless appeal keeps dessert lovers coming back for more.
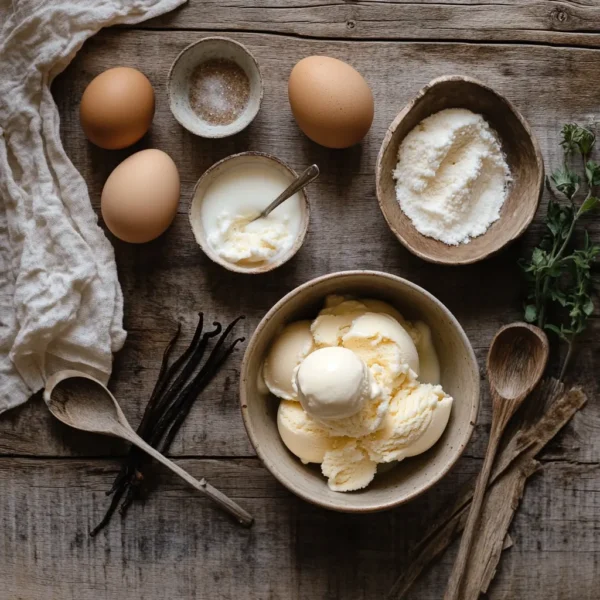
Perfect Pairings

German chocolate cupcakes can be paired with various beverages. A rich cup of coffee enhances the chocolate experience. Milk or cream complements the sweetness and texture delightfully. Additionally, a scoop of vanilla ice cream makes for a fantastic dessert duo. These pairings elevate the cupcake enjoyment to another level.

Creative Variations

Fans of German chocolate cupcakes can explore creative variations. Adding different flavored frostings can provide a unique twist. Experimenting with filling options, like caramel, can surprise the palate. You can incorporate spices or extracts for an intriguing flavor profile. These variations keep the classic recipe fresh and exciting.

Delicious German chocolate cupcakes topped with coconut and pecans, presented on a rustic wooden platter.

A closer look at the key ingredients that define German chocolate and make these cupcakes delicious.

Essential Ingredients for Rich German Chocolate Cupcakes

High-Quality German Chocolate

The star ingredient in German chocolate cupcakes is high-quality German chocolate. This type of chocolate has a unique sweetness that sets it apart. The rich, dark flavor enhances the cupcakes, making them decadent. Using premium chocolate creates a superior taste that is unmatched. Selecting the right chocolate elevates your baking game in every way.

Fresh Coconut for Texture

Fresh coconut is essential for its delightful texture and flavor. It adds chewiness that contrasts beautifully with the moist cupcake. Shredded coconut also enhances the overall visual appeal of the dessert. The natural sweetness of fresh coconut complements the chocolate perfectly. This ingredient makes the cupcakes feel gourmet and indulgent.

Chopped Pecans for Crunch

Chopped pecans bring a satisfying crunch to German chocolate cupcakes. Their nutty flavor pairs beautifully with chocolate and coconut. Toasting the pecans enhances their rich, buttery taste, adding depth. Adding nuts creates a textural contrast that is delightful. Every bite captures a perfect balance of flavor and texture.

All-Purpose Flour for Structure

All-purpose flour serves as the base for a stable cupcake structure. It provides the necessary support for the fluffy texture. This ingredient absorbs moisture, giving cupcakes a delightful crumb. Choosing the right flour ensures your cupcakes rise beautifully. The result is a light and airy cupcake that everyone will love.

Sweeteners for Perfect Balance

Sweeteners like granulated sugar play a critical role in flavor balance. They enhance the overall sweetness without overpowering the chocolate. The right amount of sugar creates a perfectly moist cupcake. Adjusting the sugar level allows for custom sweetness to fit your taste. This key ingredient balances the rich flavors perfectly.

IngredientsPurposeFlavor Suggestions
German ChocolateBase flavor, adds richnessDark chocolate variants
Fresh CoconutTexture and sweetnessToasted coconut
Chopped PecansCrunch and nuttinessRoasted or spiced pecans
All-Purpose FlourStructure and stabilityWhole wheat for a nutty taste
Granulated SugarSweetness and moistureBrown sugar for depth

Step-by-Step Guide to Baking the Perfect German Chocolate Cupcakes

Gather Your Ingredients

The first step in creating German chocolate cupcakes is gathering all ingredients. Use high-quality German chocolate for the best flavor. Don’t forget fresh coconut and chopped pecans for added texture. Ensure you have all-purpose flour, sugar, and eggs on hand. Preparing everything ahead streamlines the baking process significantly.

Prepare Your Baking Tools

Next, prepare your baking tools for a smooth experience. Select cupcake liners that match your theme for an appealing look. Use a mixing bowl, whisk, and spatula for easy blending. An electric mixer can enhance speed and efficiency. Preheat your oven to 350°F for optimal baking conditions.

Mixing the Batter for German Chocolate Cupcakes

Start by melting German chocolate gently using a double boiler. In a separate bowl, cream butter and sugar until light and fluffy. Gradually add eggs, one at a time, ensuring each blends well. Gradually incorporate melted chocolate into the mixture, followed by flour and coconut. The batter should be smooth and slightly thick, perfect for German chocolate cupcakes.

Filling the Liners with German Chocolate Cupcake Batter

Once your batter is ready, it’s time to fill the cupcake liners with German chocolate cupcake batter. Use a scoop or spoon for even distribution. Fill each liner about two-thirds full to allow space for rising. This ensures that they bake evenly and maintain their shape. Be careful not to overfill to prevent messy overflow.

Baking German Chocolate Cupcakes to Perfection

Place the filled liners in the preheated oven and bake German chocolate cupcakes for about 20-22 minutes. A toothpick should come out clean when inserted in the center. Avoid opening the oven door to maintain consistent heat. Once baked, allow cupcakes to cool in the pan for several minutes. Then, transfer them to a wire rack for complete cooling.

Step-by-step guide showing the process of baking German chocolate cupcakes with fresh ingredients and baking tools.

A closer look at the key ingredients that define German chocolate and make these cupcakes delicious.

Decorating Your Cupcakes : Fun and Creative Ideas

Classic Coconut-Pecan Frosting

One of the best ways to decorate German chocolate cupcakes is with classic coconut-pecan frosting. This rich frosting combines sweetened condensed milk, coconut, and toasted pecans. The texture contrasts beautifully with the moist cupcakes, enhancing the overall experience. Spread a generous layer on top for a decadent finish. This classic frosting celebrates the traditional flavors of German chocolate.

Whipped Chocolate Ganache

Whipped chocolate ganache is another delightful option for decorating your cupcakes. Made using heavy cream and high-quality chocolate, it’s both rich and silky. This luxurious frosting is easy to prepare and spreads beautifully. For an extra touch, use a piping bag for a professional-looking swirl. Drizzle with caramel sauce for added elegance and flavor.

Colorful Sprinkles and Edible Decorations

For a fun and festive touch, consider adding colorful sprinkles and edible decorations. Sprinkles come in various shapes, sizes, and colors to match any occasion. They add a pop of color that makes the cupcakes visually appealing. Consider using themed sprinkles for holidays or celebrations. This simple addition makes decorating easy and enjoyable for everyone.

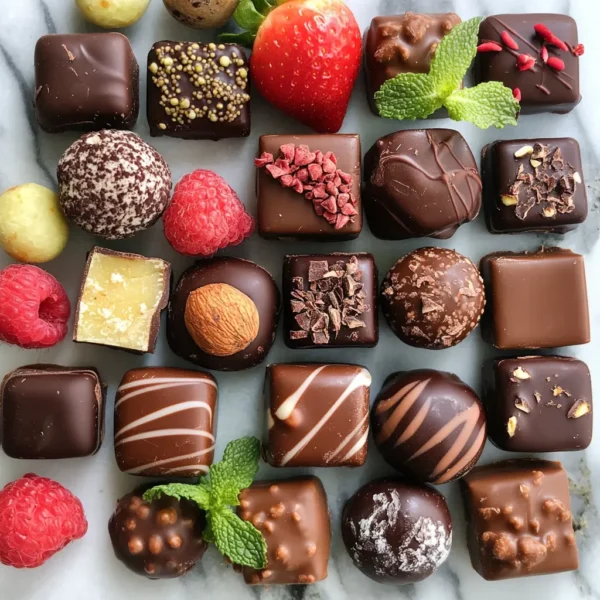
Fresh Fruit Garnishes

Fresh fruit garnishes can create a beautiful presentation on German chocolate cupcakes. Slices of strawberries, raspberries, or oranges add color and freshness. The natural acidity of fruit can balance the sweetness of the cupcakes. Use whole or sliced fruit for decorative flair. Layering fruits can create a stunning visual effect that impresses guests.

Themed Decorations for Special Occasions

When celebrating special occasions, themed decorations can enhance your cupcakes. Use edible ornaments, candles, or toppers relevant to the event. Creative designs, like holiday motifs or birthday wishes, add a personal touch. Customize your cupcakes to match party themes for instant charm. These thoughtful details make each cupcake memorable for guests.

Creative Drizzles and Sauces

Drizzling sauces on cupcakes can elevate both flavor and presentation. Popular options include caramel, chocolate, or fruit coulis. Use a spoon or squeeze bottle for precise control when decorating. A drizzle can create beautiful designs that enhance the visual appeal. Combining flavors can lead to unique and delicious creations that delight the palate.

Fun and Unique Textures

Experimenting with different textures can enhance your cupcake decorating game. Incorporate crushed cookies or graham crackers as a topping. Whipped cream can add lightness and airy appeal. Adding textural elements creates an engaging eating experience. Playing with textures ensures that each cupcake is as delightful to the senses as it is to the taste buds.

Common Mistakes to Avoid

Skipping Ingredient Preparation

One common mistake is skipping ingredient preparation before baking. Always measure ingredients accurately to ensure the right balance. Prepping ingredients like eggs and butter at room temperature ensures better mixing. Lack of preparation can lead to uneven texture in your cupcakes. Taking the time to prepare ingredients pays off with delicious results.

Overmixing the Batter

Overmixing the batter is a frequent error that can ruin your cupcakes. Mixing too much incorporates excess air, leading to dry and tough cupcakes. Aim for just enough blending until the ingredients are combined. A smooth, thick batter yields fluffy and moist cupcakes. Remember: less is more when it comes to mixing!

Incorrect Oven Temperature for German Chocolate Cupcakes

Baking your German chocolate cupcakes at the wrong temperature can result in uneven baking. Using an oven thermometer can help ensure accuracy. Too high heat can lead to burning on the top while remaining raw inside. Conversely, too low heat can make cupcakes dense and undercooked. Always preheat your oven for best results.

Not Using Cupcake Liners for German Chocolate Cupcakes

Neglecting to use cupcake liners is another common mistake. Liners not only make cupcakes easier to remove but also enhance presentation. They prevent sticking, which can be frustrating when serving. Choose themed or colorful liners to add charm to your cupcakes. Don’t skip this crucial step to boost aesthetics and ease!

Overfilling the Cupcake Liners with German Chocolate Cupcake Batter

Overfilling cupcake liners with German chocolate cupcake batter is a common pitfall that creates a mess. Filling each liner too much causes the batter to overflow when baking. Aim to fill liners about two-thirds full for optimal rising. This ensures a nicely shaped cupcake without overflow issues. Properly portioned batter guarantees beautiful, rounded cupcakes every time.

Forgetting to Cool Completely Before Frosting German Chocolate Cupcakes

Not allowing German chocolate cupcakes to cool completely before frosting is a significant mistake. Warm cupcakes can cause frosting to melt, ruining your decorations. Patience is essential; let them cool on a wire rack for even cooling. This helps maintain the frosting’s shape and texture upon application. Waiting improves the overall cupcake appearance and taste.

A list of common mistakes to avoid when baking German chocolate cupcakes, with images of each mistake.

A closer look at the key ingredients that define German chocolate and make these cupcakes delicious.

Chef’s Note

Baking German chocolate cupcakes can be a delightful experience that yields incredible results. Here are a few additional tips to ensure your cupcakes come out perfect every time :

  1. Use Quality Ingredients: The flavor of German chocolate cupcakes relies heavily on the quality of your ingredients. Always opt for high-quality chocolate and fresh ingredients whenever possible.
  2. Room Temperature Ingredients: Ensure that your eggs, butter, and any dairy ingredients are at room temperature before mixing. This allows for better emulsification and a smoother batter.
  3. Experiment with Flavors: Don’t be afraid to get creative! Feel free to add extracts like almond or coffee for an exciting flavor boost. You can also play around with different types of nuts or toppings.
  4. Test for Doneness: Remember that oven temperatures can vary, so always check for doneness a couple of minutes before the recommended baking time. A toothpick inserted in the center should come out clean or with a few moist crumbs.
  5. Storage: If you have leftover cupcakes, store them in an airtight container at room temperature for up to three days. For longer storage, consider freezing unfrosted cupcakes, then thawing them before decorating.
  6. Have Fun: Baking should be enjoyable! Invite friends or family to join in the fun, share tips, and create memories while decorating your delightful creations.

By keeping these notes in mind, you’re sure to impress your friends and family with your delicious German chocolate cupcakes. Happy baking !

By: Gastronome Recipes, february 06, 2025

Discover the Bold Taste of Grape Ice Cream with Ben & Jerry’s !

A colorful bowl of grape ice cream topped with fresh grapes and served in a cone.

Embark on a flavorful journey with grape ice cream; explore this unique treat from Ben and Jerry’s !

A Flavorful Journey into Grape Ice Cream

Grape ice cream is a delightful twist on traditional frozen desserts. This unique flavor from Ben and Jerry’s tantalizes with fruity sweetness. As a refreshing treat, it’s perfect for all occasions. The combination of creamy ice cream and grape essence captivates dessert lovers. Exploring grape ice cream opens the door to new culinary adventures.

The Allure of Ben and Jerry’s

Ben and Jerry’s is renowned for its innovative flavors and high-quality ingredients. This iconic brand consistently brings excitement to the ice cream aisle. Grape ice cream represents their commitment to creativity and quality. With a variety of indulgent options, they cater to every palate. Enjoying their ice cream is a pleasure for both new and lifelong fans.

Why Grape Ice Cream Stands Out

Grape-flavored desserts carry a unique nostalgia for many dessert lovers. This refreshing taste offers a different experience compared to common flavors. The vibrant color and refreshing flavor attract adventurous eaters. Grape ice cream provides an inviting option for summer gatherings. Its unexpected presence among classic flavors makes it an enticing choice.

Exploring Ben and Jerry’s Ice Cream Offerings

A Legacy of Flavor Innovation

Ben and Jerry’s has built a reputation for creativity and unique flavors. Founded in 1978, the company emphasizes using high-quality ingredients. Their approach to flavor development invites customers to explore new taste combinations. Signature offerings include classic favorites alongside limited-edition varieties. Experience their dedication to producing indulgent, memorable ice cream.

A Diverse Flavor Palette

Ben and Jerry’s ice cream menu ranges from classic to quirky. Each flavor mixes rich cream with exciting ingredients, ensuring variety. Popular choices include Cherry Garcia, Cookie Dough, and Phish Food. Seasonal flavors add a twist throughout the year. This diverse palette keeps ice cream lovers intrigued and engaged with new options.

Commitment to Sustainability

Ben and Jerry’s takes sustainability seriously in their ice cream production. They prioritize responsibly sourced ingredients, benefiting farmers and communities. Their commitment extends to environmental consciousness, supporting various social initiatives. This dedication appeals to customers looking for ethical dessert options. With every scoop, you can feel good knowing you support a brand that cares.

Unique Flavors That Inspire Creativity

Beyond traditional offerings, Ben and Jerry’s frequently experiments with innovative flavors. Their playful combinations, like grape ice cream, Ben and Jerry’s invites adventurous eaters to try the unexpected. This commitment to flavor experimentation inspires home cooks to recreate unique desserts. Drawing inspiration from Ben and Jerry’s keeps the culinary world vibrant and exciting.

Grape Ice Cream : A New Addition

Grape ice cream from Ben and Jerry’s stands out as an intriguing choice for dessert enthusiasts. This refreshing flavor showcases the brand’s versatility in creating new experiences. Made with high-quality grape ingredients, it offers a delightful burst of flavor. Enjoying grape ice cream Ben and Jerry’s style is a must-try for all ice cream lovers.

Why Grape Ice Cream Ben and Jerry’s is a Must-Try

Grape ice cream Ben and Jerry’s provides a nostalgic twist to traditional flavors. Ideal for summer days, this treat offers refreshing sweetness. Its unique profile distinguishes it from more conventional ice cream options. Indulging in this flavor brings excitement to your ice cream adventures. Don’t miss out on this unique flavor experience !

A colorful display of various Ben and Jerry's ice cream tubs showcasing their unique flavors.

Embark on a flavorful journey with grape ice cream; explore this unique treat from Ben and Jerry’s !

Defining Grape Ice Cream and Its Popularity

Understanding Grape Ice Cream

Grape ice cream is a delightful frozen dessert that captures the essence of fresh grapes. Its appealing purple hue and fruity flavor make it visually enticing. Many dessert lovers appreciate its unique taste compared to traditional flavors. The base typically includes creamy ice cream combined with real grape essence. This unique combination elevates it to a gourmet dessert level.

Cultural Significance of Grape Flavors

Grape flavors have long been cherished in various cultures worldwide. From wine production to sweet confections, grapes are versatile ingredients. In Asian cultures, grape-flavored desserts enjoy substantial popularity, making them accessible. As a result, grape ice cream Ben and Jerry’s resonates with diverse palates. The cultural connection adds to its charm and appreciation in dessert menus worldwide.

Grape Ice Cream Ben and Jerry’s as a Trending Flavor

Recently, grape ice cream Ben and Jerry’s has emerged as an exciting trend in the dessert world. Its refreshing taste attracts adventurous eaters seeking new experiences. creative approach encourages consumers to try grape ice cream. The unique offerings keep dessert lovers engaged and curious. This trend signals a shift towards embracing innovative flavor combinations.

Nostalgia and Grape Ice Cream Ben and Jerry’s Experience

For many, grape ice cream Ben and Jerry’s evokes memories of childhood treats and summer days. Growing up, grape-flavored sweets were a common delight for many families. Nostalgia plays a significant role in the appeal of grape ice cream. This emotional connection enhances the enjoyment of the dessert. It serves as a reminder of carefree, joyful moments associated with sweet indulgence.

Pairing Grape Ice Cream Ben and Jerry’s with Other Treats

Grape ice cream Ben and Jerry’s pairs wonderfully with a range of desserts and snacks. Enjoy it alongside warm pastries, tartlets, or fruity toppings. The refreshing flavor complements chocolate, creating balanced indulgence. Experimenting with grape ice cream in milkshakes or sundaes elevates traditional flavors. These creative combinations add excitement to your dessert experience !

If you’re curious about why grape ice cream isn’t a common flavor, check out this insightful article on the topic here. It explores the intriguing world of ice cream flavors!

Key Ingredients in Grape Ice Cream

The Foundation : Creamy Base

The creamy base of grape ice cream is essential for its rich texture. High-quality dairy, including heavy cream and whole milk, provides creaminess. This foundation allows the grape flavor to shine through beautifully. Selecting the right dairy components enhances taste and mouthfeel. This step is crucial for achieving the perfect indulgence in each scoop.

Fresh Grape Flavor Dynamics

The use of real grape puree or extract is vital for flavor depth. Fresh grapes offer a bright, natural sweetness that elevates the dessert. The balance of tartness from certain grape varieties adds complexity. This alignment creates a unique flavor profile that distinguishes grape ice cream. Choosing vibrant, ripe grapes ensures the best possible taste.

Sweeteners that Enhance Taste

Sweeteners play an important role in balancing flavors and sweetness. Cane sugar is commonly used to enhance the natural sweetness. Honey or agave syrup can add alternative sweetness and subtle flavor notes. The right amount of sweetener is vital in complementing grape flavors. Balancing sweetness ensures a delightful experience with each bite.

Texture Contributors : Stabilizers and Thickeners

Stabilizers and thickeners are often incorporated to improve texture. Ingredients like cornstarch or guar gum help create a smooth consistency. These components prevent ice crystals from forming in the freezing process. A well-textured grape ice cream yields a more enjoyable mouthfeel. Understanding the importance of these ingredients contributes to an ideal dessert.

Key Ingredients Table

IngredientsPurposeFlavor Suggestions
Heavy CreamProvides a rich, creamy baseEnhances overall dessert richness
Whole MilkAdds creaminess and balances textureComplements the grape flavor
Fresh Grape PureeDelivers authentic grape flavorBright, fruity taste
Cane SugarSweetens the ice creamBalances tartness for a pleasant taste
CornstarchStabilizer that helps create a smooth texturePrevents ice crystallization
Guar GumThickening agent for consistencyImproves creaminess
A visually appealing display of the key ingredients used in grape ice cream, showcasing fresh grapes and dairy.

Embark on a flavorful journey with grape ice cream; explore this unique treat from Ben and Jerry’s !

Creative Ways to Enjoy Grape Ice Cream Ben and Jerry’s

Grape Ice Cream Ben and Jerry’s Sundae Delight

Transform your grape ice cream Ben and Jerry’s experience by creating a delectable sundae. Start by scooping grape ice cream into a bowl. Elevate it with toppings like whipped cream, chocolate sauce, and nuts. Add fresh grapes for a burst of flavor and color. This playful presentation makes for an eye-catching dessert. Enjoy the combination of creamy, crunchy, and fruity goodness !

Frozen Grape Ice Cream Ben and Jerry’s Smoothie

Blend grape ice cream Ben and Jerry’s to make a refreshing smoothie. Combine it with yogurt, fresh fruits, and a splash of juice. This easy recipe creates a sweet, creamy beverage perfect for warm days. The bright color and refreshing taste make it appealing. Add spinach for secret nutrition without affecting the flavor!

Grape Ice Cream Ben and Jerry’s Milkshake Magic

Craft a delicious grape ice cream Ben and Jerry’s milkshake that delights all ages. Blend grape ice cream with milk until smooth and creamy. Garnish with whipped cream, a cherry, or sprinkles for flair. This grape ice cream milkshake is perfect for parties or casual gatherings. Its fun flavor is sure to impress guests and kids alike!

Gourmet Grape Ice Cream Ben and Jerry’s Float

Create a gourmet twist on the classic float using grape ice cream Ben and Jerry’s and grape soda. Fill a glass with grape soda and top it with a generous scoop of ice cream. The combination of fizzy soda and rich grape ice cream creates a refreshing drink. Enjoy it on a hot summer day for a delightful treat. It’s a nostalgic yet modern option for any ice cream lover!

Pairing Grape Ice Cream Ben and Jerry’s with Savory Creations

For a unique culinary experience, pair grape ice cream Ben and Jerry’s with savory dishes. Serve grape ice cream alongside cheese platters featuring creamy cheeses and salty crackers. The contrast of sweet and savory flavors elevates both dish experiences. You can also accompany grape ice cream Ben with charcuterie boards for an exquisite treat. This pairing surprises guests with unexpected culinary combinations !

Common Mistakes to Avoid

Overlooking Ingredient Quality

One major mistake when preparing desserts is using low-quality ingredients. Choosing fresh, high-quality grapes can significantly improve the flavor. The richness of Ben and Jerry’s ice cream also relies on premium ingredients. Avoid stale or outdated components that detract from the final taste. Always prioritize quality for exceptional desserts.

Skipping the Measurement Process

Accurate measurements are crucial in dessert recipes. Skipping this step can lead to imbalanced flavors and poor texture. Use proper tools like measuring cups and spoons for liquids and solids. Inconsistent measurements can ruin the intended outcome of grape ice cream. Ensure you follow the recipe closely for the best results.

Ignoring Freezing Guidelines

Freezing guidelines are essential for making ice cream at home. Ignoring proper freezing times can result in icy, granular textures. For a smooth consistency, allow enough time for freezing the mixture. Additionally, ensure the ice cream base is well-chilled before churning. Avoid rushing this important step for better texture.

Neglecting Presentation Techniques for Grape Ice Cream

Presentation is key to making desserts visually appealing. Neglecting to plate your grape ice cream beautifully detracts from the experience. A well-dressed dish enhances enjoyment and anticipation. Use garnishes like fresh grapes or mint leaves to elevate your presentation. Invest time in aesthetics to impress your guests.

Failing to Experiment with Flavors in Grape Ice Cream

Not experimenting with flavors restricts your creativity in dessert making. While grape ice cream is delightful, exploring other complementary flavors can enhance it. Consider mixing in hints of lemon or mint to elevate the taste. Try different toppings to create a new experience with each serving. Embracing creativity leads to delicious discoveries!

A colorful array of desserts, showcasing beautifully presented grape ice cream and other sweet treats.

Embark on a flavorful journey with grape ice cream; explore this unique treat from Ben and Jerry’s !

Chef’s Note

Creating a delightful grape ice cream experience can be smooth sailing when you follow a few key tips. Here are some insights to elevate your dessert-making process :

  1. Quality First: Always prioritize fresh and high-quality ingredients. The flavor of grape ice cream relies heavily on the quality of grapes used. Fresh, ripe grapes will amplify both taste and color.
  2. Precision in Measuring: Use accurate measuring techniques for all ingredients. Even small variations in sugar or cream can impact the texture of your ice cream. Invest in good measuring cups and a kitchen scale for consistency.
  3. Chilling Ingredients: Ensure that your ice cream base is thoroughly chilled before churning. This helps achieve a smooth, creamy consistency without ice crystals. It can make a significant difference in the final product.
  4. Experiment with Pairings: Don’t hesitate to experiment by adding complementary flavors. Consider citrus notes, such as lemon zest, or fresh herbs like mint to elevate your grape ice cream. This creativity can lead to delightful surprises.
  5. Presentation Counts: Take the time to plate your grape ice cream attractively. Beautiful presentation not only enhances the visual appeal but also makes the indulgent experience more enjoyable for your guests. Garnishing with fresh fruits or edible flowers adds a personal touch.
  6. Enjoy the Process: Remember that cooking should be a joyful experience. Share your creations with family and friends, and savor the moments spent enjoying delicious desserts together. Your passion for making grape ice cream will be reflected in your dishes.

Following these tips will help you create exquisite grape ice cream that will impress anyone who gets a taste. Enjoy your culinary journey !

By: Gastronome Recipes, february 04, 2025

Savor Exotic Flavors : Indulge in Asian Desserts Today !

A vibrant display of various Asian desserts, showcasing diversity and appeal.

Explore the enchanting world of Asian desserts, where traditional flavors meet modern innovation !

The Allure of Asian Desserts

Asian desserts are a captivating fusion of flavors and textures. Each region boasts unique sweet treats that reflect its culture. From delicate cakes to rich puddings, Asian sweets offer something for everyone. The balance of sweetness and savory ingredients makes these desserts enticing. Discovering Asian desserts can expand your culinary horizons and delight your taste buds.

A Journey of Sweetness Across Asia

Exploring the world of Asian desserts is an adventure filled with delicious aromas. Each country presents its culinary heritage through sweet creations. Influences from fruits, spices, and traditional methods contribute to standout desserts. Travel through these flavors and experience different textures with each bite. Allow this journey to inspire your own cooking adventures.

Celebrating Tradition Through Dessert

In many Asian cultures, desserts are essential for celebrations and gatherings. Traditional sweets, made with love and care, bring families together. Festivals often showcase unique desserts that represent local customs and flavors. By enjoying these treats, we honor the rich cultural heritage of Asia. Each dessert tells a story, making it special and memorable.

Discover the Delightful World of Asian Desserts

A Flavorful Fusion of Cultures

Asian desserts showcase a diverse range of flavors and traditions. From East to West, each region offers unique sweet treats. Countries like Japan, Thailand, and China feature distinct ingredients and preparation methods. You will find flavors such as matcha, coconut, and red bean prevalent in many popular desserts. This fusion creates exciting tastes that will delight every palate.

Iconic Asian Desserts to Savor

Some Asian desserts have become iconic around the world. Mochi, a chewy rice cake, is celebrated for its delightful texture. Mango sticky rice combines sweet coconut and fresh mango goodness for a tropical treat. On the other hand, egg tarts offer a creamy custard filling in crisp pastry. Exploring these celebrated desserts allows you to appreciate Asian culinary creativity.

Seasonal Inspirations in Asian Desserts

In Asian cultures, desserts often reflect seasonal ingredients and local specialties. Traditional recipes incorporate fresh fruits during their peak seasons, enhancing flavors and nutrition. Festivals often inspire special desserts that celebrate the harvest. Understanding the connection between seasons and desserts adds a cultural depth to your culinary experience. Embracing these seasonal aspects allows you to savor authenticity.

The Art of Presentation in Asian Desserts

Presentation plays a crucial role in Asian desserts. Many sweets are beautifully arranged, appealing to both the eye and palate. Vibrant colors and intricate designs enhance the dining experience. For instance, desserts like wagashi and fruit-shaped buns showcase artistic craftsmanship. Beautifully presented food encourages appreciation and enjoyment, elevating the entire experience of indulging in Asian desserts.

Sweet Traditions and Celebrations

Asian desserts often play an important role in cultural celebrations and family gatherings. Special occasions feature traditional sweets that hold symbolic meanings. For example, mooncakes are essential during the Mid-Autumn Festival. Understanding the significance of these desserts allows you to connect with deeper cultural roots while enjoying Asian desserts.

Exploring Unique Flavors in Asian Desserts

Each Asian dessert brings unique flavors that reflect regional ingredients. From fragrant pandan to rich matcha, these flavors create exciting combinations. Experimentation with textures, such as chewy, crunchy, or creamy, enhances the dessert experience. Discovering diverse flavor profiles inspires creativity in your culinary explorations of Asian desserts.

The Future of Asian Desserts

The world of Asian desserts is evolving, blending traditional flavors with modern techniques. Innovative chefs are experimenting with new ingredients and presentations. The fusion of culinary practices is delighting dessert lovers globally. As these trends emerge, the joy of exploring Asian desserts continues to grow, crafting a limitless future of sweet possibilities.

If you’re looking to explore more about Asian desserts, check out this insightful article on cozy meal recipes for Asian desserts. It offers a variety of delicious treats from the East !

A colorful display of various Asian desserts presented elegantly.

Explore the enchanting world of Asian desserts, where traditional flavors meet modern innovation !

Key Ingredients in Asian Desserts Recipes

Essential Flours Used in Asian Desserts

Various types of flour contribute to the unique textures of Asian desserts. Rice flour is a crucial ingredient in many traditional sweets. This gluten-free option enhances chewiness in desserts like mochi. Wheat flour is often used in pastries like egg tarts. Understanding the role of different flours is important for replicating traditional recipes.

Sweeteners that Elevate Flavors

Sweeteners play a vital role in Asian desserts, balancing the flavors. Traditional sweeteners include sugar, honey, and palm sugar. These natural options add depth and complexity to sweet treats. For instance, jaggery imparts a rich flavor to confections. Selecting the right sweetener enhances your dessert’s overall taste experience.

Fruits and Vegetables for Freshness

Incorporating fresh fruits and vegetables elevates the appeal of Asian desserts. Ingredients like mango, lychee, and coconut are popular choices. These ingredients provide vibrant colors and natural sweetness. Additionally, pumpkin and sweet potato feature in various confections. Using seasonal produce ensures freshness and enhances flavor profiles in your desserts.

Creamy Elements for Decadence

Many Asian desserts include creamy elements that enhance richness. Coconut milk is a common ingredient, providing a luxurious texture in puddings. Condensed milk also lends creaminess and sweetness to desserts like ice creams. Exploring different dairy and non-dairy options allows for unique twists on traditional recipes.

IngredientsPurposeFlavor Suggestions
Rice FlourBase for chewy desserts like mochiNeutral, allows other flavors to shine
Palm SugarNatural sweetener that adds depthCaramel-like richness
Fresh MangoEnhances sweetness and colorTropical, fruity
Coconut MilkAdds creaminess and richnessRich, tropical flavor
Sweet PotatoProvides natural sweetness and colorEarthy, sweet
JaggeryTraditional sweetener for confectioneryDeep, caramel flavor
LycheeAdds freshness and floral notesJuicy, fragrant
Heavy CreamEnhances texture in creamy dessertsThick, rich

Easy Asian Desserts Recipes to Try at Home

Deliciously Simple Mochi Ice Cream

Mochi ice cream combines chewy mochi with creamy ice cream. This fun dessert is popular for its unique texture. Choose your favorite ice cream flavors to fill the mochi. Making mochi at home is surprisingly easy. Once prepared, enjoy this delightful treat anytime !

Classic Mango Sticky Rice

Mango sticky rice is a beloved Thai dessert you can recreate at home. Follow simple steps to cook sticky rice perfectly. Pair with ripe mango slices and drizzle with coconut sauce. This dish celebrates sweet and salty flavors beautifully. Serve it warm or chilled for a refreshing treat.

Light and Refreshing Coconut Pudding

Coconut pudding offers a light and satisfying dessert option. Made with coconut milk and agar-agar, it’s easy to prepare. The silky texture melts in your mouth, giving you a delightful experience. Enhance the flavor with fresh fruits or toasted coconut. This recipe is perfect for warm days!

Flavorful Chinese Egg Tarts

Chinese egg tarts feature a buttery crust filled with creamy custard. They are easy to make and undeniably delicious. Use store-bought pastry for a quicker option. The combination of flaky crust and silky filling is heavenly. Enjoy these tarts as a sweet snack anytime !

Indulgent Thai Coconut Custard

Thai coconut custard is a cherished dessert, combining sweet coconut and rice flour. The layers create a delightful texture experience. Serve it warm or chilled for the best enjoyment. This treat is perfect for special occasions or everyday indulgence. Explore the traditional methods for authentic flavor !

Easy Asian Dessert Recipes : Final Thoughts

When exploring easy Asian dessert recipes, embrace creativity and flavor. Don’t hesitate to experiment with different ingredients and styles. Sharing these delightful treats with loved ones creates memorable experiences. Discovering these easy Asian dessert recipes will broaden your culinary skills and enjoyment. Enjoy the journey of making delicious desserts !

A beautifully arranged display of various Asian desserts, including mochi ice cream, mango sticky rice, and egg tarts.

Explore the enchanting world of Asian desserts, where traditional flavors meet modern innovation !

Popular Asian Desserts You Must Try

Exquisite Mochi : A Chewy Delight

Mochi is a beloved Japanese rice cake made from glutinous rice. Its distinctive chewy texture makes it a must-try dessert. Mochi can be found in various flavors including matcha, strawberry, and red bean. Often, it’s filled with ice cream or sweetened fillings. This versatile treat can be enjoyed year-round, offering a unique experience with each bite.

Delightful Mango Sticky Rice

Mango sticky rice is a popular Thai dessert showcasing sweet, ripe mangoes. This dish features glutinous rice cooked in sweetened coconut milk. The combination of creamy, sweet rice and juicy mango creates a heavenly balance. Traditionally served with a drizzle of coconut sauce, it’s a refreshing treat. Enjoy this dessert during Thailand’s mango season for optimal flavor.

Decadent Chinese Egg Tarts : A Must-Try Asian Desserts

Chinese egg tarts are a classic pastry that combines a flaky crust with a creamy custard filling. Originating from Cantonese cuisine, these tarts are enjoyed by people of all ages. The sweet, silky custard melts in your mouth, offering a delightful taste experience. Often served in dim sum restaurants, they are a must-have for any dessert lover.

Unique Thai Kanom Krok : Another Delicious Asian Desserts

Kanom krok is a unique Thai coconut pudding, made with rice flour and coconut milk. These delightful mini pancakes are served in small cups, creating a perfect bite-sized treat. The combination of crispy edges and creamy centers offers a delightful contrast. Enjoy them fresh from the pan with a sprinkle of green onions for added flavor. Kanom krok is popular at street markets, showcasing Thailand’s vibrant food culture.

Common Mistakes to Avoid

Overlooking Ingredient Quality

One of the significant mistakes when making Asian desserts is using low-quality ingredients. High-quality ingredients enhance flavor and texture significantly. Fresh fruits and premium flours directly impact the final product. Avoid using outdated or stale ingredients, as they affect taste. Always seek out fresh, quality products for the best results.

Ignoring Traditional Techniques

Many Asian desserts require specific cooking techniques to achieve desired results. Ignoring these traditional methods can lead to disappointing outcomes. For instance, not following proper steaming or chilling techniques can alter textures. Understanding the importance of these methods ensures better success with recipes. Invest time in mastering the techniques before experimenting.

Not Measuring Ingredients Accurately

Baking and cooking require precision when measuring ingredients. Skipping this step can lead to unbalanced flavors and textures. Use proper measuring tools for liquids and solids to ensure accuracy. Improper measurements can ruin the desired density of cakes or puddings. Take the time to measure accurately for kitchen success.

Skimping on Presentation

Presentation matters when serving Asian desserts. Neglecting the visual appeal can detract from the overall dining experience. Beautifully plating desserts enhances enjoyment and appreciation. Use garnishes and colorful elements to create an inviting display. A well-presented dish elevates the perception of taste and sophistication.

Rushing the Cooling Process

Cooling time is essential for many Asian dessert recipes. Rushing this step can affect texture and flavor development. For example, mochi needs time to set properly for the right chewiness. Letting desserts cool completely ensures optimal results. Patience can pay off significantly in achieving desirable outcomes.

A beautifully presented assortment of Asian desserts, showcasing proper preparation and presentation techniques.

Explore the enchanting world of Asian desserts, where traditional flavors meet modern innovation !


Chef’s Note

Creating delicious Asian desserts requires a blend of technique, precision, and passion. Here are some invaluable tips to enhance your dessert-making experience :

  1. Prioritize Fresh Ingredients: Always use the freshest ingredients possible. Quality fruit, dairy, and specialty items will significantly impact the final taste of your desserts. Fresh, high-quality ingredients can elevate even the simplest recipes.
  2. Take Your Time: Patience is key when it comes to Asian desserts. Whether it’s allowing mochi to cool or giving a custard time to set, rushing through the process can lead to less-than-perfect results. Enjoy each step, and let flavors develop fully.
  3. Experiment with Flavors: Don’t be afraid to get creative! While traditional recipes are wonderful, adding your own twist can make your desserts truly unique. Experiment with different flavor combinations, textures, and presentations to create a signature dish.
  4. Practice Presentation Skills: A beautiful presentation is just as important as taste. Take time to plate your desserts thoughtfully, using colors and textures to create an appetizing display. Garnishes like fresh herbs, edible flowers, or a drizzle of sauce can elevate the dish dramatically.
  5. Learn from Mistakes: Don’t be discouraged by failures; every chef makes mistakes. Use them as learning opportunities to refine your techniques and recipes. With every attempt, you advance your skill and gain confidence in the kitchen.
  6. Enjoy the Process: Cooking should be a joyous experience! Share your desserts with family and friends and enjoy the moments created around the table. The smiles and compliments you receive will make all your efforts worthwhile.

Following these tips will not only help you create sumptuous Asian desserts but will also enhance your overall culinary journey. Happy cooking !

By: Gastronome Recipes, february 04, 2025

Caramel Apple Cookies : A Delicious Fall Treat to Savor !

A beautifully arranged plate of caramel apple cookies on a rustic wooden table, surrounded by autumn leaves and fresh apples.

Discover the delightful flavors of caramel apple cookies, the perfect autumn treat !

What Makes Caramel Apple Cookies Special ?

Caramel apple cookies combine the flavors of sweet caramel and tart apples, creating a delightful treat. These cookies blend soft textures with a chewy bite, appealing to all ages. Perfectly suited for fall, they evoke nostalgic feelings of autumn celebrations and family gatherings. The warm spices enhance their flavor, making them irresistible as a seasonal dessert.

A Perfect Fall Treat for Any Occasion

These cookies are versatile enough for various occasions, from holiday parties to cozy family nights. Their delicious aroma fills your kitchen, inviting everyone to gather. Whether served warm or at room temperature, caramel apple cookies are sure to impress guests. Enjoy them with a cup of cider, hot cocoa, or coffee, creating a memorable experience.

Why You’ll Love This Recipe

This recipe is easy to follow, perfect for bakers of all skill levels. With simple ingredients, you can whip up a batch in no time. The delightful mixture of flavors satisfies sweet cravings while providing a wholesome snack alternative. You’ll love sharing these cookies with friends and family, making them a seasonal favorite to savor.

The Definition of Caramel Apple Cookies

What Are Caramel Apple Cookies ?

Caramel apple cookies are a delicious blend of flavored dough, caramel bits, and chopped apples. These cookies combine sweet and tart elements to create a delightful treat. Often enjoyed during the fall season, they evoke memories of harvest festivals and cozy gatherings. Their unique flavor profile sets them apart from traditional cookies.

Key Characteristics of This Delicious Dessert

These cookies are known for their soft, chewy texture and a rich, sweet taste. The addition of caramel provides a gooey center that contrasts with the apple’s crispness. Spices like cinnamon and nutmeg enhance the overall flavor, contributing to the cookie’s warmth. Their inviting aroma fills your kitchen, creating a welcoming atmosphere.

The Perfect Balance of Sweetness and Tartness

Caramel apple cookies achieve a harmonious balance between sweetness from the caramel and tartness from the apples. This combination makes them irresistible to cookie lovers. The flavor profile appeals to a broad audience, ensuring everyone enjoys this tasty treat.

Unique Ingredients That Define the Cookie

Ingredients such as diced apples and caramel bits give these cookies their signature taste. The use of warm spices adds depth and character. Quality ingredients contribute to a better flavor and texture, elevating the overall dessert experience. This combination truly defines caramel apple cookies.

How They Differ from Other Cookie Varieties

Caramel apple cookies stand out due to their specific ingredients and flavor combinations. Unlike regular chocolate chip cookies, these feature fruit and caramel, offering a different taste experience. The blend of sweetness from the caramel and tartness from the apples makes them uniquely satisfying. Their seasonal appeal makes them a must-try during autumn.

Discover the ultimate caramel apple cookies recipe that will delight your fall gatherings and sweeten your treat list !

A close-up view of caramel apple cookies with bits of caramel and apple pieces, showcasing their chewy texture and warm colors.

Discover the delightful flavors of caramel apple cookies, the perfect autumn treat !

Key Ingredients for Flavorful Cookies

Essential Ingredients for Caramel Apple Cookies

To create delicious caramel apple cookies, you’ll need a few key ingredients. The base starts with all-purpose flour, which provides structure. Granulated sugar and brown sugar add sweetness, depth, and moisture to the dough. Eggs bind the ingredients together while adding richness. Each of these components plays a vital role in achieving the perfect cookie.

The Role of Apples and Caramel in the Recipe

Fresh apples are a star ingredient in this recipe, providing natural sweetness and tartness. Choose firm apples like Granny Smith or Honeycrisp for the best results. Chewy caramel bits melt during baking, creating pockets of gooey goodness. This combination of apples and caramel gives the cookies their distinct flavor profile that makes them irresistible.

Tips for Choosing the Best Apples

Choosing the right apples is crucial for flavor and texture. Opt for varieties that are crisp and slightly tart to balance the sweetness of the caramel. Avoid soft or mealy apples, as they won’t hold up well during baking. Look for fresh, seasonal fruits to enhance the overall taste of your cookies.

The Importance of Spices in Flavor Development

Spices like cinnamon and nutmeg are essential in caramel apple cookies. They add warmth and depth, enhancing the overall flavor. Just a pinch of these spices elevates the taste experience, giving the cookies a cozy autumn feel. Don’t underestimate the power of spices in creating a memorable dessert !

IngredientsPurposeFlavor Suggestions
All-Purpose FlourProvides structure for the cookiesCombine with whole wheat flour for nuttiness
Granulated SugarAdds sweetnessUse organic sugar for a more natural taste
Brown SugarAdds moisture and depthDark brown sugar enhances caramel notes
EggsBinds the ingredients, adds richnessUse room temperature eggs for better emulsification
Fresh ApplesProvides natural sweetness and tartnessUse Granny Smith or Honeycrisp for balance
Chewy Caramel BitsCreates gooey pockets of sweetnessIncorporate caramel sauce for extra richness
CinnamonAdds warmth and depthMix with pumpkin spice for a festive twist
NutmegEnhances flavor complexityUse freshly grated nutmeg for a stronger flavor

Step-by-Step Recipe to Make Caramel Apple Cookies

Preparation : Getting Ready to Bake

Before you start, gather all necessary ingredients and tools. Preheat your oven to 350°F (175°C) for optimal baking conditions. Line a baking sheet with parchment paper to prevent sticking. Measure out your flour, sugars, and spices accurately, ensuring consistent results. This preparation phase sets the foundation for delicious cookies.

Mixing the Dough : Creating the Perfect Base

In a large bowl, cream together softened butter, granulated sugar, and brown sugar until light and fluffy. Add eggs one at a time, mixing well after each addition. Gradually incorporate the dry ingredients to form a cohesive dough. Finally, gently fold in diced apples and caramel bits for delightful bursts of flavor.

Adding Flavor : Incorporating Spices and Ingredients

Enhance the dough by adding cinnamon and nutmeg for a warm, cozy flavor. These spices complement the sweetness perfectly, making your caramel apple cookies even more inviting. Ensure the ingredients are evenly distributed throughout the dough. The right spices will elevate your cookies, making them a seasonal favorite.

Shaping and Baking the Cookies

Using a cookie scoop or spoon, drop rounded portions of dough onto the prepared baking sheet. Leave ample space between each cookie to allow for spreading. Bake in the preheated oven for 10-12 minutes until the edges are golden brown. The cookies will continue to firm up as they cool, so avoid overbaking.

Cooling and Serving : Enjoying Your Creation of Caramel Apple Cookies

Once baked, remove the cookies from the oven and let them cool on the baking sheet for 5 minutes. Transfer them to a wire rack to cool completely. Serve warm or at room temperature, savoring the delightful combination of caramel and apple in each bite. These caramel apple cookies are best enjoyed fresh but can be stored in an airtight container.

Storing and Reheating Caramel Apple Cookies

To keep your caramel apple cookies fresh, store them in an airtight container at room temperature. They can last for about a week if stored properly. If you prefer warm cookies later, simply reheat them in the microwave for a few seconds. This will enhance the caramel’s gooeyness, making them irresistibly delicious all over again.

A step-by-step visual guide showcasing the process of making caramel apple cookies, including mixing ingredients and baking.

Discover the delightful flavors of caramel apple cookies, the perfect autumn treat !

Creative Variations and Serving Suggestions

Unique Twists on the Classic Recipe

Enhance your caramel apple cookies with unique twists for a delightful surprise. Consider adding crushed pecans or walnuts for added crunch and flavor. You can also substitute dried cranberries or raisins for a fruity twist. For a chocolate lover’s delight, try mixing in chocolate chips or drizzle melted chocolate on top. These adaptations will keep your cookies exciting and delicious !

Pairing with Drinks : Perfect Fall Beverages

Caramel apple cookies pair wonderfully with a variety of fall beverages. Serve them alongside warm apple cider for a cozy treat. A cup of hot cocoa complements the sweetness perfectly, enhancing the cookie’s flavors. For a more sophisticated option, consider pairing with spiced chai or a pumpkin spice latte. These drink combinations elevate your cookie experience to a whole new level.

Creative Ways to Present Caramel Apple Cookies

Presentation can elevate your caramel apple cookies to gourmet status. Arrange them on a beautiful platter and garnish with fresh apple slices or caramel drizzle. Consider wrapping individual cookies in decorative parchment paper tied with a ribbon for a delightful gift. Alternatively, stack cookies in a mason jar for a cute fall centerpiece. These presentation ideas make your cookies visually enticing.

Storing and Sharing: Gift Ideas for Fall

Share the joy of caramel apple cookies by gifting them to friends and family. Package a batch in a decorative box for an enjoyable surprise. Consider including a recipe card to encourage others to create their own. Storing them in airtight containers also keeps them fresh for longer, making them perfect for sharing during fall gatherings or holidays.

Common Mistakes to Avoid

Overmixing the Dough for Caramel Apple Cookies

One of the most common mistakes when making caramel apple cookies is overmixing the dough. Mixing too long can develop gluten, resulting in tough, dense cookies. Instead, mix until ingredients are just combined, ensuring a tender texture and delightful chewiness. Remember, less is more when it comes to mixing for cookie recipes!

Underbaking or Overbaking Caramel Apple Cookies

Baking time is crucial for achieving the perfect recipe. Underbaking can leave cookies doughy and unappetizing, while overbaking results in dry, crumbly treats. Aim for a golden brown edge with a soft center when pulling them from the oven. Allow cookies to cool on the baking sheet, firming up as they rest.

Skipping Ingredient Measurements in Caramel Apple Cookies

Accurate measurements are essential for baking success. Skipping measurements can throw off the balance of flavors and textures in your caramel apple cookies. Always use measuring cups and spoons for precise quantities. Investing in a kitchen scale to measure ingredients by weight can greatly improve consistency. Proper measurements lead to more successful baking experiences.

Ignoring Ingredient Quality

The quality of ingredients directly impacts the flavor of your caramel apple cookies. Using subpar apples or imitation caramel can diminish the overall taste. Choose fresh, crisp apples and high-quality caramel for the best results. The little details make a significant difference in creating a delicious cookie treat that everyone will love.

Not Allowing Cookies to Cool Properly

Many bakers make the mistake of not allowing cookies to cool properly after baking. Cooling is key to achieving the right texture and flavor. If you move them too soon, they can break apart or become misshapen. Let cookies rest on the baking sheet for a few minutes before transferring them to a wire rack, ensuring they hold their shape perfectly.

A visual representation of common mistakes in baking caramel apple cookies, including mixing dough, baking times, and ingredient measurements.

Discover the delightful flavors of caramel apple cookies, the perfect autumn treat !

Chef’s Note

When baking caramel apple cookies, a few expert tips can help you achieve the best results :

  1. Use Fresh Ingredients: The quality of your apples and caramel can significantly impact flavor. Choose firm, crisp apples like Granny Smith for the perfect balance of sweetness and tartness.
  2. Experiment with Spices: Don’t hesitate to adjust the spices to your taste! Adding a pinch of allspice or ginger can provide an interesting twist that enhances the autumn flavor profile.
  3. Chill the Dough: If you find your dough is too sticky, try chilling it in the refrigerator for about 30 minutes. Chilled dough is easier to scoop and helps the cookies maintain their shape while baking.
  4. Monitor Baking Time: Every oven is different. Keep an eye on your cookies in the last few minutes of baking to prevent overbaking. They should be lightly golden around the edges and soft in the center.
  5. Serve Warm: These cookies are especially delightful when enjoyed warm from the oven. Consider serving them with a scoop of vanilla ice cream or a drizzle of caramel sauce for an indulgent dessert.
  6. Store Properly: To maintain freshness, store your cookies in an airtight container at room temperature. If you want to keep them for longer, consider freezing the baked cookies—just be sure to separate them with parchment paper before freezing.

By following these tips, you’ll create caramel apple cookies that not only taste fantastic but also impress your friends and family. Enjoy the baking process and share the delicious results !

By: Gastronome Recipes, february 02, 2025

Mil Hojas Cake : A Delicious Layered Pastry Dessert Recipe

Discover the irresistible charm of Mil Hojas cake—an elegant dessert that combines flaky pastry and rich cream!

Discover the charm of Mil Hojas cake—an elegant dessert of flaky pastry and rich cream !

Discover the Delight of Mil Hojas Cake

Mil Hojas recipe is an exquisite dessert that captures hearts with its layered structure. Translating to “a thousand sheets,” this cake’s name reflects its delicate, flaky layers made from puff pastry. The layers are typically filled with a rich pastry cream, enhancing the overall flavor and texture. Traditionally enjoyed in Spanish-speaking countries, Mil Hojas is a celebration of culinary artistry, perfect for special occasions and gatherings. With its delightful combination of ingredients, Mil Hojas cake is both visually stunning and incredibly delicious !

The Perfect Balance of Texture and Flavor

What sets Mil Hojas cake apart is its balance of textures and flavors. The contrast between the crispy layers of pastry and the creamy filling creates a delightful experience with every bite. Each layer, carefully crafted, not only adds structure but also acts as a canvas for flavor. The sweetness of the pastry cream, combined with the richness of the plated cake, makes it a standout dessert. Whether served at a birthday party or a family gathering, Mil Hojas cake is sure to enchant everyone at the table !

Easy to Make, Hard to Resist

Many home bakers may think that making a Mil Hojas recipe is daunting. However, this dessert can be accessible and enjoyable for anyone looking to impress. With quality ingredients and some patience, you can prepare this show-stopping cake at home. The process is as rewarding as the result, providing not just a tasty treat but also a sense of accomplishment. Perfectly made Mil Hojas will leave your friends and family asking for seconds !

What is Mil Hojas Cake ?

A Layered Dessert Delight

Mil Hojas recipe, meaning “a thousand layers,” is a traditional dessert loved for its exquisite layers. The cake consists of flaky puff pastry stacked with creamy fillings. Each layer brings a unique texture that appeals to the senses. The combination of crispy and smooth creates a delightful contrast in every bite. This layered dessert is often served at celebrations and gatherings, showcasing its inviting presentation.

Traditional Ingredients Used in Mil Hojas Cake

The key ingredients in Mil Hojas recipe include puff pastry, creamy custard, and sugar. Puff pastry is the foundation, providing the flaky layers essential for this dessert. A rich custard filling made from eggs, milk, and vanilla adds depth and flavor. Sugar sweetens the cake, enhancing its delightful taste. Understanding these components will help bakers appreciate the balance of flavors that make Mil Hojas Cake a standout treat !

The Cultural Significance of Mil Hojas Cake

Originating from Spain and popular in Latin America, Mil Hojas Cake carries cultural significance in various countries. It represents the art of pastry-making and showcases the creativity of bakers. Traditionally served at special occasions or family gatherings, it embodies celebration and joy. As culinary traditions evolve, Mil Hojas recipe remains a cherished dessert, continuing to delight those who experience its complex flavors and textures.

Serving Suggestions

Mil Hojas Cake can be enjoyed in various ways. It can be served plain or garnished with fresh fruits for added vibrancy. A dusting of powdered sugar enhances its visual appeal while providing a touch of sweetness. Consider pairing it with a scoop of vanilla ice cream for an indulgent combination. These serving suggestions create opportunities for creative presentations and delightful dining experiences with Mil Hojas Cake !

For a delicious version of Mil Hojas cake, check out this slice of Mil Hojas from Vilma’s Bakery that you won’t want to miss !

A beautifully presented slice of Mil Hojas Cake, showcasing its flaky layers and creamy custard filling, adorned with fresh fruit and a dusting of powdered sugar.

Discover the charm of Mil Hojas cake—an elegant dessert of flaky pastry and rich cream !

Key Ingredients for Mil Hojas Cake

Flaky Puff Pastry

The cornerstone of Mil Hojas Cake is flaky puff pastry. This delicate pastry is made by layering butter and dough to create thin sheets. When baked, it rises beautifully, resulting in airy and crispy layers. The texture is essential for achieving the signature lightness of this dessert. Quality puff pastry ensures a delicious foundation for creamy fillings, making it a vital ingredient in this recipe !

Creamy Custard Filling

A rich and smooth custard filling is another key ingredient in Mil Hojas Cake. Typically made with egg yolks, milk, sugar, and vanilla, it adds sweetness and depth of flavor. The custard provides contrasts to the flaky pastry, ensuring every bite is indulgent. Properly cooked custard must be chilled to set before layering in the cake, enhancing its richness. This creamy filling is what makes the cake truly irresistible !

Sweetening with Sugar

Sugar is essential for balancing the flavors in Mil Hojas Cake. Granulated sugar is commonly used to sweeten the custard and pastry, enhancing the overall dessert experience. In addition, a dusting of powdered sugar on top of the finished cake adds a touch of elegance. Adjust the sugar levels according to personal taste; this allows customization for those who prefer less sweetness. Getting the sugar balance just right is crucial for delicious results !

Flavor Boost with Vanilla

Vanilla extract is a key component in both the pastry and custard filling. It enhances the flavor profile and adds warmth to the cake. A high-quality vanilla extract ensures you achieve the best flavor in your Mil Hojas Cake. Alternatively, you can use vanilla bean paste for a more intense and authentic taste. This ingredient elevates the overall experience of this delightful dessert !

Garnishing with Fresh Fruit

While not a primary ingredient, fresh fruit plays a significant role in Hojas Cake presentation and taste. Fruits like berries or slices of kiwi add color and freshness. They create a beautiful contrast against the creamy layers and flaky pastry. Consider using citrus fruits for a zesty touch that complements the sweetness. Proper garnishing not only enhances visual appeal but also adds delightful flavors !

IngredientsPurposeFlavor Suggestions
Flaky Puff PastryProvides the base structure and textureUse store-bought for convenience or homemade for freshness
Creamy Custard FillingAdds richness and sweetness to the layersInfuse with vanilla, rum, or citrus zest for varied taste
Granulated SugarSweetens both the pastry and custard fillingAdjust sweetness levels to preference, using brown sugar for depth
Vanilla ExtractEnhances the flavor of the custardReplace with vanilla bean paste for a more intense flavor
Fresh FruitGarnishes and adds freshness and colorUse berries, kiwi, or citrus slices for a delightful contrast
Powdered SugarAdds final touch of sweetness and presentationDust over the top before serving for an elegant look
A beautifully organized display of key ingredients for Mil Hojas Cake, including flaky puff pastry, creamy custard, sugar, vanilla extract, and fresh fruit, set on a rustic kitchen countertop.

Discover the charm of Mil Hojas cake—an elegant dessert of flaky pastry and rich cream !

Step-by-Step Guide to Making Mil Hojas Cake

1 : Prepare the Puff Pastry

The first step in making Mil Hojas is preparing the puff pastry. If using store-bought, ensure it’s thawed and ready to roll. If making homemade pastry, layer cold butter and dough for the best texture. Roll out the pastry to 1/8 inch thick for even baking. Cutting it into equal rectangles ensures uniformity in your layers. This foundational step is crucial for achieving the cake’s flaky quality !

2 : Make the Creamy Custard Filling

While the puff pastry is baking, prepare the creamy custard filling. In a saucepan, whisk together egg yolks, sugar, and milk until combined. Cook over medium heat, stirring frequently, until the mixture thickens. Remove from heat and add vanilla extract for flavor. Allow the custard to cool completely before using it to layer with the pastry in the Mil Hojas Cake.

3 : Assemble the Mil Hojas Cake

Once the puff pastry and custard are ready, begin assembling the Mil Hojas Cake. Start by placing a layer of baked pastry on your serving platter. Spread a generous layer of custard on top, then repeat with additional layers. Continue layering with custard and pastry until all are used, finishing with a layer of pastry on top. Ensure an even distribution of custard for balanced flavors throughout !

4 : Chill the Mil Hojas Cake

After assembling your Mil Hojas Cake, it’s essential to chill it for a few hours. Refrigerating allows the layers to set properly, making it easier to slice. This chilling time enhances the flavors, allowing them to meld beautifully. Cover the cake with plastic wrap to prevent it from absorbing other odors in the refrigerator. Be patient; the wait will be worth it !

5 : Serve and Enjoy Your Mil Hojas Cake

Finally, it’s time to serve your Hojas Cake! Before serving, dust the top with powdered sugar for a lovely finish. Garnish with fresh fruit or whipped cream for added flavor and presentation. Slice into portions and enjoy the delightful contrast of flaky pastry and creamy custard. Celebrate the homemade goodness of your Mil Hojas Cake with family and friends—it’s sure to impress !

Nutritional Insights for Mil Hojas Cake

Understanding the Caloric Profile

This Cake features layers of pastry and creamy filling. The caloric content of this dessert can be relatively high due to butter and sugar. A single slice can contain significant calories, particularly if topped with frosting or fruit. Understanding its caloric profile helps manage portion sizes and enjoy the indulgence in moderation. Always enjoy dessert as a treat while maintaining a balanced diet !

Nutritional Value of Ingredients

The main ingredients in Mil Hojas offer varying nutritional benefits. Puff pastry provides energy but lacks significant vitamins. On the other hand, the creamy custard contains protein, calcium, and essential vitamins from eggs and milk. Balancing indulgences with nutritional awareness is key to enjoying desserts without overindulgence. These insights allow you to make informed choices while savoring your cake !

Moderation is Key with Mil Hojas Cake

Although this Cake is delicious, moderation is essential. Enjoying a smaller portion can satisfy cravings without excessive calorie intake. Pair your dessert with a healthy meal or balance it with physical activity to offset indulgence. This approach encourages a healthy relationship with desserts, allowing you to enjoy sweet treats responsibly. Appreciating flavors while practicing moderation contributes to lasting satisfaction !

Exploring Healthier Alternatives to Mil Hojas Cake

If you desire a lighter version of this recipe, consider using whole grain pastry or reducing sugar. You can substitute some of the cream with Greek yogurt to increase protein while lowering fat content. Fresh fruit toppings add nutrients and balance sweetness. Exploring these alternatives retains the essence of the cake while making it a better fit for health-conscious diners !

Enjoying Mil Hojas Cake Guilt-Free

Ultimately, the goal is to appreciate this Cake while being mindful of your overall diet. Enjoying the occasional slice can fit into a balanced lifestyle. Savor the delicious layers and rich flavors without guilt. Celebrate special occasions with this festive treat, knowing you can indulge thoughtfully. Life is about enjoyment, and every bite can be memorable !

A beautifully presented slice of Mil Hojas Cake, showcasing its layers of flaky pastry and creamy custard, garnished with fresh fruit on a rustic wooden table.

Discover the charm of Mil Hojas cake—an elegant dessert of flaky pastry and rich cream !

Common Mistakes to Avoid

Overworking the Dough

One common mistake when making Mil Hojas Cake is overworking the dough. Overmixing can lead to tough, chewy layers rather than crispy, flaky pastry. Roll the dough gently and avoid excessive handling. This ensures that the layers remain light and airy. Keeping the butter cold while preparing helps create that signature flakiness. Remember, gentle hands lead to delightful results !

Not Chilling the Dough

Failing to chill the dough is another frequent mistake. Chilling the dough is important to maintain the structure of the puff pastry. This helps solidify the butter, resulting in distinct flaky layers. If you skip this step, the pastry can spread too much during baking. Refrigerate the dough for at least 30 minutes for optimal results. Patience pays off when making Mil Hojas Cake !

Ignoring Oven Temperature for Mil Hojas Cake

Baking at the wrong temperature can ruin your Mil Hojas Cake. An oven that is too hot can burn the pastry, while a cooler oven can lead to uneven cooking. It’s essential to preheat your oven to the recommended temperature before baking. Use an oven thermometer to ensure accuracy. Monitoring baking time closely is key to achieving that golden color !

Skipping the Layering Process

One of the unique features of Mil Hojas is its layered structure, so skipping or rushing the layering process can affect texture. Each layer needs to be distinct to create the desired appearance and eating experience. Take care to spread fillings evenly and layer each piece of pastry thoughtfully. The time taken during layering greatly enhances the visual presentation.

Not Allowing the Mil Hojas Cake to Set

Lastly, neglecting to let the cake set before serving can diminish the overall experience. Allowing Mil Hojas Cake to rest lets the flavors meld beautifully and ensures it holds its shape when sliced. Refrigerate the assembled cake for several hours or overnight for best results. This simple step can greatly enhance your dessert !

A beautifully plated Mil Hojas Cake, highlighting its flaky layers and creamy filling, with a focus on avoiding common baking mistakes.

Discover the charm of Mil Hojas cake—an elegant dessert of flaky pastry and rich cream !

Chef’s Note

Welcome to the delicious journey of crafting Mil Hojas Cake! This exquisite dessert, with its layered pastry and creamy filling, can be very rewarding. To ensure your Mil Hojas Cake turns out perfectly every time, here are a few essential tips to keep in mind :

  1. Be Gentle with the Dough: When working with puff pastry, handle it with care. Overworking the dough can result in tough layers rather than the desired flaky texture. Aim to keep things light and airy to achieve that perfect crunch!
  2. Chilling Makes a Difference: Don’t skip chilling the dough. Chilling helps maintain the structure of the pastry and ensures it rises beautifully in the oven. Waiting for the dough to chill is worth every minute for that ideal flakiness.
  3. Precision in Baking: Always preheat your oven to the correct temperature and use an oven thermometer to ensure accuracy. An incorrect baking temperature can easily lead to uneven results. Properly baked this recipe should have a beautiful golden color.
  4. Layering with Care: Take your time during the layering process! Each layer should be distinct to showcase the beautiful structure of the cake. Ensure the filling is evenly spread and layer each piece with patience.
  5. Let It Rest: Allowing the Cake to set in the refrigerator before serving enhances both flavor and texture. This resting time allows the layers to meld together nicely, making it easier to slice and serve.

By following these helpful tips, you’ll create a stunning Mil Hojas that impresses friends and family alike. Celebrate the joy of baking, and enjoy every delicious bite of your masterpiece !

By: Gastronome Recipes, february 01, 2025

Discover the Magic of Fall with Homemade Apple Cinnamon Cookies

A beautifully arranged plate of freshly baked apple cinnamon cookies, featuring warm colors and cinnamon sticks, set on a rustic wooden table with seasonal decor.

Discover the delightful world of apple cinnamon cookies—a perfect treat for cozy fall moments !

Welcome to the World of Apple Cinnamon Cookies

Apple cinnamon cookies are a delightful treat that embodies the warm flavors of fall. Combining fresh apples and fragrant cinnamon creates a cozy experience. These cookies evoke nostalgia for many and are perfect for any gathering. Whether enjoyed with a cup of tea or coffee, they provide comfort throughout the season. Get ready to discover how easy it is to make these delicious cookies!

Why Choose Apple Cinnamon Cookies ?

Choosing apple cinnamon cookies means embracing the essence of autumn. The harmonious blend of flavors offers a perfect balance of sweetness and spice. They’re ideal for celebrations, family gatherings, or simply as a sweet snack at home. These cookies can also be easily prepared ahead of time. Dive into this recipe for a seasonal delight that everyone will love !

An Easy Recipe to Try

Making apple cinnamon cookies is simple and rewarding. With just a few key ingredients, you can create a batch that fills your home with delightful aromas. From measuring ingredients to baking, the entire process is enjoyable. Follow this easy recipe to impress friends and family with your baking skills. Let’s explore how to create these cozy cookies together !

What Are Apple Cinnamon Cookies ?

The Delicious Combination of Flavors in Apple Cinnamon Cookies

Apple cinnamon cookies marry the sweet taste of apples with the warm spice of cinnamon. This delightful blend creates a flavorful treat perfect for any occasion. The natural sweetness of apples enhances the cookie, making it a popular choice among dessert lovers. With every bite, you’re met with contrasting textures that delight the senses. Enjoying these cookies evokes feelings of comfort and nostalgia, especially during autumn !

The Classic Ingredients

These cookies typically include essential ingredients like flour, sugar, eggs, and, of course, apples and cinnamon. The apples provide moisture and bounce, while cinnamon adds warmth. Butter contributes richness and depth to the flavor profile. Depending on the recipe, additional ingredients may include nuts or oats for extra crunch. The classic combination makes these cookies easy to customize and versatile for every occasion !

Why Apple Cinnamon Cookies Are Beloved

Apple cinnamon cookies are adored for their delicious flavor and comforting aroma. They evoke memories of cozy family gatherings and holiday celebrations. These cookies are perfect for sharing with friends or enjoying with a cup of tea or coffee. Their homemade charm makes them a favorite among both bakers and eaters. Baking a batch brings warmth and joy to any kitchen !

Versatility in Recipe Variations

One of the best features of apple cinnamon cookies is their versatility. They can be soft and chewy or crisp and crunchy, depending on your preference. You can also experiment with various types of apples, spices, and add-ins. Feel free to play with the recipe, making it your own! This adaptability allows for endless possibilities in creating the perfect cookie.

For a delightful variety of apple cookie recipes, check out this link to amazing apple cookies that will inspire your baking !

A plate of freshly baked apple cinnamon cookies, adorned with cinnamon sticks and apple slices, set on a rustic wooden countertop with warm seasonal decoration.

Discover the delightful world of apple cinnamon cookies—a perfect treat for cozy fall moments !

Key Ingredients for Apple Cinnamon Cookies

Apples : The Star of the Show

Fresh apples are the core ingredient in apple cinnamon cookies. They add natural sweetness and moisture, enhancing texture. For the best flavor, choose firm varieties like Granny Smith or Honeycrisp. The combination of tartness and sweetness balances wonderfully in cookies. With every bite, the delicious apple flavor shines through!

Cinnamon : The Warm Spice

Cinnamon is essential for infusing warm flavors into your cookies. This spice complements the sweetness of apples beautifully. Using ground cinnamon elevates the overall flavor profile, making each cookie irresistible. It also pairs well with other spices, such as nutmeg or allspice, for added complexity. A touch of cinnamon is vital for cozy, autumn-inspired treats !

Flour : The Structural Base

All-purpose flour serves as the foundation of cookie dough. It provides structure and stability, holding the cookies together. The right flour ratio ensures a pleasing texture, whether soft or chewy. Properly measuring flour is crucial to avoid dense cookies. This key ingredient balances flavors while allowing other ingredients to shine !

Sugar : Sweetening the Experience

Granulated sugar and brown sugar combine to provide sweetness and depth. Granulated sugar promotes spread during baking while brown sugar adds moisture. The caramel notes enhance the overall flavor, making each bite delectable. This sweetness is essential for creating memorable cookies. Adjusting sugar levels allows you to customize sweetness to your liking !

Butter : Adding Richness

Butter brings richness and flavor to apple cinnamon cookies. It contributes to a tender cookie texture and enhances the overall taste. Using unsalted butter allows better control of salt levels in recipes. Creaming butter with sugars helps incorporate air, resulting in a lighter cookie. Quality butter can make all the difference in your baking !

IngredientsPurposeFlavor Suggestions
Fresh ApplesAdds natural sweetness and moistureUse Granny Smith for tartness or Honeycrisp for sweetness
Ground CinnamonProvides warmth and spicinessCombine with nutmeg or allspice for complexity
All-Purpose FlourProvides structure and stabilityEnsure proper measurement for ideal texture
Granulated SugarSweetens the cookiesSubstitute with brown sugar for caramel notes
Brown SugarAdds moisture and depth to flavorEnhances chewiness and richness
Unsalted ButterContributes richness and tendernessCan use room temperature for easy mixing
EggsHelps bind ingredients togetherAdds moisture and stability
A beautifully arranged display of key ingredients for apple cinnamon cookies, including fresh apples, cinnamon, flour, sugar, and butter, set on a rustic wooden countertop.

Discover the delightful world of apple cinnamon cookies—a perfect treat for cozy fall moments !

How to Make Apple Cinnamon Cookies

Gather Your Ingredients for Apple Cinnamon Cookies

Start by gathering all your essential ingredients for apple cinnamon cookies. This includes fresh apples, ground cinnamon, flour, butter, and eggs. Having everything prepared makes the process smoother and more enjoyable. Measure each ingredient precisely to ensure the perfect balance of flavors. Proper preparation sets the stage for a successful baking experience!

Prepare the Dough

In a mixing bowl, cream together the softened butter and sugars until light and fluffy. This step is crucial for incorporating air, resulting in tender cookies. Next, add in the eggs and vanilla extract, mixing well to combine. Gradually incorporate the flour and cinnamon, ensuring a smooth dough. Fold in the chopped apples, creating a flavorful mixture that is ready to bake !

Chilling the Dough for Apple Cinnamon Cookies

After preparing the dough, it’s beneficial to chill it for 30 minutes to an hour. Chilling solidifies the fat, leading to less spread during baking. This step improves the cookie’s texture and shape. While the dough chills, preheat your oven to the proper temperature. Once chilled, scoop the dough onto a baking sheet lined with parchment paper.

Baking the Cookies

Bake the cookies in the preheated oven until edges are lightly golden. Keep an eye on the baking time, as overbaking can lead to dry cookies. The aroma of apples and cinnamon will fill your kitchen, creating an inviting atmosphere. Allow the cookies to cool on the baking sheet for a few minutes before transferring them to a wire rack to cool completely.

Enjoying Your Cookies

Once cooled, enjoy your delicious apple cinnamon cookies! These treats are perfect for sharing with family and friends. Serve them with a warm beverage or incorporate them into festive gatherings. Their warm spices and hearty texture make them a favorite in any household. Savor the cozy flavors and the joy of baking !

Common Mistakes to Avoid When Making Apple Cinnamon Cookies

Overmixing the Dough

One of the most common mistakes when making cookies is overmixing the dough. Overmixing can lead to tough cookies rather than soft and chewy ones. The gluten in flour develops with excessive mixing, affecting texture. Always mix until ingredients are just combined for the best results. Taking care during this stage ensures delicious apple cinnamon cookies !

Not Measuring Ingredients Accurately

Accurate measurements are essential for successful baking. Using too much flour can lead to dry cookies, while too little sugar may affect taste. Invest in a kitchen scale for precise measurements. Spoon flour into measuring cups lightly and level off to avoid packing. Proper measuring helps maintain the right balance of flavors and textures in your baking !

Not Chilling the Dough for Apple Cinnamon Cookies

Failing to chill the dough is another frequent mistake. Chilling solidifies the fats, helping apple cinnamon cookies maintain their shape during baking. Without chilling, cookies may spread too much and become flat. After preparing the dough, refrigerate for at least 30 minutes. This simple step makes a significant difference in cookie quality !

Ignoring Cooling Time for Apple Cinnamon Cookies

Lastly, ignoring the cooling time can impact texture and flavor. Allowing apple cinnamon cookies to cool on the baking sheet prevents them from becoming soggy. Transfer them to a wire rack after a few minutes. Cooling enhances texture while letting flavors develop. Patience makes all the difference in enjoying your delicious apple cinnamon cookies !

A visual representation of common baking mistakes, featuring mismeasured ingredients, overmixed dough, and improperly baked apple cinnamon cookies, set on a kitchen countertop.

Discover the delightful world of apple cinnamon cookies—a perfect treat for cozy fall moments !

Nutritional Benefits of Apples and Cinnamon

Apples : A Nutrient Powerhouse

Apples are a fantastic source of essential nutrients and dietary fiber. They are rich in vitamin C, which supports the immune system. Apples also contain antioxidants that promote heart health and reduce inflammation. The soluble fiber in apples aids digestion and helps regulate blood sugar levels. Incorporating apples into your diet contributes to overall wellness !

The Health Benefits of Cinnamon

Cinnamon is not only a flavorful spice but also offers numerous health benefits. It boasts anti-inflammatory properties that help combat chronic diseases. Cinnamon is known to improve insulin sensitivity, aiding in blood sugar control. Additionally, its rich antioxidant content can protect the body from oxidative stress. Adding cinnamon to your diet supports general health and vitality !

Heart Health and Weight Management with Apples and Cinnamon

Consuming apples and cinnamon together can enhance heart health and assist with weight management. Apples contain heart-healthy fiber, while cinnamon can help lower cholesterol levels. This combination promotes a healthy heart and can aid in weight loss. The satisfying flavor of apples and cinnamon makes it easy to enjoy as part of a balanced diet.

Digestive Health Boost with Apples and Cinnamon

Both apples and cinnamon play a role in supporting digestive health. The fiber in apples helps maintain regular bowel function. Cinnamon can soothe the digestive system and may help alleviate gas and bloating. These benefits make this duo an excellent choice for improving gut health. Incorporating apples and cinnamon into meals can contribute to better digestion !

Antioxidant Protection

Apples and cinnamon are rich in antioxidants that protect the body from free radicals. Antioxidants help reduce the risk of chronic diseases like cancer and diabetes. Regular consumption of these foods can enhance the body’s defense mechanisms. Including apples and cinnamon in your diet is a tasty way to boost antioxidant intake !

An infographic depicting the nutritional benefits of apples and cinnamon, highlighting vitamins, fiber, and antioxidants, with visually appealing images of both ingredients."

Discover the delightful world of apple cinnamon cookies—a perfect treat for cozy fall moments !

Chef’s Note

Welcome to the delightful world of apples and cinnamon! This flavorful duo not only elevates your recipes but also packs numerous health benefits. Here are a few tips to maximize their impact in your dishes :

  1. Choose Fresh and Seasonal: Always opt for fresh, seasonal apples for the best flavor and nutrition. Varieties like Granny Smith or Honeycrisp are perfect for baking and cooking. Fresh cinnamon sticks offer a stronger aroma and flavor compared to pre-ground cinnamon.
  2. Balance Your Flavors: When incorporating apples and cinnamon in your recipes, consider balancing sweetness with acidity. A little lemon juice can enhance the flavors while adding a refreshing note. This creates a well-rounded and harmonious taste profile.
  3. Experiment with Pairings: Don’t hesitate to pair apples and cinnamon with other ingredients. They complement flavors like nuts, oats, and even savory elements like pork or chicken. Experimenting with different combinations can lead to delicious new discoveries!
  4. Health Benefits: Remember that both apples and cinnamon offer incredible health benefits. Apples are high in fiber and antioxidants, while cinnamon has anti-inflammatory properties. Adding this duo to your meals can contribute to overall wellness.
  5. Enjoy Them Year-Round: While apples and cinnamon are often associated with fall, you can enjoy them year-round. Use them in salads, snacks, and desserts, or incorporate them into breakfast dishes like oatmeal and pancakes.

Indulging in the flavors of apples and cinnamon is a pleasurable experience, and their nutritional benefits make every bite worthwhile. Happy cooking

By: Gastronome Recipes, January 31, 2025

Unlocking Ice Cream Secrets : How Eggs Change the Game !

A visually appealing image representing the introduction to ice cream making, featuring bowls of ingredients such as eggs, cream, sugar, and ice cream in various flavors, arranged on a rustic kitchen countertop.

Explore the essential role of eggs in ice cream-making and their impact on flavor and texture !

Understanding the Significance of Eggs in Ice Cream

Eggs play a crucial role in ice cream recipes. Their unique properties contribute to the binding and stability of the final product. As an emulsifier, eggs help blend fat and water, creating a smooth texture. Their presence enhances creaminess, richness, and overall flavor. For many traditional recipes, eggs are an essential ingredient that defines quality.

Exploring the Function of Binders

Binders are vital for achieving the right texture in ice cream. They help hold ingredients together and prevent separation during freezing. Eggs, as a binder, contribute to the consistency and mouthfeel we love in ice cream. Understanding the function of eggs as binders adds depth to your ice cream-making knowledge. Analyzing their role helps improve recipes and ensure delicious results.

A Journey into Ice Cream Making

Delving into the science of ice cream offers insight into its delightful experience. From understanding ingredients to mastering techniques, making ice cream is an art. This exploration reveals the intricate balances that lead to perfect scoops. Knowing the roles that eggs play enriches your perspective on classic ice cream recipes. It encourages experimentation with flavors and textures.

The Rise of Eggless Ice Cream Alternatives

With evolving dietary trends, eggless and vegan ice cream options have gained popularity. These alternatives aim to replicate the creamy texture of traditional varieties. Understanding how eggs function helps create satisfying substitutes. This journey not only honors classic recipes but also embraces modern culinary creativity. Discovering eggless options opens avenues for more inclusive ice cream enjoyment.

The Role of Eggs in Ice Cream

Emulsification: The Secret to Smooth Texture in Eggs in Ice Cream

Eggs play a vital role in emulsifying ice cream mixtures. They help blend fat and water, which can separate easily. This emulsification process is key to achieving a smooth, creamy texture. Without eggs, ice cream may become icy or grainy. Emulsifiers like egg yolks stabilize the mixture for a delightful eating experience!

Enhancing Flavor and Richness with Eggs in Ice Cream

Incorporating eggs into ice cream recipes elevates flavor profiles and richness. Egg yolks add depth and a creamy mouthfeel that enhances overall taste. Their natural richness complements other ingredients beautifully. The unique flavor of eggs brings warmth to ice cream, making each scoop satisfying. This is especially true in custard-based recipes that rely on eggs for depth.

Contributing to Creaminess and Stability with Eggs in Ice Cream

Eggs significantly improve the creaminess and stability of ice cream. They help achieve the desired cream texture by trapping air during the churning process. This increases volume while preventing large ice crystals from forming. As a result, the final product is smooth and velvety. The stability eggs provide is crucial for maintaining quality during storage.

Nutritional Benefits of Eggs in Ice Cream

Beyond their culinary functions, eggs offer valuable nutrition in ice cream. They are a rich source of protein, vitamins, and healthy fats. Including eggs helps increase the nutritional content of ice cream, making it a more wholesome treat. Understanding these benefits allows ice cream makers to appreciate the dual purpose of eggs in recipes !

For a deeper understanding of the functions of eggs, check out this comprehensive guide on the functions of eggs.

An image showing egg yolks being whisked, surrounded by ice cream ingredients like cream and sugar, highlighting the essential role of eggs in creating ice cream.

Explore the essential role of eggs in ice cream-making and their impact on flavor and texture !

Key Ingredients Eggs in Ice Cream

The Importance of Dairy Products

Dairy products are the foundation of any ice cream. Milk and cream provide the necessary fat and texture. The fat content contributes to a creamy mouthfeel that everyone loves. Using high-quality dairy enhances the richness of the final product. A balanced combination of dairy is crucial for achieving optimal flavor.

Sugar : Sweetness and Texture

Sugar plays a vital role in ice cream recipes. It not only sweetens but also affects texture. Sugar lowers the freezing point, making ice cream smoother and less icy. Different sugars, like granulated or powdered, bring unique flavors to the dish. Balancing sweetness is essential to ensure a delightful treat.

Eggs : The Emulsifying Power

Eggs are essential for creating a custard base in many ice cream recipes. They emulsify the mixture, blending fat and water effortlessly. The presence of eggs enhances creaminess and richness, resulting in a luxurious texture. They also help stabilize ice cream to prevent ice crystals. Understanding their role is key to great ice cream !

Flavorings and Add-Ins

Flavorings and add-ins transform basic ice cream into delightful creations. Common flavorings include vanilla, chocolate, and fruit purees. Each adds unique notes to the overall taste. Additionally, mix-ins like nuts, chocolate chips, or cookie pieces provide exciting textures. Creativity with flavors can result in endless variations for everyone to enjoy.

Stabilizers : Maintaining Quality

Stabilizers are often included to improve the texture and shelf life of ice cream. Ingredients like gelatin or guar gum help maintain consistency. They prevent ice crystals from forming while keeping the ice cream creamy. Understanding stabilizers allows for the creation of high-quality ice cream at home. Achieving the right balance is critical !

IngredientsPurposeFlavor Suggestions
MilkProvides liquid base and creaminessWhole milk for richness; skim for lightness
Heavy CreamAdds fat for a rich, smooth textureUse organic cream for better flavor
SugarSweetens the ice cream and affects textureExperiment with brown sugar or honey
EggsEmulsifies and stabilizes the mixtureUse in custard-based ice creams
Vanilla ExtractEnhances flavor and adds aromatic depthTry other extracts like almond or coconut
Fruits (purees)Adds natural sweetness and unique flavorsBerries, mango, or banana work well
Chocolate (cocoa or chips)Introduces rich, sweet flavor to ice creamDark chocolate for intensity; white chocolate for sweetness
Stabilizers (e.g., gelatin)Improves texture and prevents ice crystallizationUse natural stabilizers for home recipes
An organized display of key ingredients for ice cream: milk, cream, sugar, eggs, and various flavorings, set on a wooden kitchen countertop.

Explore the essential role of eggs in ice cream-making and their impact on flavor and texture !

What Makes Ice Cream Creamy ?

The Role of Fat Content

The amount of fat in ice cream plays a crucial role in creaminess. High-fat dairy products like heavy cream contribute significantly to texture. Fat coats the palate, creating a smooth and rich mouthfeel. Ice cream with at least 10% fat achieves that desired creaminess. Balancing fat levels is essential for great ice cream !

Proper Incorporation of Air

Churning ice cream incorporates air into the mixture, a process known as overrun. This creates a lighter, fluffier texture that enhances creaminess. The air makes ice cream easier to scoop and maintains its shape. A well-churned mixture increases volume while avoiding icy textures. Understanding air incorporation is vital for perfect scoops !

Use of Emulsifiers

Emulsifiers, like egg yolks or lecithin, help blend fat and water. They create a stable mixture that prevents separation, resulting in a smoother consistency. Emulsifiers improve texture by minimizing ice crystal formation. The presence of egg yolks, commonly used in custard bases, enhances both creaminess and flavor. Emulsifiers are essential for high-quality ice cream !

Quality Ingredients Matter

Using high-quality ingredients impacts the creaminess of ice cream. Fresh, natural dairy products and pure flavorings yield better results. Avoiding artificial additives helps maintain a smooth texture. Investing in quality ingredients enhances flavor and overall experience. This attention to detail is what sets homemade ice cream apart !

The Right Freezing Process

The freezing method significantly affects ice cream’s creaminess. Rapid freezing reduces ice crystal size, leading to a smoother texture. Home ice cream makers can achieve this with proper churning and freezing techniques. Slow freezing results in larger crystals, which create an undesirable icy texture. Knowing the freezing process is key for creamy perfection !

Definitions and Functions of Binders

Understanding Binders in Culinary Terms

Binders are ingredients that help hold food together, creating a cohesive texture. In ice cream, binders prevent separation of fats and liquids. They enhance the overall structure and integrity of the dish. Common binders include eggs, gelatin, or cornstarch, depending on the recipe. Understanding their role is essential for successful cooking !

The Role of Binders in Ice Cream

In ice cream, binders play a crucial role in texture and stability. They prevent ice crystals from forming, ensuring a smooth consistency. Binders help emulsify fats and water, contributing to the creaminess of ice cream. Without binders, ice cream would become icy and unpleasant. Their presence is vital for achieving high-quality frozen desserts !

Types of Binders Used

Various binders can be used to achieve desired results in ice cream. Eggs are a common choice, providing emulsification and richness. Other options include gelatin, which adds stability, and cornstarch, which thickens the mixture. Each binder affects flavor, texture, and mouthfeel differently. Choosing the right binder is key for perfecting your recipe !

Benefits of Using Binders

Using binders in recipes offers multiple advantages. They improve the texture of ice cream, making it creamier and more enjoyable. Binders also help prevent ingredients from separating, maintaining stability. In addition, they can enhance flavors by allowing better incorporation of ingredients. Understanding these benefits can elevate your cooking game !

Creative Alternatives to Traditional Binders

With the popularity of dietary alternatives, many creative substitutes exist for traditional binders. Plant-based options like aquafaba or nut butters can replace eggs. Alternatives like arrowroot powder or agar-agar serve as vegan stabilizers. Embracing these options allows for diverse recipe adaptations while accommodating various dietary needs. The possibilities are endless !

An informative graphic illustrating different binders used in cooking, showcasing eggs, gelatin, and cornstarch, with a focus on their role in improving texture and stability in ice cream.

Explore the essential role of eggs in ice cream-making and their impact on flavor and texture !

Alternatives to Eggs in Ice Cream Recipes

The Rise of Egg-Free Ice Cream

As dietary preferences evolve, egg-free ice cream recipes are gaining popularity. Many people seek alternatives for allergies or vegan lifestyles. These recipes maintain creaminess without sacrificing flavor or texture. Innovative ingredients are now available to replace eggs effectively. Understanding these substitutes opens new avenues for delicious frozen desserts !

Aquafaba: The Magic of Chickpea Water

Aquafaba is the liquid from canned chickpeas, often used as an egg substitute. This versatile ingredient whips up beautifully, mimicking the texture of egg whites. It adds volume and creaminess to ice creams without altering flavor significantly. Using aquafaba allows for a lighter, airy texture. Explore this fabulous option for egg-free delights !

Nut Butters : Creamy and Flavorful Substitutes

Nut butters, such as almond or cashew butter, serve as excellent egg alternatives. They add healthy fats and a rich flavor profile to ice cream. Nut butters not only enhance creaminess but also boost nutrition. However, consider using them in moderation to avoid overpowering the dish. Their unique flavors can elevate any ice cream recipe !

Silken Tofu: A Protein-Rich Option

Silken tofu is a fantastic option for achieving smooth and creamy ice cream without eggs. Blending silken tofu gives a rich consistency that mimics custard bases. This protein-rich alternative adds thickness without compromising flavor. It’s an excellent choice for both vegan and non-vegan ice cream lovers. Experimenting with silken tofu can be rewarding !

Commercial Egg Replacers : Convenient Solutions

Commercial egg replacers are designed specifically for baking and cooking. These products usually contain starches and leavening agents. They provide an easy solution for creating egg-free ice cream. Their convenience allows for quick adaptations of traditional recipes without trial and error. Explore different brands to find the best fit for your ice cream creations !

A close-up image of fresh eggs on a wooden countertop, with a background featuring creamy ice cream scoops and ingredients like milk and vanilla, emphasizing the role of eggs in ice cream recipes.

Explore the essential role of eggs in ice cream-making and their impact on flavor and texture !

Chef’s Note :

As you dive into the world of making ice cream, understanding the role of eggs can elevate your creations significantly. Eggs are not just a filler; they serve crucial functions that contribute to the overall quality of your ice cream. Here are a few tips to keep in mind :

  1. Quality Matters: Always use fresh, high-quality eggs for the best flavor and texture. The richness of the yolks enhances the creaminess and depth of your ice cream.
  2. Cooking Techniques: When using eggs in your ice cream base, consider making a custard. This method involves gently heating the mixture to incorporate the eggs, ensuring a smooth and safe product. A custard base provides a luxurious mouthfeel that you and your guests will love.
  3. Temperature Control: Make sure to bring your ingredients to room temperature before mixing. This helps achieve a creamy texture and ensures even incorporation of the eggs into the mixture.
  4. Experiment with Different Styles: While traditional recipes often call for whole eggs or just yolks, don’t be afraid to experiment. You can try variations, like using only egg whites for a lighter texture, or blending with alternatives for a unique twist.
  5. Stabilize Wisely: If you’re looking to make egg-free versions, consider other stabilizers that replicate the creaminess and texture that eggs provide. This way, you can cater to various dietary preferences without sacrificing quality.

Enjoy the process of making your ice cream, and don’t hesitate to get creative. Whether you’re sticking to classic flavors or experimenting with new combinations, eggs can help you craft a delightful frozen treat !

By: Gastronome Recipes, January 31, 2025

Eggnog Cookies Recipe : A Festive Twist on a Classic Treat

Festive eggnog cookies with spiced flavor, soft texture, and holiday sprinkles on a rustic wooden table.

Festive eggnog cookies—soft, spiced, and perfect for the holidays !

Why Eggnog Cookies recipe Are the Ultimate Holiday Treat

The Magic of Eggnog in Baking

Eggnog cookies recipe bring the rich, creamy flavor of eggnog into every bite. The combination of nutmeg, cinnamon, and vanilla creates a warm, spiced aroma. These cookies are soft, chewy, and perfect for holiday gatherings. They capture the essence of festive drinks in a delightful dessert. Everyone loves how they taste like Christmas in cookie form.

A Festive Twist on Classic Sugar Cookies

Eggnog cookies recipe are a creative upgrade to traditional sugar cookies. They incorporate the creamy texture and spiced flavor of eggnog. This twist makes them stand out at holiday parties and cookie exchanges. They’re easy to make and even easier to enjoy. Perfect for adding a unique touch to your dessert table.

Perfect for Christmas, Thanksgiving, and New Year’s

These cookies are versatile and fit any holiday occasion. Whether it’s Christmas morning or a New Year’s Eve party, they’re always a hit. Their festive flavor pairs well with hot cocoa, coffee, or even more eggnog. They’re a must-have for your holiday baking list. A treat that brings joy to every celebration.

Why Everyone Loves This Festive Dessert

Eggnog cookies recipe are loved for their nostalgic flavor and soft texture. They remind people of cozy winter nights and family traditions. Kids and adults alike enjoy their sweet, spiced taste. They’re also fun to decorate with icing and sprinkles. A dessert that truly embodies the holiday spirit.

What Are Eggnog Cookies recipe ?

A Festive Flavor Combination

Eggnog cookies recipe are delightful treats blending the creamy richness of eggnog with the satisfying chew of a classic cookie. These cookies often incorporate warm spices, like cinnamon and nutmeg, reminiscent of the holiday beverage itself. The result? A festive and delicious cookie perfect for the holiday season. Expect a soft, comforting texture. Homemade cookies are best.

The Magic of Eggnog in Cookie Form

The essence of eggnog—that unique blend of cream, eggs, and spices—infuses these cookies with unmistakable flavor. This festive spirit shines through in every bite. Many recipes include rum extract for extra holiday cheer. Think creamy, comforting, and delicious. Try a new recipe this year.

Beyond the Classic Christmas Cookie

While often associated with Christmas baking, eggnog cookies recipe can be enjoyed any time of year. Their rich flavor profile transcends seasonal limitations. Their versatility makes them enjoyable year-round. This dessert brings holiday joy all year. Enjoy these cookies anytime!

Texture and Taste : A Perfect Blend

Eggnog cookies recipe typically boast a soft, chewy texture. This contrasts beautifully with the warming spices. They are a perfect blend of soft and chewy. The creamy eggnog adds delightful richness. These cookies are a sweet delight. They’re utterly irresistible.

Variations on a Theme for Eggnog cookies recipe

From simple drop cookies to more elaborate designs, eggnog cookie recipes offer endless possibilities. You can experiment with different shapes and additions. Add nuts or chocolate chips. Customize them to your liking. They’re versatile and adaptable. Easy recipes abound online.

Try the BEST eggnog cookies recipe! They’re soft, chewy, and full of amazing holiday flavor. Check out this delicious recipe here !

A close-up shot of delicious, soft eggnog cookies, sprinkled with cinnamon.

Festive eggnog cookies—soft, spiced, and perfect for the holidays !

Key Ingredients for the Perfect Eggnog Cookies recipe

The Star of the Show : Eggnog

The foundation of these delightful cookies, eggnog brings its signature creamy texture and warm spices. Use store-bought or homemade eggnog. Quality eggnog matters. Rich eggnog is key. Experiment with different brands.

Buttery Goodness : Unsalted Butter

Unsalted butter contributes richness and helps create a tender crumb. Control the salt level. Use high-quality butter. Soft butter is essential. Butter adds to the flavor.

Sweetness and Structure : Sugar

Granulated sugar provides sweetness and helps bind the ingredients. Brown sugar adds moisture. Balance sweetness carefully. Sugar aids texture. Adjust sugar to your taste.

The Binding Agent : Flour

All-purpose flour provides structure and helps hold the cookies together. Avoid overmixing. Flour impacts texture. Use good quality flour. The right flour matters.

Warming Spices : A Flavor Symphony

Cinnamon, nutmeg, and allspice complement the eggnog’s flavors. Ground spices are best. Add a dash of ginger. Spices enhance the taste. Experiment with spice levels.

IngredientsPurposeFlavor Suggestions
EggnogFlavor base, creaminess, moistureUse a high-quality eggnog; consider adding rum extract
Unsalted ButterTenderness, richnessUse high-quality butter for best flavor
Granulated SugarSweetness, structureAdjust to preference; brown sugar adds moisture
All-Purpose FlourStructure, binding agentUse good quality flour
CinnamonWarm spice, holiday flavorAdjust to preference; use freshly ground cinnamon if possible
NutmegWarm spice, holiday flavorAdjust to preference; use freshly grated nutmeg if possible
AllspiceWarm spice, complex flavorAdjust to preference; use freshly ground allspice if possible
A close-up shot of key eggnog cookie ingredients: eggnog, butter, sugar, flour, and spices, arranged attractively

Festive eggnog cookies—soft, spiced, and perfect for the holidays !

Step-by-Step Guide to Making Eggnog Cookies recipe

Prep Work : Gathering Your Ingredients

Before you begin baking, ensure you have all your ingredients prepped and ready. This includes measuring out your flour, sugar, and spices. Soften your butter. Crack your eggs. Read the recipe carefully. Gather all baking supplies.

Creaming Butter and Sugar : A Sweet Start

Begin by creaming together the softened butter and sugar until light and fluffy. This incorporates air. Use an electric mixer. Cream until pale and fluffy. This step is crucial.

Blending the Wet Ingredients : Eggnog Magic

Gradually add the eggnog to the creamed mixture. Mix until combined. Don’t overmix the batter. Add vanilla extract here. Combine wet ingredients well.

Incorporating Dry Ingredients : Gentle Folding

Gradually add the dry ingredients (flour and spices) to the wet ingredients. Fold gently until just combined. Overmixing leads to tough cookies. Mix until fully combined. Avoid overmixing the batter.

Serving and Storing Your Eggnog Cookies recipe

Serving Suggestions for Eggnog Cookies recipe

Serve your eggnog cookies recipe on a pretty platter or in a festive tin. A sprinkle of powdered sugar adds elegance; cinnamon complements the spices. Consider a tiered stand for an impressive display, or arrange them around a small Christmas village. Serve with coffee, hot cocoa, or even a glass of eggnog for a complete holiday experience. Sharing them with loved ones enhances the enjoyment.

Room Temperature Delight : Best Served Fresh

Eggnog cookies recipe are best enjoyed at room temperature. Let them cool completely on a wire rack for optimal texture and flavor. Room temperature allows the flavors to fully develop and prevents a soggy bottom. While a quick microwave warm-up might soften them, room temperature offers the best balance of texture and taste. Enjoy them fresh for the ultimate experience.

Storage Solutions : Keeping Them Fresh

Store leftover cookies in an airtight container at room temperature for up to three days. This prevents moisture loss and keeps them soft. Choose a well-sealed container and store it in a cool, dry place away from heat and direct sunlight. If they start to stale, a brief microwave warm-up might help.

Freezing for Future Indulgence : Long-Term Storage

Freeze cookies in a freezer-safe container or bag for up to two months. For easier portioning, freeze them individually before placing them in a larger container. Thaw at room temperature or gently warm in the microwave. Freezing helps preserve their flavor and texture for later enjoyment.

Gifting Your Creations : Sharing the Joy

Package cookies attractively for gifting—festive bags tied with ribbons make charming presents. A handwritten card adds a personal touch. These homemade cookies are a thoughtful and delicious gift for friends, family, or colleagues, spreading holiday cheer.

A step-by-step photo collage showing the process of making eggnog cookies, from creaming butter and sugar to baking and cooling.

Festive eggnog cookies—soft, spiced, and perfect for the holidays !

Common Mistakes to Avoid when preparing Eggnog Cookies recipe

Overmixing the Dough : A Texture Tragedy

Overmixing develops gluten, resulting in tough cookies. Gently fold dry ingredients into wet ingredients until just combined. Avoid over-creaming the butter and sugar. A slightly undermixed batter is better than an overmixed one. Aim for a slightly lumpy, evenly moistened consistency.

Incorrect Baking Time : Soggy or Burnt Cookies

Underbaking produces soft, unbaked cookies; overbaking creates dry, hard ones. Monitor cookies closely during the last few minutes. Use a toothpick test: a few moist crumbs, not wet batter, indicate doneness. Oven temperatures vary, adjust baking time accordingly.

Using Cold Ingredients : A Consistency Catastrophe

Cold butter and eggs hinder proper creaming and emulsification. Soften butter completely and use room-temperature eggs for optimal results. This ensures a lighter, fluffier dough and better texture.

Neglecting Cooling : A Structural Failure

Let cookies cool completely on the baking sheet before transferring them to a wire rack. Hot cookies are fragile and prone to breakage. Cooling allows them to firm up and retain their shape.

Improper Storage : A Freshness Faux Pas

Store cookies in an airtight container at room temperature to maintain freshness. Avoid refrigeration, which can dry them out. Proper storage prevents staleness and preserves their delicious texture.

Eggnog Cookie Baking Mistakes

Festive eggnog cookies—soft, spiced, and perfect for the holidays !

Chef’s Note

As you embark on the delightful journey of baking these Eggnog Cookies, remember that this recipe is not just about the ingredients, but also about the festive spirit that comes with it. Eggnog, a cherished holiday beverage, brings its rich, creamy flavor and seasonal spices into these cookies, making them a perfect treat for gatherings and celebrations.

For the best flavor, use high-quality eggnog and fresh spices like nutmeg and cinnamon. Freshly grated nutmeg can elevate the taste significantly. These small choices can make a big difference in the overall quality of your cookies.

To achieve soft, chewy cookies, be mindful of your baking time. Overbaking can lead to dryness. The cookies should be slightly golden at the edges but still soft in the center when you take them out of the oven. If you have the time, consider chilling the cookie dough for about 30 minutes before baking. This helps the cookies maintain their shape and enhances the flavors.

Feel free to customize your eggnog cookies by incorporating add-ins like chocolate chips, chopped nuts, or dried fruits for added texture and flavor. This is a chance to put your own twist on the classic recipe!

These cookies pair wonderfully with a warm cup of eggnog or a rich hot chocolate. They also make a great gift when packaged in festive boxes for friends and family. Enjoy creating a batch of these scrumptious Eggnog Cookies, and may they add a touch of joy and warmth to your holiday festivities !

By: Gastronome Recipes, January 30, 2025

How to Make Candied Orange Peels : A Sweet and Simple Delight !

Introduction to Candied Orange Peel: showcasing vibrant orange peels and sugar mixture.

Uncover the delightful process of transforming fresh oranges into delicious homemade treats.

Candied Orange Peel

Candied orange peel transforms a simple fruit into an exquisite treat. This delightful process creates sweet, chewy snacks bursting with citrus flavor. Homemade versions offer unique tastes compared to store-bought options. Making candied orange peel is an enjoyable activity for all ages. It also uses scraps, minimizing waste and maximizing flavors.

The Art of Candying Citrus

Candying citrus fruits is an ancient culinary technique. The process involves boiling fruit peels in sugar and water. This method not only preserves the fruit but also enhances its natural sweetness. Using fresh, vibrant oranges creates a colorful and tasty result. The art of candying turns everyday ingredients into gourmet delights.

Health Benefits of Candied Orange Peel

Oranges are not just delicious; they offer numerous health benefits. Rich in vitamin C, they boost immunity and enhance skin health. Additionally, they provide dietary fiber, promoting good digestion. The antioxidants present in oranges help combat free radicals. Incorporating candied orange peel allows you to enjoy these benefits in a sweet form.

Versatility in Culinary Creations

Candied orange peel is versatile and can elevate various dishes. Use it as a garnish for desserts, cakes, or pastries. It can also enhance the flavor of savory dishes, adding a unique twist. Furthermore, it pairs beautifully with chocolate or nuts, creating gourmet combinations. Let your creativity shine by experimenting with this tasty treat.

What is Candied Orange Peel ?

Understanding Candied Orange Peel

Candied orange peel is a delectable confection made from orange rinds. The process involves boiling the peels in sugar syrup. This method preserves the fruit while adding sweetness and flavor. Candied peels are chewy, sweet, and bursting with citrusy goodness. They make excellent snacks or additions to various dishes.

The Candying Process Explained

Creating candied orange peel is surprisingly simple and fun. First, the orange peels are cut into strips, removing any bitter pith. Next, they are boiled in sugar syrup until translucent and tender. Once cooled, the peels are rolled in sugar for a delightful finish. This candying method transforms ordinary ingredients into gourmet delights.

Culinary Uses and Versatility for Candied Orange Peel

Candied orange peel is versatile in culinary applications. It can be used as a garnish for cakes, pastries, or desserts. Additionally, it enhances savory dishes with a touch of sweetness. Chocolate lovers enjoy combining candied peel with their favorite treats. This ingredient elevates many recipes, adding a unique twist.

A Brief History of Candied Citrus

Candied orange peel has a rich history dating back centuries. It’s been enjoyed in various cultures around the world. This treat originally served as a method of food preservation. Candied citrus became popular in European confections, showcasing culinary creativity. Its timeless appeal continues to delight dessert lovers today.

To learn a delightful recipe for creating candied orange peel, check out this detailed guide here.

An illustration of candied orange peel strips coated in sugar, showcasing their vibrant color and texture.

Uncover the delightful process of transforming fresh oranges into delicious homemade treats.

Key Ingredients for Making Candied Orange Peel

Fresh Oranges: The Star Ingredient

Fresh oranges are essential for making candied orange peel. The zest and natural sweetness contribute rich flavors. Choose vibrant, organic oranges for the best results. The peels should be firm, glossy, and free from blemishes. Utilizing the entire fruit reduces waste and maximizes enjoyment.

Granulated Sugar for Sweetness

Granulated sugar is crucial in the candying process. It transforms the peels into a sweet, chewy delight. Sugar helps preserve the orange peels, enhancing their flavor. Using standard granulated sugar is most common, but variations exist. Experimenting with alternatives adds interesting notes to the final product.

Water: The Binding Element

Water serves as a binding element in the candying process. It is mixed with sugar to create a syrup. The right balance of water ensures excellent texture and consistency. Boiling the peels in syrup allows for optimal absorption of sweetness. This step is vital for achieving that chewy, irresistible quality.

Optional Ingredients for Flavor Boost

While oranges and sugar are the main ingredients, optional flavors can enhance the taste. Adding lemon juice brightens the citrus profile significantly. A splash of vanilla extract can complement the sweetness beautifully. Spice options like cinnamon or ginger add warmth and depth. Feel free to get creative with flavors!

Storage Ingredients: Ensuring Freshness

To maximize freshness, consider using ingredients for storage. Airtight containers maintain quality over time. Desiccant packs can prevent excess moisture. A cool, dark place works best for preserving candy. Proper storage guarantees that your homemade treats stay delicious longer.

IngredientsPurposeFlavor Suggestions
Fresh OrangesThe star ingredient; provides sweetness and zest.Lemon juice for brightness and tang.
Granulated SugarSweetens the peels and aids in preservation.Vanilla extract for a warm, aromatic note.
WaterCreates a syrup for candying the peels.A hint of cinnamon for added warmth.
Lemon JuiceEnhances citrus flavor and balances sweetness.Ginger for a spicy kick.
Vanilla ExtractAdds depth and warmth to the overall flavor.Orange zest for an extra citrus punch.
CinnamonAdds a cozy, comforting touch to the candy.Nutmeg for a holiday feel.
GingerProvides a spicy contrast to the sweet flavor.Cloves for a warm, aromatic blend.
An assortment of key ingredients for making candied orange peel: fresh oranges, granulated sugar, and a jar of syrup.

Uncover the delightful process of transforming fresh oranges into delicious homemade treats.

Step-by-Step Guide to Candying Orange Peel

Gather Your Ingredients and Tools for Candied Orange Peel

Before starting, gather all necessary ingredients and tools. Fresh oranges are crucial for this recipe. Ensure you have granulated sugar and water on hand. A sharp knife will help cut the peels evenly. Additionally, prepare a pot, spoon, and baking sheet for convenience.

Prepare the Oranges for Candying

Begin by washing the oranges thoroughly to remove any wax. Next, carefully peel the oranges, trying to keep strips intact. Aim for minimal pith, as it could add bitterness. Cut the peels into uniform strips for even cooking. This preparation sets the stage for delicious candied treats.

Boil the Orange Peels

In a pot, combine the orange peels with water. Bring the mixture to a boil, then reduce heat for simmering. Allow the peels to cook for about 10-15 minutes. This process helps soften the peels and reduce bitterness. Drain the water before moving on to the next step.

Create the Sugar Syrup

In the same pot, mix granulated sugar with water to create a syrup. Use a ratio of 2:1 sugar to water for optimal sweetness. Heat the mixture until the sugar dissolves completely. Once the syrup reaches a gentle simmer, add the cooked orange peels. Coat them in the syrup, infusing sweet flavors.

Candy the Orange Peels

Simmer the orange peels in the sugar syrup for about 45 minutes. Stir occasionally to ensure even coating and prevent sticking. You’ll notice the peels becoming translucent and sticky. After cooking, remove them from the pot and place them on a lined baking sheet. Allow the peels to cool completely.

Coat the Peels in Sugar

Once cooled, coat the sticky orange peels in granulated sugar. This final step enhances sweetness and adds texture. Spread the sugared peels on a wire rack or parchment paper to dry. Allow them to sit for several hours or overnight for best results. Enjoy your candied orange peels as a treat !

Step-by-step photos showing the process of candying orange peel, including ingredient preparation, cooking, and sugaring.

Uncover the delightful process of transforming fresh oranges into delicious homemade treats.

Creative Ways to Use Candied Orange Peel

Elevate Your Baking Adventures of Candied Orange Peel

Candied orange peel can transform your baking recipes into gourmet creations. Incorporate it into cakes, cookies, or muffins for added flavor. The sweet, chewy texture complements various baked goods perfectly. Additionally, it pairs wonderfully with chocolate, enhancing your favorite desserts. Experimenting with candied peel opens up delightful baking possibilities.

Flavorful Garnishes for Desserts

Using candied orange peel as a garnish adds elegance to desserts. Place strips atop cakes, tarts, or ice cream for a stunning presentation. The vibrant color contrasts beautifully with creamy textures. Moreover, it dials up the flavor in each bite, creating a memorable experience. Impress guests with this simple yet effective touch.

Savory Dishes with a Twist

Candied orange peel isn’t just for sweets; it’s perfect for savory dishes too. Add chopped peels to salads for a burst of sweetness and citrus flavor. They also complement grilled meats, particularly duck or chicken. Incorporating candied peel into sauces adds depth and complexity. It’s a creative way to elevate everyday meals.

Homemade Candies and Snacks

Make your own candies and snacks using candied orange peel as a base ingredient. Chop it into small pieces and combine with nuts or chocolate. Create energy bites or trail mix with an exciting twist. Additionally, mixing it with granola adds sweetness and zest. Healthy snacking can be both delicious and exciting.

Unique Holiday Treats

During the holiday season, candied orange peel makes a special addition to festive treats. Use it in holiday cookies or cakes for a nostalgic flavor. Pair it with spices like cinnamon and nutmeg for a wintery vibe. It can even be given as a thoughtful homemade gift. Celebrate the season with this delightful, handcrafted treat !

Nutritional Benefits of Candied Orange Peel

Rich in Dietary Fiber

Orange peels are an excellent source of dietary fiber. Fiber is essential for digestive health and regularity. Consuming fiber helps maintain a healthy gut microbiome. Additionally, it aids in weight management by promoting a feeling of fullness. Including orange peels in your diet supports overall digestive well-being.

High in Vitamin C

Orange peels contain a significant amount of vitamin C. This vitamin is critical for immune system support and fight diseases. Vitamin C also promotes healthy skin and collagen production. Eating orange peels can help you meet your daily vitamin C needs. They serve as an added nutritional boost alongside the fruit itself.

Packed with Antioxidants

Antioxidants in orange peels help combat oxidative stress in the body. This protective benefit contributes to overall health and wellness. Flavonoids and polyphenols are abundant in the peels, offering anti-inflammatory effects. Consuming antioxidants can support heart health by reducing cholesterol levels. Incorporating orange peels into your diet is a simple way to enhance your antioxidant intake.

Essential Oils and Their Benefits

Orange peels contain essential oils that provide unique health benefits. These oils have antimicrobial and anti-inflammatory properties. Additionally, they can enhance mood and alleviate stress when inhaled. The aromatic nature of orange peels makes them perfect for various culinary uses. Embracing orange peels means enjoying both flavor and wellness benefits.

Nutrient Absorption Boost

The presence of essential oils in orange peels can aid in nutrient absorption. These compounds help the body better utilize vitamins and minerals from foods. Improved absorption supports overall health, enhancing energy levels and vitality. Eating orange peels ensures you gain the full benefits from nutrients. They serve as both food and functional health support.

Visual representation of the nutritional benefits of orange peels, highlighting fiber, vitamin C, and antioxidants in vibrant orange slices.

Uncover the delightful process of transforming fresh oranges into delicious homemade treats.

Chef’s Note

When making candied orange peel, remember that the quality of your oranges significantly impacts the final product. Opt for organic oranges if possible, as they are free from pesticides and have a more vibrant flavor. The freshness of the oranges will enhance the sweetness and zest of your candied peel.

Also, don’t hesitate to get creative with flavors! Feel free to experiment by adding spices like cinnamon or ginger to your syrup. A touch of lemon juice can brighten the overall flavor profile. You can also try using different citrus fruits such as lemons, limes, or grapefruits for a unique twist.

Lastly, be patient during the drying process after candying. Allow the peels to dry thoroughly to achieve the right texture. Properly dried candied orange peel will be chewy yet not overly sticky, making it perfect for snacking or incorporating into recipes. Enjoy this delightful treat in various dishes or savor it on its own !

By: Gastronome Recipes, January 29, 2025

Vegan Chocolates Made Easy : Quick and Sweet Recipes

A visually engaging kitchen scene showcasing various common mistakes when making vegan chocolates, focusing on preparation techniques and ingredients.

Explore the delightful world of vegan chocolates and why they’re a must-try !

The Allure of Vegan Chocolates

Vegan chocolates are delicious treats that cater to those seeking animal-free options. Made without dairy, they offer indulgence without sacrificing taste. The popularity of vegan treats has surged as more people embrace plant-based lifestyles and dietary preferences. With rich flavors and creamy textures, vegan chocolates prove that you can have it all. Discover the wonderful world of vegan chocolates that everyone can enjoy!

Why Choose Vegan Chocolates ?

There are many reasons to choose vegan chocolates over traditional varieties. They often contain healthier ingredients such as natural sweeteners and high-quality cocoa. Vegan chocolates are suitable for those with lactose intolerance or dairy allergies. Additionally, they can provide a more sustainable option for eco-conscious consumers. Embracing vegan treats contributes to overall well-being, supporting both health and ethical choices.

How to Use Vegan Chocolates

Vegan chocolates are incredibly versatile in the kitchen. They can be incorporated into various desserts, snacks, and even savory dishes! Melted vegan chocolate makes great dips for fruits and snacks. Use it as a filling for cookies or cupcakes, enhancing sweetness and decadence. The options are endless! Experimenting with vegan chocolate inspires creativity and delicious results in your cooking adventures.

What Are Vegan Chocolates ?

Defining Vegan Chocolates

Vegan chocolates are delightful confections made without any animal products. They typically use plant-based ingredients, including cocoa, natural sweeteners, and fats. Unlike traditional chocolates, which often contain milk, vegan versions maintain richness without dairy. This makes them suitable for vegans and those with lactose intolerance. Understanding the definition of vegan chocolates opens up new culinary experiences.

The Ingredients That Make Them Special

The key ingredients in this recipe contribute to their unique flavor and texture. High-quality cocoa powder provides that rich chocolate taste, while plant-based sweeteners like maple syrup or agave nectar are commonly used. Instead of cream, ingredients like coconut oil or nut butters add creaminess while ensuring that the product remains dairy-free. These components create a delicious treat that anyone can enjoy.

The Benefits of Vegan Chocolates

Choosing vegan chocolates comes with numerous benefits beyond taste. They are generally lower in saturated fats compared to their dairy counterparts, making them a healthier option. The absence of animal products also aligns with the ethical choices of many consumers. Vegan chocolates often incorporate more natural, clean ingredients, promoting a healthier lifestyle. These factors contribute to the growing popularity of vegan confections.

Popular Types of Vegan Chocolates

There are many varieties of vegan chocolates available on the market. Dark chocolate is often a favorite due to its rich flavor and lower sugar content. Some brands offer milk chocolate alternatives made with almond or coconut milk. Additionally, flavored vegan chocolates can include exciting ingredients like sea salt or infused with fruit flavors. Exploring these options enhances your chocolate experience.

How to Choose Quality Vegan Chocolates

When selecting chocolate recipe, look for high-quality ingredients and sustainable practices. Check for certifications like vegan or organic to ensure ethical sourcing. Read ingredient labels to avoid unnecessary additives and preservatives. Quality chocolates typically use premium cocoa and natural sweeteners, resulting in superior flavor. Being informed helps you make better choices when it comes to enjoying vegan treats.

Tips for Using Vegan Chocolates in Recipes

Vegan chocolates are versatile and can be used in many recipes. Use them in baking, creating delicious cookies, cakes, or brownies. Melt vegan chocolate for drizzling over desserts or dipping fruits. They can also be blended into smoothies for a rich chocolate flavor. Experimenting with vegan chocolates opens doors to endless culinary possibilities !

For a fantastic selection of vegan chocolates, check out this collection of vegan chocolate to inspire your cravings !

An inviting assortment of vegan chocolates displayed on a decorative tray, showcasing various flavors and textures, highlighting their plant-based nature.

Explore the delightful world of vegan chocolates and why they’re a must-try !

Essential Components for Vegan Chocolates

Core Ingredients for Vegan Chocolates

The foundation of chocolate lies in its core ingredients. High-quality cocoa powder is essential for rich flavor and color. Cocoa butter serves as a key fat that creates a smooth texture in chocolates. Natural sweeteners like maple syrup or agave nectar provide the necessary sweetness without dairy. Together, these ingredients work harmoniously to create delightful vegan confections. Understanding these components is crucial for successful chocolate making.

Enhancing Flavor Profiles

Incorporating additional flavor enhancers can elevate perfect chocolates to new heights. Ingredients like vanilla extract contribute warmth and depth, enriching the overall taste experience. Sea salt is another fantastic addition that can intensify the sweetness of chocolate. You can also experiment with spices like cinnamon or chili powder for exciting flavor combinations. By blending different flavors, you create unique and delightful vegan treats.

Textural Additions

Textural variety is important in vegan chocolates, so consider integrating elements like nuts or seeds. Chopped almonds or hazelnuts add a satisfying crunch that contrasts with the creamy chocolate. You can also incorporate crispy rice for an interesting texture. The balance of textures creates a more enjoyable eating experience, making vegan chocolates truly irresistible.

IngredientsPurposeFlavor Suggestions
Cocoa PowderProvides rich chocolate flavor.Dark cocoa for more intensity.
Cocoa ButterCreates a smooth, creamy texture.Blends well with sweeteners.
Natural SweetenersAdds necessary sweetness without dairy.Maple syrup or agave for unique flavor.
Vanilla ExtractEnhances overall flavor profile.Try almond extract for additional depth.
Nuts/SeedsAdds crunch and texture to chocolates.Use chopped almonds, walnuts, or pistachios.
A close-up shot of essential ingredients for vegan chocolates, including cocoa powder, cocoa butter, and natural sweeteners arranged on a kitchen counter.

Explore the delightful world of vegan chocolates and why they’re a must-try !

Easy Steps to Make Vegan Chocolates

Gather Your Essential Ingredients

Before you start making vegan chocolates, ensure all essential ingredients are ready. High-quality cocoa powder and cocoa butter are key for rich flavor. Natural sweeteners like maple syrup or agave nectar provide delicious sweetness without dairy. Prepare all your ingredients to make the process smoother and more enjoyable. Having everything organized saves time and enhances your chocolate-making experience.

Melting the Chocolate Smoothly

The first step in making vegan chocolates is melting the cocoa butter and cocoa powder. Use a double boiler to gently melt the ingredients, ensuring they remain smooth and glossy. Stir constantly to prevent burning and to achieve a uniform consistency. Proper melting technique is crucial for achieving velvety vegan chocolates. Once melted, let it cool slightly before proceeding to the next step.

Mixing in Sweetness and Flavor

After melting, it’s time to mix in natural sweeteners. Gradually add the maple syrup or agave nectar into the melted chocolate. Incorporate any additional flavors like vanilla extract or a pinch of sea salt to boost taste. Ensure everything is well combined, creating a harmonious mixture. Adjust the sweetness according to your personal preference, resulting in a chocolate base that suits your taste.

Pouring into Molds

Next, pour the chocolate mixture into molds, filling them evenly. Silicone molds are ideal for easy removal, while any mold will work in a pinch. Gently tap the molds on the counter to remove any air bubbles. This step ensures each piece is perfectly formed and smooth. Refrigerate or freeze the molds until the chocolate hardens completely, resulting in delicious vegan treats.

Enjoying and Storing Your Chocolates

After the chocolates have set, carefully remove them from the molds. Store your vegan recipe in an airtight container to maintain freshness. If you’re feeling creative, consider garnishing them with nuts or a sprinkle of sea salt. Enjoy your vegan chocolates straight away or share them with friends for a festive treat. These chocolates are perfect for snacking, gifting, or celebrating special occasions.

A visual display of the chocolate-making process, featuring melted cocoa butter and cocoa powder, along with molds for shaping delicious vegan chocolates.

Explore the delightful world of vegan chocolates and why they’re a must-try !

Creative Variations of Vegan Chocolates

Flavor Infusions for Unique Treats

One of the best aspects of chocolate recipe is their versatility in flavor. Experimenting with various infusions can lead to unique and exciting results. Adding ingredients such as orange zest or peppermint extract can create fresh flavor profiles. You can also explore spices like cinnamon or chili powder for a delightful twist. Each infusion enhances the richness of the chocolate and elevates the indulgent experience.

Nutty and Crunchy Additions

Incorporating nuts and seeds into your chocolate adds texture and nutritional benefits. Consider folding in chopped almonds, hazelnuts, or walnuts for delightful crunch. This addition not only enhances taste but also introduces healthy fats and protein. For a fun twist, experiment with seeds like pumpkin or sunflower for an unexpected crunch. These variations cater to different textures and enhance the overall enjoyment of your treats.

Decadent Vegan Chocolate Bark

Creating vegan chocolate bark is an easy way to incorporate various flavors and textures. Simply spread melted chocolate onto a baking sheet and top it with a mix of dried fruits, nuts, and seeds. Popular combinations include cranberries and pistachios or coconut and almonds. Once it sets, break it into pieces for fun snacking! This creative option allows for endless combinations that suit every palate.

Dark Chocolate Delights

For those who enjoy bold flavors, dark chocolate variations can be incredibly satisfying. Use high-quality dark cocoa to create rich, intense chocolate. You can also enhance it by adding roasted coffee beans or a dash of sea salt. These additions elevate the chocolate experience, making it perfect for indulgent desserts or gifts. Dark chocolate is also packed with antioxidants, making it a health-conscious choice.

Festive Seasonal Variations

Adapting vegan chocolates for the seasons can be a fun and creative project. During the holidays, consider adding festive flavors like peppermint or gingerbread spices. For spring, try incorporating fresh fruit flavors like strawberry or raspberry. Seasonal variations not only keep your chocolate creations exciting but also make them perfect for holiday gifting. These adaptations encourage exploration and enhance the joy of indulging in vegan chocolates.

Common Mistakes to Avoid

Overheating the Chocolate

One of the most common mistakes when making perfect chocolates is overheating the cocoa blend. High temperatures can cause chocolate to seize, resulting in a grainy texture. Always use low heat to melt cocoa butter and cocoa powder gently. Stir regularly for even melting and a smooth consistency. Avoid this mistake to ensure rich, creamy vegan chocolates every time.

Using Low-Quality Ingredients

Using low-quality ingredients can significantly impact the final flavor of your vegan chocolates. Opt for high-quality cocoa powder and cocoa butter for richer taste. Cheap sweeteners may alter the overall sweetness and texture negatively. Fresh, organic ingredients enhance the integrity of your chocolates, yielding better results. Prioritizing quality ingredients leads to delicious desserts and treats that impress.

Not Measuring Ingredients Accurately

Failing to measure ingredients accurately is a common error that can ruin your vegan chocolate recipe. Precision in measuring cocoa, sweeteners, and liquids ensures a balanced mixture. Improper ratios can lead to overly sweet, bitter, or undesirable textures. Always use measuring cups and spoons for success in your cooking endeavors. Taking time to measure accurately leads to consistently enjoyable vegan chocolates.

Skipping Taste Testing

Many home cooks overlook the importance of taste testing during preparation. Not sampling your mixture can lead to unbalanced flavors. Be sure to taste your melted chocolate before it cools, adjusting sweetness or additional flavors as needed. This step is essential for getting the perfect balance in your vegan chocolates. Don’t forget to enjoy the process and make adjustments along the way!

Ignoring Storage Recommendations

Storing homemade vegan chocolates improperly can compromise their freshness. Many forget to keep chocolates in an airtight container, leading to dryness or spoilage. Store your chocolates in a cool, dark place, or refrigerate if necessary. Pay attention to use-by dates on fresh ingredients to maintain quality. Following proper storage techniques ensures that your creations remain delightful and enjoyed for longer.

Overcomplicating the Recipe

A common mistake is overcomplicating the chocolate-making process. Many ingredients or steps can lead to confusion and frustration. Start with simple recipes to build confidence and mastery. Familiarizing yourself with basic techniques helps develop your chocolate-making skills effectively. Avoiding unnecessary complexity ensures a smoother experience and delicious results.

Not Experimenting with Flavor Variations

Another mistake is not experimenting with flavor variations. Sticking to basic recipes limits creativity and enjoyment. Try adding unexpected ingredients like sea salt, espresso powder, or spices for unique twists. Explore different textures by incorporating nuts, seeds, or dried fruit. Embracing experimentation results in delightful surprises and enhances your chocolate repertoire.

A visually inviting scene of various vegan chocolates arranged on a decorative plate, surrounded by fresh fruits and ingredients that highlight their appeal.

Explore the delightful world of vegan chocolates and why they’re a must-try !


Chef’s Note

When crafting your own vegan recipe, attention to detail is essential for achieving the perfect flavor and texture. Start with high-quality, ethically sourced ingredients. The better your cocoa powder and cocoa butter, the richer the taste of your chocolates will be. Always ensure your sweeteners are pure and fresh, as they can significantly influence flavor.

One critical tip is to temper your chocolate correctly. This process involves melting chocolate to specific temperatures to ensure a nice snap and shine once it cools. Avoid overheating to prevent the chocolate from seizing; instead, use a gentle heat method such as a double boiler or a microwave at short intervals.

Feel free to experiment with flavors! The beauty of making vegan chocolates is the ability to customize. Infuse your chocolates with interesting ingredients like spices, essential oils, or unique flavors like lavender or chili for a twist. Don’t hesitate to showcase your creativity in each batch you make.

Lastly, presentation is key. Whether you’re sharing your chocolates as gifts or enjoying them yourself, beautiful wrapping or creative plating can make a difference. Consider using decorative boxes or clear bags tied with ribbons for gifting. Ultimately, enjoy the process of making and sharing your vegan chocolates. Happy chocolate-making !

By: Gastronome Recipes, January 27, 2025