Why JR Bacon Cheeseburgers Should Be Your Next Guilty Pleasure

Delicious JR Bacon Cheeseburger with crispy bacon, melted cheese, and fresh greens, presented in a stylish fast food setting.

Discover the exciting 1-cent deal on the JR Bacon Cheeseburger !

A Delicious Opportunity Awaits for JR Bacon Cheeseburgers

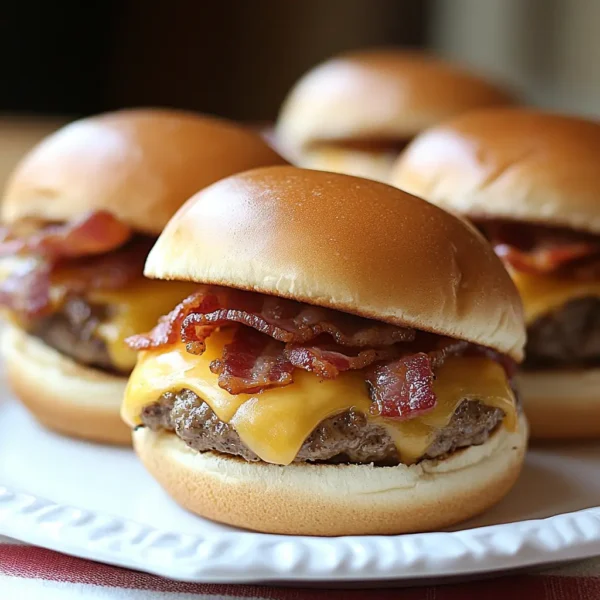
The JR Bacon Cheeseburger is a beloved fast-food option. Its mouthwatering combination of flavors tantalizes taste buds. Recently, the chance to grab one for just 1 cent has created excitement. This limited-time offer is ideal for burger enthusiasts on a budget. Don’t miss out on this incredible deal that delivers satisfaction.

Why Choose the JR Bacon Cheeseburger ?

This JR Bacon cheeseburger stands out for various reasons. Fresh, quality ingredients elevate the flavor profile significantly. Juicy patties topped with crispy bacon create a delightful contrast. Melted cheese adds creaminess, making every bite unforgettable. Whether it’s a casual lunch or a late-night snack, this burger fits all occasions.

The Fast Food Landscape Today

Fast food promotions are a powerful marketing strategy. With numerous choices available, diners seek the best deals. This promotion highlights how chains attract customers with captivating offers. The JR Bacon Cheeseburger deal is both wallet-friendly and delicious. It’s a testament to the evolving fast-food dining experience.

Join the Flavor Revolution of JR Bacon Cheeseburgers

Burgers are timeless and continually evolving. New combinations and unique ingredients keep the menu interesting. The JR Bacon Cheeseburger showcases this delicious trend through simplicity. As fast food continues to innovate, offers like this keep customers engaged. Embrace the opportunity to indulge in this tempting option.

Unlocking the JR Bacon Cheeseburger Deal

How to Take Advantage of JR Bacon Cheeseburgers

To enjoy this incredible deal, visit participating locations during the promotion. Check the chain’s website or app for specific terms and conditions. Ordering through the app may provide additional benefits or options. Be sure to arrive early, as popularity can lead to sellouts quickly. Following these tips will ensure you secure your delicious JR Bacon Cheeseburger.

Timing Is Key: Best Days to Buy JR Bacon Cheeseburgers

Taking advantage of the deal requires strategic planning. Weekdays may experience less crowding, allowing quicker service. Additionally, consider visiting during off-peak hours for shorter wait times. Staying informed about the promotion’s duration is essential. Plan your visit accordingly to avoid disappointment and enjoy your meal with ease.

Customer Experiences: What People Are Saying

Customers have widely embraced this fantastic offer, sharing their excitement online. Many reviews praise the irresistible combination of flavors and quality. Social media buzz amplifies the enthusiasm surrounding the JR Bacon Cheeseburger. Join others in savoring this quick meal while enjoying significant savings. Your feedback can help spread the word about this delicious deal !

Delicious JR Bacon Cheeseburger placed on a vibrant table, showcasing the 1-cent promotional offer

Discover the exciting 1-cent deal on the JR Bacon Cheeseburger !

What Makes the JR Bacon Cheeseburger Unique ?

Signature Ingredients That Stand Out

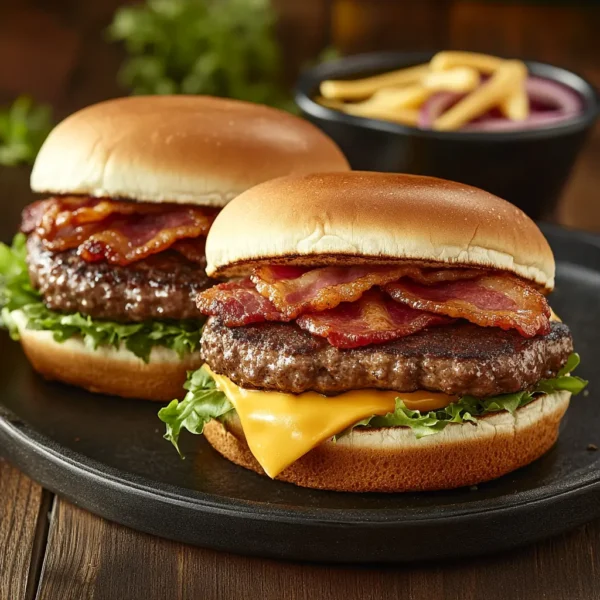
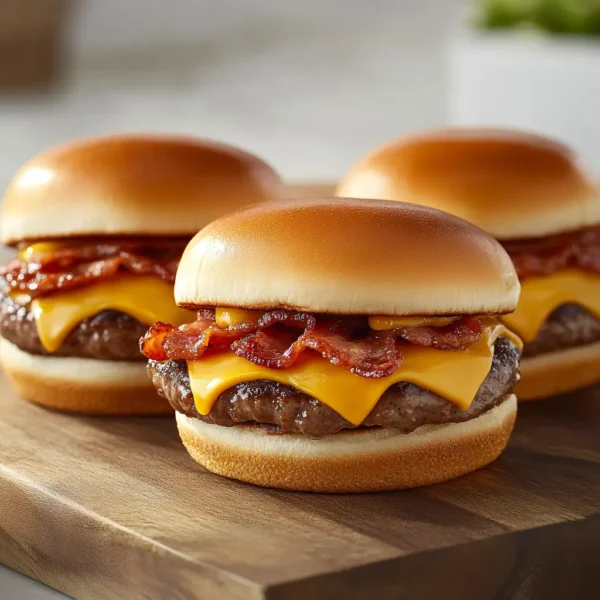
The JR Bacon Cheeseburger features high-quality ingredients that set it apart. Juicy beef patties provide a rich, savory flavor. Crispy bacon adds a satisfying crunch and irresistible taste. Melted cheese brings creaminess that enhances overall enjoyment. Fresh lettuce and tomato add a refreshing touch, balancing the burger perfectly.

Flavor Profile: What to Expect

This cheeseburger offers a delightful symphony of flavors. The combination of savory beef, salty bacon, and creamy cheese creates an explosion of taste. Bite into the freshness of vegetables, adding a crisp texture. The perfect seasoning elevates each component, making it memorable. Overall, the JR Bacon Cheeseburger delivers a satisfying experience.

Comparing It to Other Fast Food Burgers

When compared to competitors, the JR Bacon Cheeseburger stands out distinctly. Its combination of ingredients creates a unique flavor profile. Many fast food offerings lack the same level of quality and taste. The balance of textures makes it a favorite among burger enthusiasts. It consistently outshines rivals, ensuring repeat customers.

Why JR Bacon Cheeseburgers with Bacon Make a Difference

Bacon is an essential component of the JR Bacon Cheeseburger. It adds an undeniable depth of flavor that elevates the burger experience. Crispy bacon bits provide a satisfying contrast to the tender beef. This ingredient enhances overall satisfaction and enjoyment. For bacon lovers, this burger is a must-try delight!

Freshness Matters: Sourcing Quality Ingredients

The quality of ingredients plays a crucial role in the JR Bacon Cheeseburger’s appeal. Fresh produce ensures that each bite is crisp and flavorful. The beef is sourced for optimal taste and texture, making every burger fulfilling. Using quality ingredients fosters customer loyalty and satisfaction. This commitment to freshness sets the chain apart in the competitive landscape.

Customization: Make It Your Own

One of the unique aspects of the JR Bacon Cheeseburger is its customization options. Customers can tailor their burgers to suit personal tastes. Add extra toppings like pickles or onions for an individualized flavor. You can choose various condiments to enhance the taste further. This flexibility makes each burger experience unique and enjoyable.

Ideal Size for Any Meal

The JR Bacon Cheeseburger is designed to be the perfect size for any occasion. Its portion is ideal for a satisfying lunch or snack. This balanced size allows for enjoyment without feeling overly full. It caters to those looking for a quick meal on the go. Versatility in size makes it a favorite among fast food patrons.

The Allure of Fast Food Branding

The popularity of the JR Bacon Cheeseburger is also due to effective branding. The fast-food chain’s strong identity attracts loyal customers. Clever marketing campaigns and promotions keep it front-of-mind. Challenging competitors in this market boosts visibility and sales. This strategic approach enhances the appeal of their signature burger.

To learn more about the amazing 1-cent deal on JR Bacon Cheeseburgers, check out the details here.

A delicious JR Bacon Cheeseburger showcasing juicy beef patty, crispy bacon, melted cheese, fresh lettuce, and tomato, highlighting each key ingredient.

Discover the exciting 1-cent deal on the JR Bacon Cheeseburger !

Key Ingredients of a JR Bacon Cheeseburger

Freshness Counts: Sourcing Quality Ingredients

The quality of ingredients significantly impacts the JR Bacon Cheeseburger. Freshly sourced beef ensures optimal taste and texture. Ingredients like lettuce and tomatoes should be crisp and vibrant. Quality bacon, ideally smoked, enhances flavor and adds a satisfying crunch. This commitment to fresh ingredients elevates the overall burger experience.

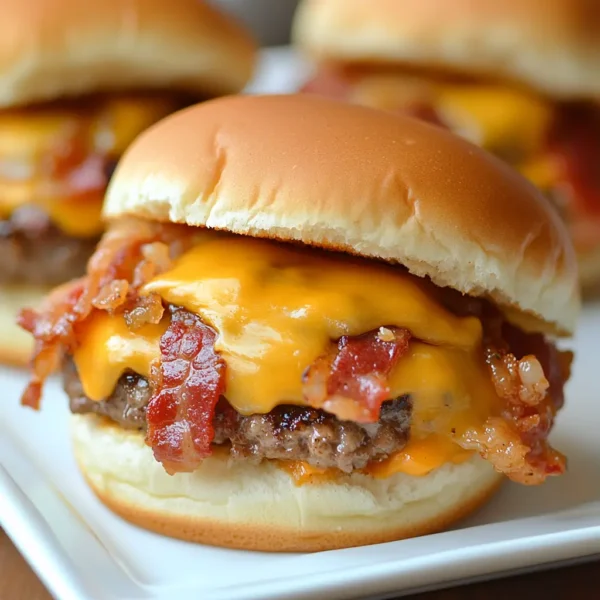
The Perfect Balance: Patty, Bacon, and Cheese

A well-cooked beef patty is the cornerstone of the JR Bacon Cheeseburger. It provides savory, hearty flavors that satisfy cravings. Crispy bacon adds a textural contrast, while melted cheese brings creaminess. The balance of these three ingredients creates a delightful harmony. Each bite delivers a memorable taste that keeps customers coming back.

Optional Add-Ons: Customize Your JR Bacon Cheeseburgers

Customization is a key feature of the JR Bacon Cheeseburger. Customers can choose additional toppings to personalize their meal. Options include pickles, onions, and various sauces for diverse flavor profiles. Adding extra cheese creates an even richer experience. This versatility ensures that everyone can enjoy their ideal burger.

Handling and Storing Ingredients for Quality

Proper handling and storage of ingredients are essential for maintaining quality. Fresh produce should be kept refrigerated to preserve crispness and flavor. Cooked patties and bacon should be stored separately in airtight containers. Keeping ingredients organized minimizes waste and ensures the best taste. Following these guidelines promotes the highest quality dining experience

IngredientsPurposeFlavor Suggestions
Juicy Beef PattyProvides protein and savory flavor; the burger’s core.Season with pepper or garlic for added taste.
Crispy BaconAdds a crunchy texture and savory, salty flavor.Pair with maple syrup for a sweet twist.
Melted CheeseCreates creaminess and richness; enhances flavor profile.Try different cheeses like pepper jack.
Fresh LettuceAdds crunch and freshness; balances richer ingredients.Opt for arugula for a peppery kick.
Slices of TomatoBrings juiciness and acidity; brightens the overall flavor.Use heirloom tomatoes for superior taste.
PicklesProvides tartness and crunch, adding complexity.Experiment with dill or sweet pickles.
OnionsOffers sharpness and depth; enhances overall flavor.Caramelized onions for sweetness.
Various SaucesAdds moisture and distinct flavor; complements ingredients.Ketchup, mustard, or special sauce.
Key Ingredients of a JR Bacon Cheeseburger: What You Need to Know

Discover the exciting 1-cent deal on the JR Bacon Cheeseburger !

Fast Food Savings : JR Bacon Cheeseburgers

Other Promotions to Look Out For JR Bacon Cheeseburgers

Fast food chains frequently run various exciting promotions. Keep an eye on limited-time offers featuring discounted meals. Seasonal promotions often include unique menu items at reduced prices. Regularly checking restaurant apps can reveal exclusive deals and savings. Don’t miss figuring out how to maximize your fast-food budget!

Budget-Friendly Dining Tips for Families

Eating out doesn’t have to break the bank, even with a family. Look for combo meals that offer significant savings compared to individual items. Consider sharing larger portions among family members to cut costs. Always check for coupons or promotions available online before ordering. Planning meals around deals can save time and money.

Making the Most of Fast Food Loyalty Programs

Loyalty programs often reward frequent customers with exclusive deals. By signing up, you can earn points for every purchase made. Accumulated points can be redeemed for free food items or discounts. Various fast food chains offer unique perks through their loyalty apps. Taking advantage of these programs enhances your overall dining experience.

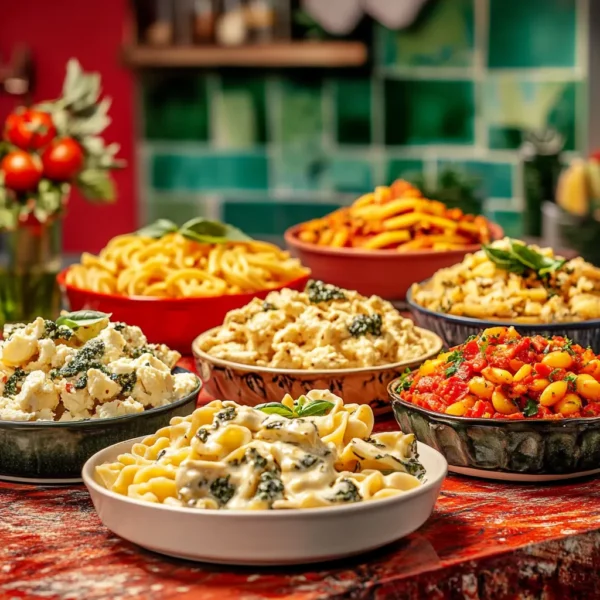
Exploring Cheap Eats Beyond burgers

While burgers are popular, many other fast food options can be affordable. Tacos, sandwiches, and salads often feature discounts as well. Expanding your menu choices can lead to delicious discoveries without overspending. Explore local fast food chains for unique offerings at great prices. Embracing variety can keep your dining experiences fresh and exciting.

Common Mistakes when making JR Bacon Cheeseburgers

Skipping the Fresh Ingredients

One of the most common mistakes is using low-quality or old ingredients. Freshness directly affects flavor, texture, and overall satisfaction. Opting for fresh produce elevates your dishes significantly. Always check the expiration dates on meats and dairy. Prioritizing quality ensures a delicious meal every time.

Overcomplicating the Recipe of JR Bacon Cheeseburgers

Many home cooks make the mistake of overcomplicating their recipes. Simple meals often yield the best flavors and experiences. Adding too many ingredients can confuse the palate. Stick to a few high-quality components for maximum impact. Embrace simplicity to create delicious and satisfying dishes.

Ignoring Cooking Times

Another frequent error is not paying attention to cooking times. Under or overcooking can ruin the texture of your meal. Using a thermometer helps ensure meats are perfectly cooked. Following recommended cooking times leads to better results. Invest in timers for precise cooking and better meals.

Not Tasting While Cooking the JR Bacon Cheeseburgers

Failing to taste your food during preparation is a common misstep. Tasting allows adjustments to be made for seasoning and flavor. Noting when ingredients need more salt or acidity is essential. Trust your palate to guide adjustments throughout the cooking process. Taste-testing leads to better-balanced and flavorful dishes.

Neglecting Proper Storage

Lastly, neglecting proper storage can lead to wasted food and money. Understanding how to store ingredients and leftovers prevents spoilage. Using airtight containers helps maintain freshness and quality. Labeling items with dates ensures timely consumption. Proper storage practices maximize the longevity of your ingredients.

A graphic showing common cooking mistakes, including spoiled ingredients, overcomplicated recipes, and improper storage methods.

Discover the exciting 1-cent deal on the JR Bacon Cheeseburger !

Chef’s Note

Cooking is both an art and a science, and it’s perfectly normal to make mistakes along the way. Remember, every chef, whether novice or expert, has faced challenges in the kitchen. The key is to learn from these experiences and refine your techniques.

Always prioritize quality ingredients—freshness is paramount for flavor. Don’t be afraid to keep your dishes simple; sometimes less is more. Get into the habit of tasting your food as you cook; it’s the best way to ensure balanced flavors. And finally, embrace the importance of proper storage to avoid wasting your hard-earned ingredients.

Cooking should be enjoyable, so don’t get discouraged by missteps. With practice and patience, you will develop confidence and improve your skills over time. Happy cooking !

By: Gastronome Recipes, January 29, 2025

Heavenly Cream Cheese Pasta : Your New Dinner Staple

A cozy kitchen scene featuring a rich bowl of creamy pasta, highlighted with garnishes, showcasing the inviting nature of homemade comfort food.

Discover why cream cheese pasta is the ultimate comfort dish and how to make it at home.

The Comfort of Cream Cheese Pasta

Cream cheese pasta is a delightful dish that brings comfort and warmth to any meal. This rich and creamy recipe combines pasta with luscious cream cheese for a delectable experience. Ideal for busy weeknights or elegant gatherings, it’s a versatile option that appeals to all tastes. Featuring simple ingredients, it’s an easy dish to prepare, allowing everyone to enjoy gourmet flavors without hassle.

Why You Should Try This Recipe

This pasta recipe is perfect for those seeking comfort food that’s also satisfying. The creamy texture of the cream cheese melds beautifully with al dente pasta. It serves as a blank canvas for various additional ingredients, allowing for creativity in the kitchen. Not only is this dish delicious, but it is also quick to prepare, making it ideal for those with busy schedules. Trying this recipe will delight your taste buds and impress your guests.

Elevate Your Culinary Skills

Making thie recipe allows you to explore culinary skills with simple yet effective techniques. From sautéing vegetables to perfecting a creamy sauce, each step enhances your cooking repertoire. The dish exemplifies how easy it can be to create restaurant-quality meals at home. Embracing this recipe invites experimentation with flavors and textures, paving the way for your culinary journey.

What is Cream Cheese Pasta ?

Defining Cream Cheese Pasta

Cream cheese pasta is a rich and creamy dish that incorporates cream cheese as a key ingredient. This delightful meal combines pasta with a velvety sauce made from softened cream cheese, ensuring each bite is indulgent. Typically served with various flavors, it can be tailored to suit personal preferences. Whether you enjoy classic flavors or prefer something unique, cream cheese pasta is a versatile option that satisfies diverse tastes.

The Appeal of Creamy Texture

One of the main attractions of cream cheese pasta is its luxurious, creamy texture. The cream cheese melts seamlessly into the warm pasta, creating a luscious, cohesive dish. This creaminess complements a range of pasta shapes, from fettuccine to penne, making it suitable for various culinary styles. The smooth consistency elevates the dish, transforming simple pasta into a gourmet experience that’s easy to prepare.

Popular Variations and Flavor Profiles

Cream cheese pasta offers endless possibilities for variations and flavor profiles. You can easily customize this dish by adding vegetables like spinach, mushrooms, or roasted red peppers. Incorporating proteins such as chicken, shrimp, or chickpeas introduces heartiness while enhancing the overall flavor. Additionally, spices and herbs like garlic, fresh basil, or black pepper can amplify taste. These variations create a unique dining experience every time.

Why It’s a Perfect Dinner Choice

Cream cheese pasta is ideal for dinners due to its ease of preparation and comforting flavors. This dish is quick to make, often requiring minimal cooking time for busy weeknight meals. It pairs beautifully with salads, garlic bread, or your favorite side dishes. The rich flavor profile and satisfying nature of cream cheese pasta make it a favorite among families and guests alike.

For an easy and quick recipe, check out this 10-Minute Cream Cheese Pasta that you can whip up in no time !

A delectable bowl of creamy pasta made with cream cheese, garnished with fresh herbs and presented in a cozy kitchen setting.

Discover why cream cheese pasta is the ultimate comfort dish and how to make it at home.

Essential Components for Cream Cheese Pasta

Key Ingredients for Flavor Excellence

To create a delicious cream cheese pasta dish, choosing the right ingredients is essential. Cream cheese serves as the base, providing a rich and creamy texture. Pasta varieties like fettuccine, penne, or spaghetti are ideal for holding the sauce, making each bite satisfying. Incorporating additional ingredients such as garlic, onion, or fresh herbs enhances the overall flavor profile, resulting in a delightful culinary experience. High-quality ingredients elevate the dish and guarantee delicious results every time.

Nutritional Elements to Consider

Including nutritious elements in your cream cheese pasta enhances its overall health benefits. Fresh vegetables like spinach, bell peppers, or broccoli add essential vitamins and fiber. Using whole grain or gluten-free pasta can cater to dietary preferences while maintaining nutritional value. Additionally, lean proteins like chicken or shrimp can be incorporated for added sustenance. Balancing flavors with nutritious choices makes your pasta dish not only tasty but also satisfying and wholesome.

Flavor Enhancements for Variety

Experimenting with various flavor enhancements can keep your recipe exciting. Adding spices like red pepper flakes, black pepper, or nutmeg can elevate the dish to new heights. Consider incorporating sun-dried tomatoes or olives for depth and richness. You can also create a creamy sauce by mixing in vegetable broth or coconut cream, depending on personal preferences. Discovering different flavor combinations ensures that you enjoy a new version of your favorite dish each time you prepare it.

IngredientsPurposeFlavor Suggestions
Cream CheeseProvides the base for a creamy texture.Use whipped cream cheese for ease of mixing.
Pasta VarietiesBase of the dish, holds the sauce.Fettuccine or penne for varied textures.
GarlicEnhances flavor with aromatic richness.Use roasted garlic for added sweetness.
Fresh HerbsAdds brightness and an aromatic touch.Basil or parsley to elevate the dish.
VegetablesIntroduces nutrients and color.Spinach, mushrooms, or cherry tomatoes.
A beautifully arranged selection of ingredients for cream cheese pasta, including cream cheese, fresh vegetables, and herbs, emphasizing quality and flavor.

Discover why cream cheese pasta is the ultimate comfort dish and how to make it at home.

Easy Steps to Prepare Cream Cheese Pasta

Gathering Your Ingredients

Before starting your cream cheese pasta, gather all essential ingredients for cooking success. High-quality pasta varieties, cream cheese, and fresh vegetables are vital for flavor. Ensure that you have garlic, herbs, and seasonings ready to enhance the dish further. Proper preparation allows for a smooth cooking experience, making the process enjoyable and efficient.

Cooking the Pasta Perfectly

To achieve the best results, cook your pasta according to package instructions for al dente texture. Bring a large pot of salted water to a boil before adding the pasta. Stir occasionally to prevent sticking and ensure even cooking. Once cooked, drain and reserve some pasta water for later use to achieve the perfect sauce consistency. This step ensures that your pasta has texture and flavor.

Preparing the Creamy Sauce

Making the sauce is a key step in achieving creamy goodness in your dish. In a large skillet, melt butter or heat olive oil over medium heat. Add minced garlic and sauté until fragrant, ensuring not to burn. Gradually add cream cheese to the skillet, stirring until melted and smooth. Incorporate a splash of the reserved pasta water for creaminess, creating a luxurious sauce that perfectly coats the pasta.

Combining and Serving

Once your sauce is ready, add the cooked pasta to the skillet, mixing everything thoroughly. This allows the sauce to cling to each noodle, enhancing flavor and texture. If desired, add cooked vegetables to the mix for added nutrition and flavor. Serve immediately while hot, garnishing with fresh herbs or grated cheese as a delightful finishing touch.

A step-by-step visual guide showing a bowl of creamy pasta being prepared, with fresh ingredients and cooking utensils beautifully arranged.

Discover why cream cheese pasta is the ultimate comfort dish and how to make it at home.

Variations of Cream Cheese Pasta

Creamy Garlic and Spinach Pasta

One delightful variation of cream cheese pasta incorporates fresh spinach and garlic. Sautéing garlic in olive oil enhances flavor while adding a rich aroma. The addition of spinach contributes vibrant color and nutritional value. This combination creates a wonderful balance of flavors that complements the creamy sauce. Enjoying this variation offers a nutritious and satisfying meal that showcases seasonal ingredients.

Sun-Dried Tomato and Basil Twist

A sun-dried tomato and basil variation adds a burst of flavor to cream cheese pasta. The tangy sweetness of sun-dried tomatoes pairs excellently with the creamy texture. Adding fresh basil not only enhances taste but also introduces aromatic elements. This vibrant combination creates a delightful Italian-inspired dish. Experimenting with this variation brings a fresh perspective to your pasta experience.

Mushroom and Thyme Delight

For mushroom lovers, incorporating sautéed mushrooms and thyme into cream cheese pasta is irresistible. The earthy flavors of Baby Bella mushrooms add depth and complexity to the dish. Fresh thyme enhances the overall aroma, making it comforting and delicious. This variation pairs wonderfully with a light salad for a complete meal. It’s perfect for cozy dinners or casual gatherings with friends.

Spicy Chipotle Cream Pasta

If you enjoy a kick of heat, try a spicy chipotle cream pasta variation. Adding chipotle peppers in adobo sauce introduces smokiness and bold flavors. The creamy texture of the sauce balances the spice beautifully, creating a satisfying dish. Consider topping with green onions or fresh cilantro to elevate the presentation and flavor. This variation is for those who crave a little extra spice in their meals.

Nut-Free Option for Cream Cheese Pasta

For a nut-free variation, consider using seeds instead of nuts or further enhancing the creamy base. Sunflower seeds blended into the sauce can create a rich texture without allergens. Adding additional veggies, like carrots or zucchini, also maintains flavor while keeping it light and healthy. This option is perfect for gatherings with various dietary needs, ensuring everyone can enjoy delicious cream cheese pasta.

Common Mistakes to Avoid When Making Cream Cheese Pasta

Overcooking the Pasta

One of the most frequent mistakes is overcooking the pasta. Overcooked pasta becomes mushy, losing its desired texture. Always follow package instructions for cooking times for best results. Aim for al dente, which means slightly firm. This texture allows the pasta to hold sauces beautifully, enhancing the whole experience. Monitoring cooking time prevents disappointment in your creamy dish.

Using Cold Ingredients

Using cold ingredients can lead to undesirable results in your cream cheese pasta. Cold cream cheese does not mix well with warm pasta, resulting in lumps. To achieve a smooth sauce, use room temperature cream cheese. Allowing it to soften promotes better blending, ensuring a creamy, luxurious consistency. This small detail can make a significant difference in the final dish.

Neglecting Seasoning

Many home cooks overlook the importance of seasoning their dishes properly. Cream cheese can be bland on its own, so adjusting seasoning ensures rich flavor. Always taste your dish as you prepare it; this lets you identify whether it needs more salt or spices. Experiment with garlic powder, black pepper, or herbs to enhance the overall profile. Proper seasoning adds depth and enhances the enjoyment of the pasta.

Skipping the Taste Test

Skipping a taste test during preparation can lead to an unbalanced dish. Take the time to sample the creamy sauce before serving. This step helps you evaluate flavor and consistency, allowing adjustments for sweetness or saltiness. By tasting throughout the cooking process, you gain control over the final outcome of your dish. Enjoying the cooking journey is as important as the result.

Rushing the Cooking Process

Rushing through the cooking process often leads to poor texture or flavor. Taking your time allows for proper caramelization of onions or the rich melting of cream cheese. Avoid cutting corners, as a leisurely pace yields better results, enhancing both flavors and satisfaction. Enjoying the process encourages experimentation, leading to culinary discoveries that make cooking enjoyable.

An array of enticing cream cheese pasta variations displayed in elegant bowls, including vibrant spinach pasta and spicy chipotle cream pasta.

Discover why cream cheese pasta is the ultimate comfort dish and how to make it at home.

Chef’s Note

When making cream cheese pasta, the key to achieving an exceptional dish lies in preparation and ingredient quality. Start with high-quality pasta; shapes like fettuccine or penne work particularly well for holding rich sauces. For the cream cheese, choose a full-fat version to ensure creaminess and flavor. Always allow the cream cheese to come to room temperature before incorporating it into your dish, as this will prevent lumps and create a smooth texture.

Sautéing aromatics, such as garlic or onion, before adding other ingredients enhances overall flavor depth. Don’t rush this step—allowing the aromatics to develop properly will elevate your dish. Maintaining balance in seasoning is crucial; tasting as you go helps you adjust flavors for the perfect outcome. Consider using fresh herbs like basil or parsley for a burst of color and taste.

Experimentation is encouraged! Adding vegetables like spinach or mushrooms can introduce various nutrients and flavors that complement the creamy texture beautifully. Finally, don’t hesitate to drizzle a little olive oil or sprinkle some cheese on top before serving to enhance visual appeal and flavor. Enjoy the process and have fun creating a delightful pasta dish that everyone will love! Happy cooking !

By: Gastronome Recipes, January 28, 2025

Baby Bella Mushroom Recipes : Simple, Savory, and Enjoyable

A vibrant kitchen counter featuring a basket of fresh Baby Bella mushrooms alongside various cutting ingredients, emphasizing their culinary versatility.

Explore the delicious flavors and nutritional benefits of Baby Bella mushrooms in your cooking.

Discovering Baby Bella Mushroom recipes

Baby Bella mushroom recipes, also known as cremini mushrooms, are a delicious addition to any dish. Their rich flavor and meaty texture make them incredibly versatile in the kitchen. These mushrooms can elevate both simple meals and gourmet recipes, appealing to a wide range of palates. Their earthy taste enhances flavors significantly, making them a favored choice in many cuisines.

Why You Should Love Baby Bella Mushrooms

Incorporating Baby Bella mushroom recipes into your meals adds not just flavor, but also numerous nutritional benefits. These mushrooms are low in calories while providing essential vitamins and minerals, including B vitamins, selenium, and potassium. They contribute valuable antioxidants to your diet, supporting overall health. For those seeking plant-based options, Baby Bella mushrooms serve as a fantastic substitute for meat in various dishes, promoting healthy eating.

Exploring Culinary Applications

From stir-fries to soups and pastas, Baby Bella mushrooms shine in diverse culinary applications. Their ability to absorb flavors allows them to complement various ingredients beautifully, making them suitable for a wide array of recipes. Whether you’re preparing a rich pasta sauce or a flavorful risotto, Baby Bella mushrooms bring a delightful taste to the table. By using these mushrooms, you can create satisfying meals that please any crowd.

What Are Baby Bella Mushroomsv?

Introduction to Baby Bella Mushroom recipes

Baby Bella mushrooms, also known as cremini mushrooms, are a popular variety with a rich, earthy flavor. They are the immature form of portobello mushrooms, making them versatile in various dishes. The tender texture and robust taste of Baby Bellas make them a favorite among chefs and home cooks alike. These mushrooms are commonly used in cooking, salads, and more, adding depth and character to meals.

Nutritional Profile of Baby Bella Mushroom recipes

Baby Bella mushrooms are not only delicious but also packed with nutrients. They are a good source of B vitamins, especially B2 and B3, which support energy metabolism. Additionally, they contain important minerals like selenium and potassium that contribute to overall health. With low calories and high fiber content, Baby Bellas offer a nutritious choice for various diets. Including these mushrooms in recipes adds both flavor and health benefits to your meals.

Culinary Uses of Baby Bella Mushroom recipes

The culinary uses of Baby Bella mushrooms are diverse and exciting. They can be sautéed, roasted, or grilled, making them suitable for various cooking methods. Baby Bellas work well in soups, stews, and pasta dishes, enhancing flavors with their rich taste. Their ability to absorb sauces makes them a fantastic addition to stir-fries and casseroles. The versatility of these mushrooms means they can shine in both simple and gourmet cuisine.

Choosing and Storing Baby Bella Mushroom recipes

When selecting Baby Bella mushrooms, look for firm, unblemished specimens with a smooth surface. Avoid mushrooms that appear slimy or have dark spots. Proper storage is key to maintaining freshness; keep them in a paper bag in the refrigerator. Consuming Baby Bella mushrooms within a week ensures optimal freshness and flavor. Following these tips helps you make the most of this delectable ingredient.

For more delicious ideas and recipes featuring baby bella mushrooms, check out this Baby Bella Mushroom guide.

A close-up image of fresh Baby Bella mushrooms on a rustic wooden table, highlighting their rich color and texture, ready for culinary use.

Explore the delicious flavors and nutritional benefits of Baby Bella mushrooms in your cooking.

Essential Components for Cooking with Baby Bella Mushroom recipes

Key Ingredients for Flavorful Dishes

When cooking with Baby Bella mushrooms, the right ingredients are essential for achieving maximum flavor. Fresh, high-quality Baby Bella mushrooms contribute a rich, earthy taste to dishes. Additionally, aromatic ingredients such as garlic and onions enhance the overall profile. Accompanying herbs and spices, like thyme or rosemary, bring out the mushrooms’ natural flavors. Understanding key ingredients allows you to create a delightful and robust meal.

Cooking Techniques for Best Results

Using the right cooking techniques can elevate your dishes with Baby Bella mushrooms. Sautéing is a popular method that highlights their texture while enhancing the earthy flavor. Roasting Baby Bellas intensifies sweetness and adds caramelization, creating a delightful contrast. Grilling brings out a smoky flavor, perfect for summer dishes. Mastering these techniques ensures that Baby Bella mushrooms shine in every recipe.

Pairing Ingredients with Baby Bella

To create balanced and flavorful dishes, consider pairing ingredients wisely. Baby Bella mushrooms complement proteins such as chicken, beef, or tofu beautifully. They also work well with hearty grains like rice or quinoa. Fresh vegetables, including spinach and bell peppers, add color and nutrition. This combination of ingredients creates satisfying meals that please any palate.

Creating Unique Flavors with Sauces

Crafting delicious sauces can take your Baby Bella mushroom dishes to the next level. Consider making a creamy garlic sauce to drizzle over pasta for added richness. A tangy balsamic reduction pairs well with sautéed mushrooms, enhancing their flavor. Experimenting with sauces allows you to enhance the overall dish while keeping it exciting. Don’t hesitate to try different combinations that highlight the mushrooms beautifully.

Meal Prep for Convenience

Incorporating Baby Bella mushrooms into meal prep can save time during busy weeks. Pre-slice and store mushrooms in an airtight container in the refrigerator for quick access. Cook a large batch of assorted dishes, then portion them for easy reheating. Having prepared meals ready to go enhances convenience and ensures you always enjoy flavorful dishes during the week. Embrace meal prep to make cooking with Baby Bella mushrooms effortless !

IngredientsPurposeFlavor Suggestions
Baby Bella MushroomsAdds rich, earthy flavor to dishes.Sauté with garlic and thyme for depth.
GarlicEnhances overall aroma and flavor.Roast for sweetness or sauté for warmth.
OnionProvides sweetness and a savory base.Caramelize for added depth of flavor.
Fresh HerbsBrightens dishes and adds freshness.Use parsley or basil for vibrant flavor.
Olive OilEssential for cooking and enhancing taste.Use extra virgin for the best flavor.
An engaging setup featuring key ingredients for cooking with Baby Bella mushrooms, including fresh mushrooms, garlic, herbs, and olive oil, beautifully arranged on a rustic kitchen counter.

Explore the delicious flavors and nutritional benefits of Baby Bella mushrooms in your cooking.

Easy and Delicious Baby Bella Mushroom Recipes

Savory Sautéed Baby Bella Mushroom recipes

Sautéed Baby Bella mushrooms make a quick and tasty side dish. Begin by heating oil in a skillet over medium heat. Add sliced Baby Bella mushrooms and cook until golden brown. The earthy flavor of the mushrooms intensifies when sautéed. Incorporate minced garlic and fresh herbs for added richness. This simple preparation complements nearly any main dish, elevating your meal effortlessly.

Creamy Baby Bella Mushroom Risotto

Creamy Baby Bella mushroom risotto is a luxurious and satisfying dish. Start by cooking Arborio rice slowly in broth, adding sautéed mushrooms for flavor. Stir in heavy cream and Parmesan cheese for a decadent texture. The combination of creamy risotto and savory mushrooms creates a comforting meal. This dish is perfect for any occasion, showcasing the versatility of Baby Bella mushrooms beautifully.

Stuffed Baby Bella Mushroom recipes

Stuffed Baby Bella mushrooms are a delightful appetizer that impresses guests. Begin with large Baby Bella mushrooms, removing the stems. Create a savory filling with cream cheese, herbs, and breadcrumbs. Stuff each mushroom cap generously, then bake until golden. These bite-sized treats pack flavor and showcase the beautiful presentation of mushrooms. Serve warm as an appetizer or side dish.

Baby Bella Mushroom Tacos

Baby Bella mushroom tacos are a delicious vegetarian option. Sauté sliced mushrooms with spices, bell peppers, and onions to create a hearty filling. Serve the mixture in soft tortillas with fresh toppings like avocado or salsa. The combination of textures and flavors makes these tacos comforting and satisfying. Perfect for dinner or a quick lunch, they are sure to please everyone !

Creative Serving Suggestions baby bella Mushroom recipes

Elevating Presentation with Style

Creating an inviting presentation can elevate the dining experience significantly. Use colorful plates or rustic cutting boards to enhance visual appeal. Arrange Baby Bella mushroom dishes artistically, allowing vibrant ingredients to shine. Garnishing with fresh herbs adds a pop of color and freshness. Incorporating textures, like crunchy nuts or crispy bread, engages the senses and makes your meal visually enticing.

Pairing with Complementary Dishes

Pairing Baby Bella mushroom dishes with complementary items enhances the overall meal. Consider serving sautéed mushrooms alongside grilled meats or roasted vegetables. A side of creamy polenta or risotto can further enrich flavor profiles. For lighter meals, fresh salads with citrus vinaigrette provide balancing flavors. Thoughtful pairings create harmony in every bite, making mealtimes more enjoyable.

Themed Dinners and Events

Hosting themed dinners can be a fun way to enjoy Baby Bella mushrooms. Create an Italian-inspired evening featuring mushroom risotto, bruschetta, and a delicious wine pairing. Alternatively, an Asian-themed night could include stir-fried Baby Bellas with noodles and sweet soy sauce. Themed events allow you to showcase flavorful dishes in a festive atmosphere, making for memorable culinary experiences.

Interactive Dining Experiences

Interactive dining experiences invite guests to engage with the meal preparation. Consider setting up a build-your-own taco bar with Baby Bella mushrooms as a key ingredient. Guests can personalize their tacos with various toppings and salsas. Alternatively, a fondue night with melted cheese and sautéed mushrooms creates a fun and engaging atmosphere. This approach encourages participation and enhances enjoyment !

beautifully arranged table showcasing various dishes featuring Baby Bella mushrooms, with vibrant herbs, cheeses, and colorful accompaniments enhancing presentation.

Explore the delicious flavors and nutritional benefits of Baby Bella mushrooms in your cooking.

Common Mistakes to Avoid When Cooking baby bella Mushroom recipes

Overcrowding the Pan

One of the most frequent mistakes when cooking mushrooms is overcrowding the pan. When too many mushrooms are added at once, they steam instead of sauté. This steaming results in soggy, unappetizing mushrooms, losing their natural texture. To avoid this issue, cook in batches to achieve that perfect golden brown result. An even layer allows for proper caramelization, enhancing flavors and presentation.

Not Prepping Mushrooms Correctly

Failing to prep mushrooms correctly can diminish their flavor and quality. Always clean them gently to remove dirt without excess water. Avoid soaking them, as mushrooms absorb moisture, leading to unwanted texture changes. Instead, use a damp cloth or soft brush for cleaning. Properly prepared mushrooms ensure optimal taste and prevent any undesired water content.

Ignoring the Cooking Temperature

Ignoring cooking temperature can lead to poorly cooked mushrooms. Cooking on low heat may result in rubbery or chewy texture, while high heat can cause burning. Use medium to high heat for sautéing, allowing moisture to evaporate while enhancing flavor development. Achieving the right temperature is essential for creating delicious, golden, sautéed mushrooms. Monitor closely to ensure the best results.

Skipping the Seasoning

Many cooks overlook the importance of seasoning mushrooms during cooking. Skipping this step can lead to bland mushrooms that lack depth. Season with salt and pepper to enhance the natural flavors. Adding herbs or spices, such as thyme or garlic, can elevate the taste even further. Properly seasoning mushrooms enhances their overall role in the dish, making them more enjoyable.

Rushing the Cooking Process

Rushing through the cooking process often results in undercooked or improperly flavored mushrooms. Take your time and let them brown slowly for enhanced flavor. Allowing the mushrooms to release their moisture before adding other ingredients is crucial. Patience in cooking results in perfectly tender and flavorful mushrooms, ensuring a satisfying dish every time.

Chef’s Note

When cooking mushrooms, attention to detail can significantly enhance the outcome of your dish. Start with fresh, high-quality mushrooms; their flavor can greatly impact your meals. Baby Bella, shiitake, and portobello are excellent choices that provide rich taste profiles.

Always clean your mushrooms properly. Use a damp cloth or brush to remove dirt, avoiding excess water to prevent sogginess. Remember that mushrooms absorb moisture, so the right cleaning technique is essential for achieving a desirable texture.

The cooking temperature is critical; sauté mushrooms over medium to high heat to achieve that golden-brown caramelization. Avoid overcrowding the pan, as this can cause steaming rather than sautéing, resulting in texture loss. Cook in batches instead to allow each piece to develop its unique flavor.

Don’t forget to season! Mushrooms thrive on seasoning. Adding salt early in the cooking process allows them to absorb the flavors, enhancing their natural taste. Experimenting with herbs like thyme or spices such as smoked paprika can create exciting variations that surprise your palate.

Lastly, take your time with the cooking process. Rushing can lead to rubbery or improperly cooked mushrooms. Enjoy the art of cooking and feel free to explore different mushroom varieties and recipes. Each experience will build your confidence in the kitchen and help you create delicious meals everyone will love. Happy cooking !

By: Gastronome Recipes, January 28, 2025

Korean BBQ Brisket Recipe : Your Guide to Tender Perfection

A beautifully grilled Korean BBQ brisket served on a platter with sides

Dive into the world of Korean BBQ brisket, where flavor meets tradition

What Makes Korean BBQ Brisket Unique?

Korean BBQ brisket stands out with its rich flavors and unique marinades. This dish is deeply rooted in Korean culture, offering both tradition and innovation. The process involves various techniques that enhance meat tenderness and taste. Characteristics such as marbling and preparation methods contribute to this experience. It’s no wonder Korean BBQ remains a favorite worldwide !

The Allure of Grilling Your Own Brisket

Embracing the art of grilling brisket at home allows for personalization. You can experiment with marinades and cooking styles that suit your tastes. The interactive cooking experience brings friends and family together. Plus, nothing beats the smoky aroma filling your backyard. Grilling creates lasting memories that elevate any dining occasion.

Discover the Perfect Recipe for Success

The foundation of mastering Korean BBQ brisket lies in following a proven recipe. Combining traditional ingredients creates an irresistible taste experience. Adequate marination time ensures flavors penetrate the meat. Additionally, precise grilling techniques yield that desirable tenderness. Your journey to culinary excellence starts with understanding the steps involved.

What is Korean BBQ Brisket ?

Understanding the Essence of Korean BBQ

Korean BBQ brisket is a beloved dish within Korean cuisine. This dish primarily focuses on high-quality cuts of beef brisket. The meat is marinated in flavorful sauces that enhance its tender texture. Popular marinades often include gochujang and soy sauce. This savory flavor makes Korean BBQ brisket a must-try dish.

The Cut That Makes a Difference

The brisket cut used in Korean BBQ comes from the chest area of the cow. This cut is recognized for its rich marbling and juiciness. When prepared correctly, it provides a mouthwatering experience. The marbling keeps the brisket moist during cooking. As a result, this cooking method enhances overall taste and satisfaction.

Techniques for Cooking Brisket

Cooking Korean BBQ brisket can be achieved through various techniques. Grilling is the most popular method, often done on charcoal or gas grills. Slow cooking allows the brisket to develop deeper flavors over time. Marinating the brisket provides extra tenderness and flavor. Each technique brings out the unique qualities of this iconic dish.

Traditional Marinades for Flavor Enhancement

The key to delicious Korean BBQ brisket lies in the marinade. Common ingredients include sesame oil, garlic, and sugar. Each ingredient plays a crucial role in flavoring the meat. A proper marinade penetrates the meat, ensuring sublime taste and tenderness. This step is vital in elevating your cooking experience.

The Experience of Korean BBQ Dining

Korean BBQ is not just about the food but the overall dining experience. Diners often gather around a grill, cooking together. This interactive approach fosters a sense of community and connection. Enjoying brisket with side dishes like kimchi adds to the cultural experience. Sharing food creates lasting memories among friends and family.

Why It’s a Global Favorite

Korean BBQ brisket has gained immense popularity worldwide. Its unique flavors and enjoyable cooking style attract food lovers. Many restaurants offer authentic Korean BBQ experiences. This dish adapts easily to various tastes and preferences. Because of its flexibility, it continues to delight palates globally.

For a detailed guide on making the perfect Korean BBQ brisket, check out this Korean BBQ Brisket Recipe for expert tips and techniques !

A close-up of Korean recipe being grilled with rich marbling visible

Dive into the world of Korean BBQ brisket, where flavor meets tradition

Key Ingredients for Perfect Korean BBQ Brisket

Essential Marinades for Flavor

Marinades are crucial for enhancing Korean BBQ brisket. A mixture of gochujang, soy sauce, and sesame oil creates a rich flavor. Garlic and ginger add depth and aromatic qualities to the marinade. These ingredients together tenderize the meat while imparting delicious flavors. Proper marination time ensures that every bite is bursting with taste.

The Importance of Quality Brisket

Choosing the right brisket cut is vital for optimal results. Look for well-marbled brisket, which promises juiciness and flavor. Select cuts from reputable butchers to ensure freshness. The thickness of the slice affects cooking time and tenderness. Understanding cuts like point and flat can elevate your BBQ experience.

Flavor Enhancers: Seasonings and Spices

Besides the marinade, seasonings and spices add layers of flavor to brisket. Traditional spices like black pepper and sea salt enhance the meat’s natural taste. Adding Korean spices can provide unique local flair. Experimenting with additional spices offers customization to suit your palate. The right combination creates a mouthwatering dish.

Accompaniments That Elevate the Meal

Korean BBQ brisket is often served with specific accompaniments. Traditional side dishes like kimchi and pickled vegetables complement the rich meat. Korean rice serves as a hearty base, absorbing wonderful flavors. Ssam, or lettuce wraps, provide a refreshing contrast to the brisket. These accompaniments enhance the overall dining experience.

A beautiful spread of BBQ recipe brisket ingredients, including marinade, spices, and fresh produce.

Dive into the world of Korean BBQ brisket, where flavor meets tradition

Step-by-Step Korean BBQ Brisket Recipe

Preparing the Brisket: Trimming and Marinating

Start by selecting a high-quality brisket with good marbling. Trim excess fat from the brisket while leaving some for flavor. Prepare a marinade using gochujang, soy sauce, and sesame oil. Coat the brisket thoroughly with the marinade, ensuring even coverage. Let the brisket marinate for at least four hours, preferably overnight.

Grilling Techniques for Perfecting Flavor

Preheat your grill, ensuring it reaches the right temperature for cooking brisket. Charcoal grills add smoky flavors; gas grills offer convenience. Place the marinated brisket on the grill, monitoring the temperature closely. Grill each side for around 4-5 minutes for a perfect sear. Using indirect heat helps maintain tenderness during cooking.

Checking for Doneness: The Key to Perfection

To ensure the brisket is cooked perfectly, use a meat thermometer. Internal temperature should reach around 195°F for optimal tenderness. Consider resting the brisket for at least 15-20 minutes after cooking. This resting period allows juices to redistribute, enhancing flavor and texture. Slice the brisket against the grain for the best results.

Serving Suggestions: How to Enjoy

When serving Korean BBQ brisket, accompany it with traditional sides. Arrange brisket slices on a platter, alongside rice and kimchi. Provide fresh lettuce leaves for delicious ssam wraps. Offer dipping sauces like Ssamjang to enhance the overall experience. Enjoying brisket this way creates a delightful dining atmosphere.

A step-by-step visual guide to cooking a BBQ brisket, detailing preparation and grilling

Dive into the world of Korean BBQ brisket, where flavor meets tradition

Tips for Achieving Tender Perfection of Korean BBQ Brisket

Choosing the Right Brisket Cut

Selecting the right brisket cut is essential for achieving tenderness. Look for brisket with abundant marbling, as it enhances flavor. Cuts like the flat and point provide different textures. Opt for whole cuts instead of pre-sliced ones. Quality brisket plays a significant role in overall cooking success.

The Importance of Proper Marination

Marination is crucial for tenderizing brisket and infusing flavor. Use a mixture of gochujang, soy sauce, and sesame oil for optimal results. Allow the brisket to marinate for at least four hours. For deeper flavors, marinate it overnight in the refrigerator. This step significantly impacts the tenderness and taste of the cooked meat.

Cooking Low and Slow for Ultimate Tenderness

To achieve perfectly tender brisket, cook it low and slow. Use indirect heat on the grill, maintaining consistent temperatures around 225°F. Slow cooking breaks down tough connective tissues in the brisket. Patience is key; aim for cooking times of 6 to 8 hours. Low and slow techniques guarantee juicy, flavorful results.

Letting the Meat Rest Before Slicing

Resting the brisket is an essential step before slicing. Allow the cooked brisket to rest for at least 15-20 minutes. This resting time allows juices to redistribute within the meat. Slicing too soon can result in dry, tough brisket. Enjoy tender, flavorful slices by properly resting the meat first.

A beautifully cooked, tender BBQ brisket with juicy slices displayed on a plate

Dive into the world of Korean BBQ brisket, where flavor meets tradition

Enjoying Your Korean BBQ Brisket Experience

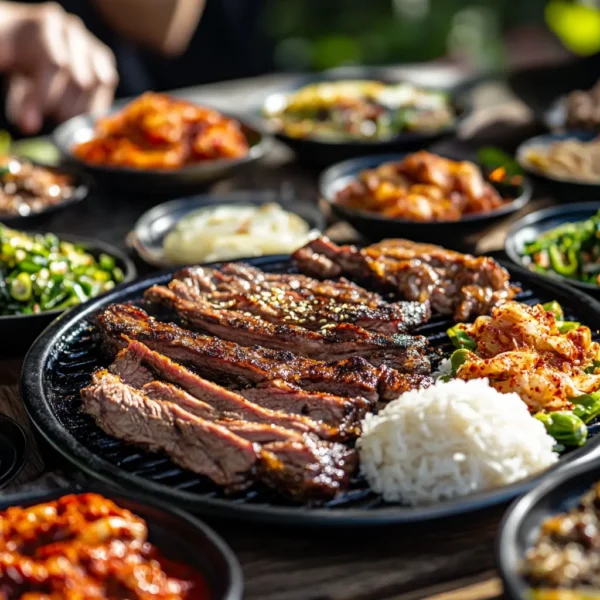
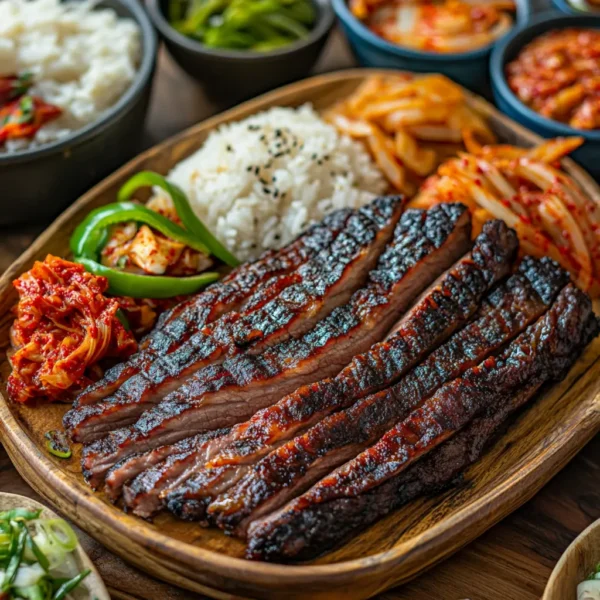
🔥 Setting the Scene for Korean BBQ Delights

To fully appreciate the Korean BBQ experience, create an inviting atmosphere. Set a table with traditional decor, such as vibrant tableware and Korean BBQ utensils. Enhance the mood with soft lighting, allowing guests to immerse themselves in delicious dishes. Warm colors, like reds and golds, emphasize the essence of Korean cuisine while igniting appetites.

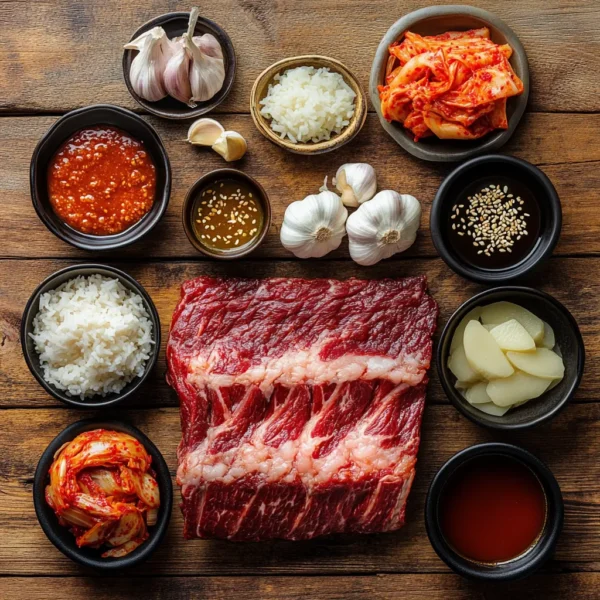
🥢 Essential Tools for Perfect Korean BBQ Brisket

Having the right tools is crucial for your Korean BBQ success. Invest in a high-quality grill, whether gas or charcoal, for perfectly tender brisket. Use grilling tongs and skewers for effortless cooking, ensuring food remains perfectly seasoned. Don’t forget essential accessories, such as meat thermometers to ensure your brisket reaches the ideal tenderness.

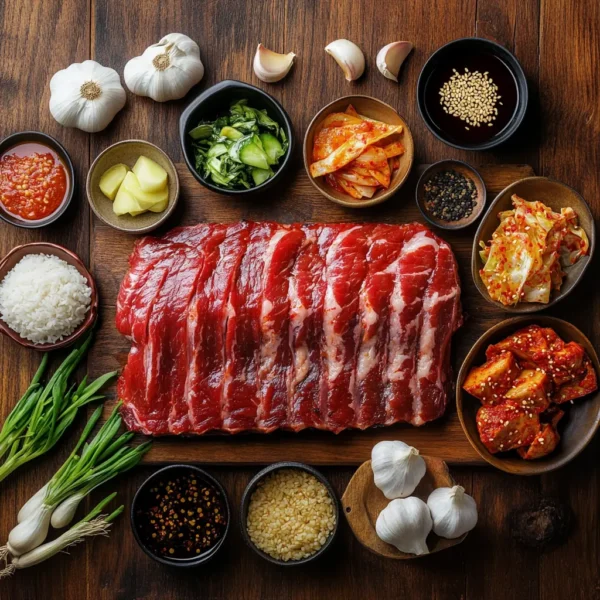
🍚 Complementing Dishes and Sides

Korean BBQ is incomplete without delicious complementary dishes. Offer savory options like kimchi, pickled veggies, or sweet marinated potatoes. Cook fragrant rice or fried rice to accompany each bite of tender brisket. Organizing a variety of side dishes enhances flavors and invites exciting culinary exploration, making your BBQ truly memorable.

🍶 Elevating Your Meal with Drinks

Completing your Korean BBQ experience involves choosing the right beverages. Explore exciting drink options like traditional soju or refreshing Korean beers to pair with your brisket. Serve sweetened green tea or homemade lemonade for non-alcoholic alternatives. The perfect drink can elevate your meal, bringing out the flavors of your carefully prepared dishes.

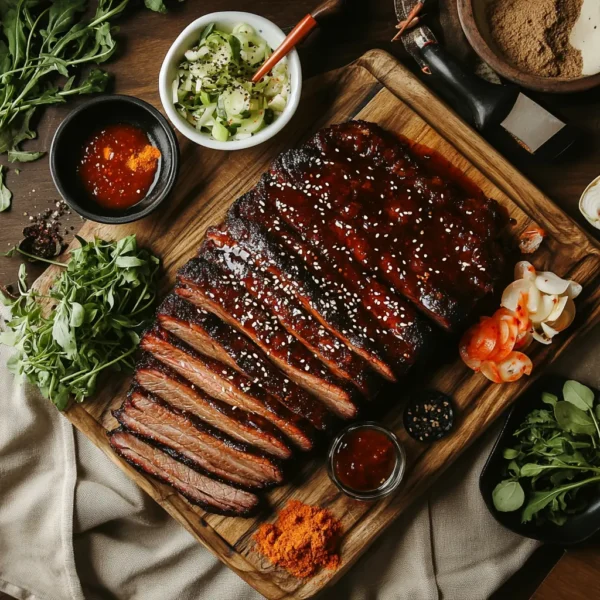
🎉 Creating Lasting Memories

Ultimately, the joy of Korean BBQ lies in creating lasting memories with loved ones. Share stories, laughter, and joy as you savor each delicious bite. Allow the communal nature of BBQ to blossom as guests participate in grilling and dining. This immersive experience ensures everyone leaves feeling satisfied and connected.

Chef’s Note

As you embark on your journey to master the art of Korean BBQ brisket, remember that patience is key. Allow your marinated brisket to rest for a good amount of time; this helps infuse flavors deeply into the meat. A longer marination time—ideally overnight—yields the most tender and flavorful results, letting the seasonings work their magic.

Utilize a meat thermometer to check for doneness, aiming for an internal temperature around 190°F for optimal tenderness. This is the sweet spot where the collagen in the brisket breaks down beautifully, making each bite melt in your mouth.

Feel free to experiment with the marinade by adding your unique twist! Try variations with different spices or even fruits like pear, which can enhance the sweetness and tenderness. This adaptability makes Korean BBQ brisket a versatile dish that can cater to various palates.

Lastly, remember that sharing this delightful experience with friends or family adds to its joy. Enjoy the grilling process, savor the aromas, and create a feast that celebrates Korean culinary traditions. Happy grilling !

By: Gastronome Recipes, January 26, 2025

Indulge in Sweetened Cheese : A Simple Recipe for Deliciousness

A bowl of creamy sweetened cheese topped with fresh fruit and nuts, accompanied by a spread of crackers on a wooden table.

Uncover the delicious world of sweetened cheese—perfect for enhancing your favorite dishes !

Sweetened Cheese is a delightful culinary creation that combines creamy textures with rich flavors. This versatile ingredient is perfect for both sweet and savory dishes, elevating your meals with its unique profile. Whether you’re spreading it on bagels or using it in desserts, Creamy cheese spread adds a special touch that everyone loves.

This blog post will guide you through the process of making sweetened cheese at home, highlighting the simplicity and satisfaction of creating your own ingredients. Not only is it an easy recipe, but it’s also a delightful treat that can impress family and friends. The blend of cream cheese, sugar, and optional flavorings provides a customizable experience with endless possibilities for use.

Discover the joy of making sweetened cheese in your kitchen, and learn how this simple yet flavorful recipe can enhance your culinary adventures. You’ll find that once you learn how to make sweetened cheese, it becomes a staple in your recipe repertoire !

What is Sweetened Cheese ?

Sweetened cheese is a delightful and creamy spread that is made by incorporating sugar into cheese, with cream cheese being the most common base. This culinary treat beautifully blends texture and sweetness, making it a versatile ingredient that can be used in countless recipes. It is commonly used across various desserts, snacks, and even breakfast dishes, providing a unique and delightful flavor. The balance of sweetness and creaminess opens the door to endless creativity in recipes, making sweetened cheese a beloved choice for many home cooks and chefs alike.

Flavor Profile of Sweetened Cheese

The flavor profile of sweetened cheese is not only rich and indulgent but also offers a luxurious creamy base that delightfully balances sweet undertones. By incorporating flavorings like vanilla extract, almond extract, or even fruit purees, sweetened cheese can cater to different palates and preferences. This combination greatly enhances the overall experience, making it an ideal and delightful topping for pastries, fresh fruit, or even enjoyed straight from the bowl as a sweet treat. Its versatility in flavors makes it suitable for a variety of culinary applications.

Culinary Uses of Sweetened Cheese

In the kitchen, sweetened cheese proves to be incredibly versatile. It can be transformed into a creamy filling for pastries, providing a decadent surprise inside various desserts. Additionally, it works wonderfully as a topping for pancakes, waffles, or oatmeal, adding sweetness and richness to breakfast dishes. It can even be used as a dip for fresh fruits, creating a delightful contrast of flavors and textures. This sweet spread elevates dessert recipes and adds a creamy element to savory dishes, making it an adaptable favorite in both home kitchens and professional bakeries. Its ability to blend seamlessly into various dishes makes sweetened cheese a cherished ingredient for culinary enthusiasts everywhere.

Tips for Making Sweetened Cheese

Consider Flavoring Variations: Don’t hesitate to experiment with different flavorings. Vanilla, almond, or even citrus zest can elevate the flavor profile significantly.

Start with Quality Ingredients: Use high-quality cream cheese for the best texture and flavor. This choice makes a noticeable difference in the final product.

Adjust Sweetness to Taste: Experiment with the amount of sugar based on your personal preference and the dish you’re making. A little taste test goes a long way !

For a delightful selection of sweet cheeses to enhance your recipes, explore a variety of sweet cheeses here !

A bowl of sweetened cheese topped with fresh fruit, surrounded by ingredients like sugar and vanilla extract, showcasing its versatility.

Uncover the delicious world of sweetened cheese—perfect for enhancing your favorite dishes !

Key Ingredients for Sweetened Cheese

1. Cream Cheese

The primary ingredient in sweetened cheese is cream cheese, which provides a rich, creamy texture that’s simply irresistible. This type of cheese acts as the foundation for the spread, ensuring it is smooth and easy to mix, making it a favorite for many recipes. Its mild flavor allows it to absorb other ingredients beautifully, enhancing the overall taste of your delicious creation. Always opt for high-quality cream cheese for the best results; it truly makes a difference. The creaminess of this ingredient is crucial for crafting delectable spreads that everyone will enjoy.

Granulated Sugar

Granulated sugar is essential for adding the perfect level of sweetness to the cream cheese. This ingredient significantly enhances the overall flavor, creating a delightful contrast to the cheese’s creamy texture. Adjusting the amount of sugar allows for customization based on your personal taste; too much sugar can overshadow the cheese. Remember, achieving the right balance is key, so use just the right amount of sugar to create a harmonious Flavored cheese.

Flavorings

Flavorings such as vanilla extract or other sweet extracts play a vital role in elevating the taste of sweetened cheese. These flavorings enrich the spread, making it more versatile for various applications, from desserts to snack pairings. Experimenting with different extracts can lead to unique combinations that delight your palate. Using flavorings effectively is essential for creating a memorable experience that keeps everyone coming back for more.

Optional Additions

Optional ingredients like fruit purées, chocolate, or nuts can elevate your sweetened cheese recipe to new heights. These additions provide exciting flavors and textures, enhancing the overall appeal of your creation. Consider integrating any of these ingredients to customize your spread according to your preferences. The versatility of Flavored cheese makes it easy to tailor to suit any occasion, ensuring that each serving is delicious and satisfying.

A collection of key ingredients for sweetened cheese: cream cheese, granulated sugar, vanilla extract, and optional fruit purées.

Uncover the delicious world of sweetened cheese—perfect for enhancing your favorite dishes !

Common Mistakes to Avoid

Avoiding common mistakes can ensure a successful and delicious outcome when making sweetened cheese. Here are key pitfalls to watch out for:

1. Using Low-Quality Cream Cheese

One of the most frequent mistakes is using low-quality cream cheese. This can lead to poor texture and flavor in your sweetened cheese. Always opt for high-quality products, as they provide a rich, creamy base that enhances the overall quality of your dish. The difference in taste will be noticeable and makes for a more delectable result.

2. Overmixing the Mixture

Another common mistake is overmixing the ingredients. Overmixing can cause the sweetened cheese mixture to become runny instead of maintaining a thick consistency. Mix until just combined to preserve its creamy texture. This careful approach ensures your recipe has the perfect spreadable quality, ideal for topping or filling.

3. Not Adjusting Sweetness

Failing to adjust the sugar to your taste can ruin the balance of flavors. Everyone has different preferences for sweetness, so don’t be afraid to experiment. Taste as you mix and add more sugar if necessary. Achieving the right level of sweetness is crucial for making delightful sweetened cheese that everyone will enjoy.

4. Ignoring Flavor Additions

Skipping optional flavorings can result in a bland product. Adding extracts like vanilla or almond can elevate your sweetened cheese to new heights. These enhancements make a substantial difference in taste, so be sure to include them in your mixture for a more complex flavor profile.

5. Forgetting to Chill the Mixture

Not chilling the mixture can affect the texture of your sweetened cheese. Chilling allows the flavors to meld and the cheese to firm up, making it easier to spread or serve. Always refrigerate your sweetened cheese before serving for the best results. This simple step ensures a delicious treat that everyone will love !

A visual representation of common mistakes to avoid when making sweetened cheese, highlighting low-quality ingredients, overmixed batter, and lack of flavorings.

Uncover the delicious world of sweetened cheese—perfect for enhancing your favorite dishes !

Chef’s Note

When making sweetened cheese, precision and quality are key to achieving delicious results. Start with high-quality cream cheese, as it is the foundation of this dish. A rich, creamy texture can significantly elevate the flavor, making a noticeable difference in the final product.

Be careful not to overmix your ingredients. Mixing just until combined ensures that your recipe has a delightful texture, perfect for spreading or filling. Taste your mixture before finalizing the sweetness; everyone has different preferences, and adjusting the sugar to match your palate is essential.

Feel free to experiment with flavorings! Adding a splash of vanilla extract or a hint of almond flavor can elevate your special recipe and add a personal touch. Don’t forget to chill the mixture for a while before serving. Chilling allows the flavors to blend beautifully and sets the consistency, making it easier to spread.

Enjoy the process of creating this versatile ingredient, whether you use it in desserts or as a dip. The joy in cooking comes from experimenting and sharing delightful creations with family and friends. Happy cooking !

By: Gastronome Recipes, January 25, 2025

Chocolate Lava Cake: How to Make the Perfect Molten Dessert

Chocolate lava cake with a molten center, garnished with powdered sugar and served with vanilla ice cream.

Discover the delicious world of chocolate lava cake, where rich chocolate meets molten perfection!

Chocolate lava cake is the ultimate indulgence for dessert lovers. This rich, molten chocolate dessert captivates with its warm, gooey center and velvety texture. Perfect for any occasion, this delectable treat impresses guests and satisfies even the strongest chocolate cravings.

Decadence in Every Bite

Each bite offers a burst of intense chocolate flavor that melts in your mouth. The contrast of warm molten cake and cold vanilla ice cream is truly irresistible and creates a memorable experience. Chocolate lava cake is an indulgent dessert that delights the senses and leaves everyone craving more.

The Perfect Dessert for Any Occasion

Whether it’s a romantic dinner, a festive celebration, or a family gathering, this dessert is crowd-pleasing and universally loved. Its elegant presentation makes it a showstopper at parties, weddings, and special events. Surprise your loved ones with this delightful treat that elevates any meal into something extraordinary.

Quick and Easy to Make chocolate lava cake

With just a few simple, high-quality ingredients, you can create magic in your kitchen. In under 30 minutes, enjoy homemade chocolate delight that rivals restaurant-quality desserts. The uncomplicated recipe guarantees delicious results every time, making it perfect for both novice and experienced bakers.

What is Chocolate Lava Cake?

Chocolate lava cake is a beloved dessert that features a warm, gooey center. This decadent treat combines the best of cake and molten chocolate. The contrast between the outer cake and the flowing chocolate interior is simply irresistible.

A Delicious Chocolate Creation

Originating from French cuisine, chocolate lava cake delights with its rich cocoa flavor. This dessert has become a favorite in restaurants worldwide. Its popularity stems from its satisfying texture and intense taste.

The Perfect Dessert Experience of chocolate lava cake

When you cut into a chocolate lava cake, a river of molten chocolate flows out. It’s a delightful surprise that keeps dessert lovers coming back for more. This sensory experience elevates any dining occasion.

Simple yet Elegant

Despite its gourmet appearance, lava cake is surprisingly easy to make. With just a handful of ingredients, anyone can recreate this masterpiece at home. It serves as an impressive dessert for dinner parties or celebrations.

For an amazing chocolate lava cake recipe that’s sure to impress, check out this delicious lava cake recipe!

Warm chocolate lava cake with molten center, garnished with powdered sugar and served with vanilla ice cream.

Discover the delicious world of chocolate lava cake, where rich chocolate meets molten perfection!

Key Ingredients for a Perfect Lava Cake

Creating the ultimate chocolate lava cake starts with using the right key ingredients. Each component is vital for achieving a luscious, molten texture and rich, indulgent flavor. Here’s a closer look at the essential ingredients that make this dessert truly decadent.

1. High-Quality Chocolate

Using high-quality chocolate is crucial for achieving a deep, rich flavor in your chocolate lava cake. Opt for semisweet or dark chocolate to enhance the overall taste and create that signature molten center. A good chocolate will melt smoothly, ensuring a luxurious texture. Avoid low-quality chocolate, as it may lead to a less satisfying and disappointing dessert experience.

2. Unsalted Butter

Unsalted butter is essential for adding richness to the cake, contributing to its creamy texture and decadent flavor. It helps achieve the perfect balance of richness without any extra saltiness. Using butter at room temperature ensures it blends smoothly with other ingredients, resulting in a luscious, cohesive batter that rises beautifully in the oven.

3. Fresh Eggs

Fresh eggs are a key ingredient for the structure and delightful texture of the lava cake. They help bind the ingredients together, providing necessary stability during baking. The egg proteins also play a crucial role in creating the characteristic gooey and molten center that makes chocolate lava cake so irresistible and indulgent.

4. All-Purpose Flour

All-purpose flour serves as the backbone of the chocolate lava cake, providing necessary structure while keeping it light and tender. Just the right amount ensures that the cake has a perfect crumb without being overly dense. Be sure to avoid overmixing the batter; this maintains the delicate texture that melts in your mouth, enhancing the overall dessert experience.

Each of these key ingredients plays a significant role in creating a decadent chocolate lava cake. By focusing on quality and precision, you can ensure that every bite delivers an unforgettable heavenly experience. Enjoy the perfect combination of flavors and textures with each delicious serving of this molten delight!

Ingredients for chocolate lava cake : semisweet chocolate, unsalted butter, fresh eggs, flour, and vanilla extract.

Discover the delicious world of chocolate lava cake, where rich chocolate meets molten perfection!

Tips for Perfecting Your Chocolate Lava Cake

Creating the perfect lava cake requires finesse and attention to detail. Here are essential tips that will help ensure your dessert turns out flawlessly every time.

1. Use Quality Ingredients

Start with high-quality ingredients to achieve the best chocolate lava cake flavor. Fresh chocolate, premium butter, and farm-fresh eggs make a noticeable difference in taste. Don’t skimp on the chocolate; after all, it’s the star of the show! Quality ingredients can elevate your dessert to gourmet status.

2. Don’t Overbake for Molten Perfection

Timing is crucial for achieving that desirable gooey center in your chocolate lava cake. Bake just until the edges set, while the center remains slightly jiggly. A few minutes can make a significant difference between a heavenly molten cake and a disappointing dry one. Perfect baking time is key!

3. Invest in Ramekins for Control

Using individual ramekins not only helps control baking time but also ensures each cake gets equal attention. Ensure your ramekins are greased well to allow for easy removal after baking. Ramekins enhance the presentation, making your lava cake look elegant and appealing on the plate.

4. Let it Rest for the Best Texture

Allow the cakes to rest for a minute after baking before serving. This critical step helps firm up the edges while, simultaneously, keeping the center molten and oozy. Serving immediately will provide the perfect contrast of warm cake and cold ice cream, creating a divine dessert experience.

These tips will elevate your chocolate lava cake, ensuring a delectable result that is bound to impress friends and family. With a little practice and proper techniques, you can master this indulgent dessert and become a baking sensation!

Perfectly baked chocolate lava cakes in ramekins, with molten centers oozing out and garnished with powdered sugar.

Discover the delicious world of chocolate lava cake, where rich chocolate meets molten perfection!

Common Mistakes to Avoid When Making Chocolate Lava Cake

When making chocolate lava cake, there are several common mistakes that can hinder your success. Being aware of these pitfalls will help you achieve the perfect dessert every time.

1. Overbaking Your chocolate lava cake

One of the most frequent mistakes is overbaking your chocolate lava cakes. This leads to a consistent firm texture rather than a gooey, molten center. Follow the recommended baking time strictly and check for that slight jiggle in the middle to achieve the ideal lava effect.

2. Skipping Quality Ingredients

Another common mistake is skipping quality ingredients. Using low-quality chocolate or butter can seriously compromise the rich flavor of your dessert. It’s essential to invest in high-quality chocolate and fresh unsalted butter for the best results. Always remember, good ingredients yield the finest outcomes.

3. Not Prepping Ramekins Properly

Not prepping your ramekins properly is also a major error. Failing to grease your ramekins can result in sticking, making removal difficult. Be generous with butter or cooking spray, ensuring easy removal after baking. Proper preparation is key to achieving beautiful presentation and optimal texture.

4. Ignoring Ingredient Temperature

Lastly, ignore ingredient temperature at your own risk. Baking with cold ingredients can negatively affect your cakes’ rise and overall texture. Always use room temperature eggs and butter for even mixing. Warm ingredients will enhance the batter consistency and contribute to the dessert’s final quality.

By avoiding these common mistakes, you can enjoy a flawlessly executed chocolate lava cake that impresses every time. Master these tips to ensure your dessert is rich, gooey, and absolutely delicious!

Recipe with a molten center, garnished with powdered sugar and served with vanilla ice cream.

Discover the delicious world of chocolate lava cake, where rich chocolate meets molten perfection!

Chef’s Note

When diving into the delicious world of lava cake, precision and attention to detail are absolutely essential. Begin by carefully measuring all your ingredients—accuracy can make a significant difference in the final texture and flavor of your molten dessert. Follow the baking times explicitly, as even a minute can turn a molten delight into a cake with a firm center.

It’s also important to preheat your oven; consequently, baking in an adequately heated environment ensures even cooking throughout the cake. Furthermore, remember that every oven is different, so you should consider doing a test run if you’re new to this decadent dessert.

Don’t shy away from personalizing your lava cake experience! Consider adding a hint of espresso or orange zest to elevate the flavors and surprise your taste buds. If you’re adventurous, experiment with fillings like peanut butter or flavored chocolate bars for a unique twist that will impress your guests.

Presentation is key too! Serve your lava cake with a scoop of vanilla ice cream or a dollop of whipped cream to create an inviting contrast to the rich, warm chocolate. Garnishing with fresh berries or a dusting of powdered sugar can visually enhance the dish, making it a feast for the eyes as much as the palate.

Enjoy the process of baking; each attempt brings you closer to perfection. And remember, the joy of cooking is not just about the result, but also about the journey. Savor the delicious results, share them with loved ones, and create wonderful memories together in the kitchen.

By: Gastronome Recipes, January 24, 2025

Quick and Easy Acini di Pepe Soup Recipes

Explore delicious and simple recipes for acini di pepe soup, from creamy variations to hearty meat options !

Acini di Pepe soup is a delicious and comforting dish that has captured the hearts of many home cooks and food enthusiasts alike. This delightful soup features small, round pasta, acini di pepe, that resembles tiny pearls, making it a perfect addition to a variety of recipes. Known for its versatility, acini di pepe can be combined with a multitude of ingredients, allowing for endless creative possibilities. Whether you’re looking for a quick weeknight meal or a cozy dish for a gathering, it offers a rich, satisfying experience that warms both the heart and palate.

Making acini di pepe soup is simple and a great way to incorporate nutritious ingredients into your diet. Depending on personal preferences, this dish can be crafted in many ways, from creamy variations enriched with dairy to hearty acini di pepe options that include protein-rich meats or vibrant vegetables. The soup is typically flavored with broth—chicken, beef, or vegetable—which enhances the overall taste and brings delightful depth to the acini di pepe soup.

Incorporating fresh herbs and seasonings further elevates the flavor of acini di pepe soup, making each serving a celebration of taste. As you delve into this blog post, you will discover quick and easy recipes for acini di pepe soup that cater to different dietary preferences and occasions. Get ready to embark on a delicious culinary adventure that promises to make acini di pepe a staple in your kitchen!

What is Acini di Pepe Pasta ?

Acini di Pepe pasta is a unique and delightful small pasta variety that originates from Italy. The name “acini di pepe” translates to “seeds of pepper,” aptly describing its petite, round shape that resembles tiny pearls or grains. This pasta is typically made from durum wheat semolina, which gives it a firm texture and excellent cooking quality. Acini di Pepe is often used in soups, salads, and even baked dishes, making it a versatile ingredient that can seamlessly fit into a variety of recipes.

One of the standout qualities of acini di pepe is its ability to absorb flavors while still retaining its structure after cooking. This characteristic makes it particularly popular for dishes like soup, where it effectively soaks up the broth, enhancing each bite with rich taste. When cooked properly, acini di pepe delivers a delightful chewiness that complements other ingredients, such as vegetables, meats, and seasonings.

In addition to its texture and flavor, acini di pepe pasta is a nutritious option. It is low in fat and provides a good source of carbohydrates, making it an ideal choice for a hearty meal. Furthermore, it can be easily incorporated into both vegetarian and meat-based dishes, offering flexibility for various dietary preferences. Understanding what acini di pepe pasta is and how to use it will undoubtedly enrich your culinary repertoire.

Acini di pepe pasta are small, round pasta shapes that resemble tiny grains or beads. They are often used in soups and salads, adding texture and heartiness to dishes. To learn more about acini di pepe and its uses, check out this informative article on :

Beef, Tomato, and Acini di Pepe Soup Recipe

Explore delicious and simple recipes for acini di pepe soup, from creamy variations to hearty meat options !

Key Ingredients for Acini di Pepe Soup

When preparing a delicious bowl of pepe soup, the choice of key ingredients is essential to achieving a rich and flavorful dish. The star of the recipe is, of course, the acini di pepe pasta. This small, round pasta absorbs the flavors of the broth and contributes a delightful texture that makes the soup satisfying. Whether you’re using it in a creamy soup, a hearty vegetable mix, or a meat-based broth, acini di pepe provides a unique chew that enhances every spoonful.

Next, the broth serves as the foundation for the soup, delivering depth and warmth to the dish. You can choose between chicken broth, vegetable broth, or beef broth, depending on your flavor preference and dietary needs. A well-seasoned broth sets the tone for the entire recipe, making it crucial to select a quality option, whether homemade or store-bought.

In addition to pasta and broth, fresh vegetables are vital for creating a nutritious and colorful acini di pepe soup. These vegetables not only add essential nutrients but also introduce layers of flavor and texture to the soup.

A blend of seasonings—from herbs like thyme and basil to spices like pepper—rounds out the dish beautifully.

By thoughtfully selecting these key ingredients, you can create a comforting recipe that everyone will enjoy.

By thoughtfully selecting these key ingredients, you can create a comforting and delicious acini di pepe soup that everyone will enjoy.

Explore delicious and simple recipes for acini di pepe soup, from creamy variations to hearty meat options !

Quick and Easy Recipes for Acini di Pepe Soup

This is not only delicious but also incredibly versatile, allowing for various recipes that cater to different tastes and dietary preferences. One popular variation is Creamy Acini di Pepe Soup, which combines the small pasta with a rich and velvety base. To make this soup, start by sautéing onions, garlic, and your choice of vegetables until they are tender. Next, add vegetable broth and bring it to a gentle boil before incorporating the acini di pepe. Finish the soup by stirring in heavy cream or a plant-based alternative for a creamy texture. Season with herbs like thyme and a sprinkle of cheese for added richness. This quick recipe is perfect for a comforting weeknight dinner.

Another fantastic option is the Vegan Pepe Soup. This recipe is simple and packed with nutrition. Begin by heating olive oil in a pot, then add diced tomatoes, carrots, and celery. Once they soften, add vegetable broth and spices like basil and oregano. Toss in the acini di pepe and let it cook until tender. For a pop of nutrition, fold in fresh spinach just before serving. This vegan version is not only easy to prepare but offers a hearty meal that satisfies.

For meat lovers, consider the Beef and Tomato Pepe Soup. Start by browning ground beef in a large pot, season with salt and pepper, and then drain any excess fat. Add diced onions, garlic, and freshly chopped tomatoes, simmering until softened. Pour in beef broth and add the acini di pepe, cooking until tender. This robust soup is perfect for chilly days and is sure to impress family and friends with its savory flavor and hearty ingredients

Explore delicious and simple recipes for acini di pepe soup, from creamy variations to hearty meat options !

Tips for Perfecting


To prevent mushiness, cook acini di pepe separately if storing leftovers, as it absorbs liquid quickly when combined with broth. Instead, cook the pasta al dente and add it to the soup just before serving. This method ensures that the pasta maintains its delightful bite and enhances the overall texture of your dish.

Another key tip is to enhance the flavor of your broth. Simmer homemade or store-bought broth with aromatics like onions, carrots, and fresh herbs for richer flavor. Adjust seasoning as needed.

Lastly, don’t hesitate to experiment with ingredients to elevate your soup. Incorporating seasonal vegetables, beans, or proteins can add layers of flavor and nutrition. Finish with a drizzle of olive oil or top with grated cheese or herbs for brightness and improved presentation. These tips will help you perfect your pepe soup, creating a comforting dish that’s both satisfying and beautiful.

Explore delicious and simple recipes for acini di pepe soup, from creamy variations to hearty meat options !

Chef’s Note

Acini di pepe soup is a versatile and comforting dish, making it a favorite among home cooks everywhere. One of the key aspects of creating a great soup is flavor development. Don’t rush the process! Simmer the broth with aromatics to meld flavors, creating a richer, more robust taste in your dish

When it comes to the pasta, remember that acini di pepe can absorb a considerable amount of liquid. Cook pasta separately for large batches and mix it with soup right before serving to maintain texture.. This technique will keep the pasta perfectly al dente and prevent it from becoming mushy over time.

Additionally, feel free to customize your soup based on what’s in season or what you have on hand. Acini di pepe soup is versatile; you can enhance it with different vegetables, legumes, or proteins for added flavor. Don’t hesitate to experiment with different herbs and spices to suit your taste preferences.

Finally, presentation matters! A drizzle of olive oil or a sprinkle of cheese will elevate your soup’s flavor and presentation. Enjoy!

By: Gastronome Recipes

Master the Art of Perfectly Cooked Snow Crab Legs

Plated snow crab legs garnished with lemon and herbs on a rustic wooden kitchen table.

Explore the culinary delights of snow crab legs and learn how to prepare this exquisite seafood treat

Snow crab legs are a delectable seafood delicacy that offers a unique combination of flavor, texture, and culinary versatility. Sourced from the frigid waters of the North Atlantic and North Pacific, particularly in regions like Alaska, they are known for their sweet, tender meat and striking reddish-orange shells. Cooking snow crab legs is a delightful experience, whether you’re boiling, steaming, or grilling them. Their rich flavor profile and tender texture make them a favorite among seafood enthusiasts and a standout choice for special occasions or family gatherings.

One of the most appealing aspects of snow crab legs is their ease of preparation. These legs are often sold pre-cooked and frozen, so home cooks can quickly bring a gourmet experience to their tables without extensive preparation. With just a few simple cooking methods, such as boiling and steaming, you can achieve perfectly tender crab legs that highlight their natural sweetness. Pairing them with delightful dipping sauces, such as melted garlic butter or zesty lemon sauce, enhances the overall dining experience.

In addition to their exquisite taste, they come with a host of nutritional benefits. They are low in fat and high in protein, offering essential vitamins and minerals that contribute to overall health. Understanding how to select, prepare, and cook snow crab legs will empower you to create a memorable seafood feast that delights family and friends alike, making any meal a special occasion. Whether you’re a seasoned chef or a novice cook, this guide will provide you with everything you need to know about cooking snow crab legs.

What Are Snow Crab Legs ?

They refer to the highly sought-after culinary delicacy harvested from snow crabs, which live in the cold waters of the North Atlantic and North Pacific oceans.
Snow crabs are primarily harvested in cold-water regions, particularly thriving in the icy depths of the Bering Sea and surrounding waters of Alaska and Canada. Recognizable by their elongated, slender legs and striking orange-red exoskeleton, these crustaceans offer a truly delightful culinary experience. The succulent meat found inside the legs boasts a sweet, oceanic taste complemented by a hint of brininess, which has captured the hearts of seafood lovers everywhere. Their tenderness and unique flavor profile make this recipe a sought-after delicacy in many seafood dishes. Understanding the anatomical characteristics of snow crab legs can enhance appreciation for this luxurious seafood option.

In addition to their exquisite taste, they are also a nutritious option for seafood lovers. They are low in fat and high in protein, making them a healthy choice for those looking to incorporate more lean protein into their diets. Packed with essential vitamins and minerals, such as vitamin B12 and zinc, snow crab legs not only satisfy your taste buds but also contribute to your overall well-being, making them a delicious and wholesome addition to any meal.

For an in-depth recipe on cooking, visit this helpful guide :

Check out this guide for cooking snow crab legs!

A cozy kitchen scene with a beautifully arranged plate of snow crab legs, garnished with lemon wedges and herbs, inviting readers to learn about cooking seafood.

Explore the culinary delights of snow crab legs and learn how to prepare this exquisite seafood treat

Key Ingredients for Cooking Snow Crab Legs

When preparing snow crab legs, the most critical ingredient is, of course, the snow crab legs themselves. they are often available in a pre-cooked and frozen state, preserving their rich flavor and delicate texture, making them convenient for home preparation. When selecting this recipe at the store, look for bright, vibrant shells that indicate freshness. Firmness is also an essential indicator; the legs should feel solid and not limp. Choosing high-quality crab legs is crucial, as this directly impacts the taste of the final dish, making freshness a priority for any seafood lover.

Another vital ingredient is water, used primarily for boiling or steaming the crab legs. To boil snow crab legs, fill a large pot with water and add a liberal amount of salt. This seasoning is essential, as it helps to accentuate the crab’s natural flavors during the cooking process.. When boiling, it’s important to bring the water to a rolling boil before adding the legs to ensure they cook evenly.This method keeps the legs juicy and succulent, enhancing the overall dining experience.

Seasonings play a significant role in amplifying the flavor of snow crab legs. While delicious on their own, various seasonings can elevate their natural sweetness. Popular options include Old Bay seasoning, garlic, and lemon juice. Melted butter is a classic accompaniment that adds richness, while fresh herbs like parsley or dill provide color and depth. These key ingredients work together to create a memorable dish that showcases the delightful taste of snow crab legs and makes for an irresistible seafood feast.

A collection of key ingredients for cooking snow crab legs: fresh snow crab legs, sea salt, garlic, lemon wedges, and melted butter on a rustic kitchen countertop.

Explore the culinary delights of snow crab legs and learn how to prepare this exquisite seafood treat

 Recommended Cooking Methods for Snow Crab Legs

Boiling Snow Crab Legs

Boiling is one of the most popular and straightforward cooking methods for snow crab legs, delivering tender and flavorful results. To begin, fill a large pot with water, ensuring it is salted generously to enhance the crab’s natural flavor. Bring the water to a rolling boil before carefully adding the thawed crab legs. It’s essential to keep the pot boiling continuously throughout the cooking process.
For optimal results, boil thawed snow crab legs for approximately 4 to 6 minutes, while frozen legs require a longer cooking time of about 8 to 10 minutes. This ensures the meat is thoroughly heated and retains its natural flavor and tenderness. Timing is crucial, as overcooking can lead to rubbery meat. When the legs are heated through, they will turn a beautiful orange color. This method efficiently brings out the inherent sweetness of the crab meat, making it a classic choice for seafood lovers.

Steaming Snow Crab Legs

Steaming is another excellent method for cooking, as it helps retain moisture while enhancing the meat’s delicate texture. To steam, fill a large pot with a few inches of water and bring it to a boil. Place a steamer basket above the boiling water, making sure it does not touch the liquid. Arrange the thawed snow crab legs in the basket and cover the pot to trap the steam inside. Steam the legs for about 5 to 7 minutes, ensuring they heat evenly. Steaming is a gentle cooking technique that allows the inherent flavors to concentrate, resulting in juicy, flavorful crab legs that are perfect for dipping or pairing with a light sauce.

Grilling Snow Crab Legs

Grilling snow crab legs adds a delightful smoky flavor that beautifully complements their natural sweetness. After boiling, brush the legs with melted butter and your choice of seasonings or marinades for added flavor. Preheat your grill to medium heat and place the crab legs directly on the grates. Grill for approximately 5 to 7 minutes, turning occasionally to achieve even char marks. This method not only enhances the flavor but also provides a lovely texture and unique taste that elevates your seafood feast. Serve grilled legs with lemon wedges and your favorite dipping sauces for an unforgettable dining experience.

A preparation scene for snow crab legs, displaying thawed crab legs on a cutting board with garlic, lemons, and seasonings, set in a warm kitchen ambiance.

Explore the culinary delights of snow crab legs and learn how to prepare this exquisite seafood treat

Serving Suggestions and Dipping Sauces

When it comes to serving snow crab, presentation is key to an enjoyable dining experience. Arrange the cooked crab legs on a large platter, emphasizing their vibrant reddish-orange color and impressive length. Garnishing with fresh lemon wedges adds a pop of color while providing a zesty complement that enhances the sweetness of the crab meat. Fresh herbs like parsley or dill can be sprinkled on top for an elegant touch, making the dish visually appealing and inviting. For a more interactive experience, consider serving the crab legs on a seafood-themed table, accompanied by tools like crab crackers and seafood forks, allowing guests to easily access and enjoy the tender meat inside.

Dipping sauces play a crucial role in elevating the flavor of this recipe and enhancing the overall dining experience. The classic choice is melted butter, often infused with minced garlic and a squeeze of lemon juice for added richness and flavor. This simple but delicious sauce beautifully complements the natural sweetness of the crab meat. Another popular option is a tangy cocktail sauce, made from ketchup mixed with horseradish, lemon juice, and Worcestershire sauce, offering a refreshing kick. For those who enjoy bold flavors, a spicy aioli or a zesty remoulade can provide a delightful contrast to the sweetness of the crab. By providing a variety of dipping sauces, you allow guests to customize their experience and explore different flavor combinations, making your snow crab leg feast unforgettable.

A display of various cooking methods for snow crab legs, featuring boiling, steaming, and grilling techniques, showcasing the culinary process in a warm kitchen environment.

Explore the culinary delights of snow crab legs and learn how to prepare this exquisite seafood treat

Chef’s Note

Snow crab legs are a fantastic choice for a special seafood meal, and with the right preparation and presentation, they can truly shine at your dining table. One of the keys to a successful dish is to avoid overcooking the crab legs, as this can lead to rubbery meat that detracts from the naturally tender texture.

Don’t be afraid to experiment with different seasonings and dipping sauces to find your perfect flavor combination. While traditional melted butter is a must-have, consider trying flavored butters infused with herbs, garlic, or spices for a unique twist.

Presentation matters, too; the visual appeal of your dish can enhance the overall experience. Garnishing with fresh herbs and lemon wedges not only brightens the plate but also invites guests to dig in. Finally, remember that enjoying snow crab is as much about the experience as it is about the flavor. Encourage your guests to take their time cracking the shells and savoring the sweet meat, creating a fun and memorable gathering around the table. Enjoy your culinary adventure with snow crab , knowing you’re serving a dish that is both delicious and nutritious !

By: Gastronome Recipes

Quick and Easy Shrimp Biryani for Busy Weeknights

An inviting spread of shrimp biryani served in a brass bowl, garnished with fresh herbs and accompanied by raita and lime.

Experience the rich flavors of shrimp biryani, a delightful dish featuring aromatic spices and succulent shrimp.

Introduction

Shrimp biryani is a delicious and aromatic dish that embodies the essence of comfort food while offering a delightful twist to traditional rice meals. With its origins rooted in South Asian cuisine, biryani is a celebratory dish that combines fragrant basmati rice, succulent shrimp, and a blend of rich spices, creating a symphony of flavors that tantalize the palate.

In our fast-paced world, where busy weeknights often leave little time for elaborate cooking, a quick and easy shrimp biryani recipe becomes a perfect solution. This one-pot meal allows you to enjoy the depth of flavor and spices found in traditional biryani without the complexity and time usually associated with it. It is not only efficient but also a great way to bring the vibrant tastes of Indian cuisine into your home.

This blog post aims to simplify the process of making shrimp biryani, making it accessible for everyone, from seasoned chefs to novice cooks. We will provide you with a straightforward recipe that emphasizes key ingredients and cooking techniques, ensuring successful results every time. Along with the recipe, you’ll find practical tips for preparation, cooking methods, and serving suggestions to elevate your dining experience.

Whether you’re looking to impress guests at a dinner party or seeking a comforting meal for your family, this quick and easy shrimp biryani is sure to satisfy. Let’s dive into the world of flavors and aromas and discover how you can create this mouthwatering dish in no time !

What is Shrimp Biryani ?

Shrimp biryani is a vibrant and flavorful rice dish that is part of the broader biryani family, which originates from the Indian subcontinent. Biryani itself is a mixed rice dish that combines fragrant basmati rice with marinated protein—typically meat or seafood—along with a variety of spices, herbs, and aromatic ingredients. The result is a hearty, well-balanced meal that is both aromatic and visually appealing.

At its core, shrimp biryani features succulent shrimp marinated in a blend of spices, then layered with partially cooked basmati rice and finished with a combination of sautéed onions, tomatoes, and fresh herbs. This cooking method allows the flavors to meld beautifully, infusing the rice with the essence of the shrimp and spices.

The dish is characterized by its rich and aromatic flavor profile, which is achieved through the use of traditional spices such as cumin, coriander, cloves, cardamom, and garam masala. These spices not only bring warmth and depth to the dish but also create a stunning aroma that fills the kitchen as it cooks. The addition of ingredients like garlic, ginger, and green chilies further enhances the complexity and overall taste.

Shrimp biryani is often served during special occasions and celebrations, symbolizing hospitality and culinary richness. In recent years, it has grown in popularity as a meal option for busy weeknights due to its versatility, allowing home cooks to prepare a satisfying and wholesome dish in less time than traditional biryani recipes require.

Despite its complexity in flavor, shrimp biryani can be simplified for ease of preparation, making it an ideal recipe for those seeking delicious, home-cooked meals without extensive effort in the kitchen. Ultimately, shrimp biryani is not just a dish; it’s an experience that encompasses the rich culture and heritage of South Asian cuisine, bringing families and friends together around the dining table.

More details

For an in-depth exploration of biryani varieties and cooking techniques, check out this informative article: Learn More About Biryani. For an in-depth exploration of biryani varieties and cooking techniques, check out this informative article: Learn More About Biryani.

An inviting spread of shrimp biryani served in a brass bowl, garnished with fresh herbs and accompanied by raita and lime.

Experience the rich flavors of shrimp biryani, a delightful dish featuring aromatic spices and succulent shrimp.

Key Ingredients for Quick and Easy Shrimp Biryani

To create a delicious shrimp biryani that is both quick and easy, it’s essential to gather the right ingredients. Each component plays a crucial role in contributing to the dish’s overall flavor, texture, and authenticity. Here’s a closer look at the key ingredients you’ll need:

1. Fresh Shrimp

Fresh or frozen shrimp serves as the star ingredient in this dish. When using fresh shrimp, choose medium to large-sized shrimp for the best texture and flavor. If using frozen shrimp, ensure they are thawed properly before cooking. The shrimp should be cleaned, deveined, and patted dry to ensure they absorb the marinades and cook evenly.

2. Basmati Rice

Basmati rice is the preferred choice for biryani due to its long grains and fragrant aroma. This type of rice cooks up fluffy without becoming sticky, allowing individual grains to stand out. For quick preparation, opt for parboiled basmati rice, which reduces cooking time while maintaining the traditional qualities of biryani.

3. Aromatics

The foundation of flavor in shrimp biryani is built on aromatics such as:

  • Onions: Thinly sliced onions are often caramelized to provide sweetness and depth of flavor.
  • Garlic and Ginger: Minced garlic and ginger add pungent, warming notes that brighten the dish.
  • Tomatoes: Fresh tomatoes, diced or pureed, contribute acidity and moisture, balancing the richness of the spices and shrimp.

4. Spices

A carefully selected blend of spices is vital to achieve the characteristic flavors of biryani. Essential spices include:

  • Cumin: Provides earthy warmth.
  • Coriander: Offers a fresh, citrusy taste.
  • Turmeric: Adds vibrant color and a mild flavor.
  • Garam Masala: A blend of warming spices that brings complexity and depth to the dish.
  • Red Chili Powder (optional): For those who enjoy heat, this adds spiciness to the biryani.

5. Fresh Herbs

Fresh herbs like cilantro and mint are crucial for garnish, adding brightness and freshness to the dish. These herbs enhance the flavors, providing a contrasting touch to the richness of the biryani. Be sure to chop them finely for even distribution.

6. Optional Add-Ins

To elevate the dish even further, consider incorporating additional ingredients:

  • Vegetables: Peas, bell peppers, or carrots not only enhance the visual appeal but also add nutrition and texture.
  • Yogurt: A few spoonfuls of yogurt can be mixed with the shrimp marinade to tenderize the shrimp and add creaminess.
  • Fried Onions: Crispy fried onions make a fantastic topping for added crunch and flavor.

By using these key ingredients, you can prepare a flavorful and quick shrimp biryani that captures the essence of this traditional dish while being suitable for busy weeknights. With minimal effort and time, this recipe can provide a satisfying meal that is sure to impress family and friends alike.

An inviting spread of shrimp biryani served in a brass bowl, garnished with fresh herbs and accompanied by raita and lime.

Experience the rich flavors of shrimp biryani, a delightful dish featuring aromatic spices and succulent shrimp.

Simple Steps to Make Shrimp Biryani

Making shrimp biryani may seem daunting at first, but with a few organized steps, you can prepare this delicious and aromatic dish with ease. Here’s a simple and straightforward guide to help you create a flavorful shrimp biryani that is perfect for busy weeknights.

Prepare the Shrimp

  • Cleaning and Marinating: Start by cleaning the shrimp thoroughly under cold water. Devein them if necessary, and pat them dry with a paper towel. In a bowl, mix the shrimp with a marinate of yogurt (if using), minced garlic, ginger, turmeric, red chili powder, and salt. Allow the shrimp to marinate for at least 15-30 minutes to absorb the flavors. This step not only enhances the taste but also helps in tenderizing the shrimp.

Cook the Rice

  • Soaking: Rinse the basmati rice under cool water until the water runs clear. Soaking it for about 30 minutes is recommended, as this helps to elongate the grains and prevents them from breaking during cooking.
  • Boiling: In a large pot, bring water to a boil and add salt. Add the soaked basmati rice to the boiling water and cook until it’s about 70% done (the rice should still have a slight bite to it). Drain the rice and set it aside.

Sauté the Aromatics

  • Creating Flavor: In a large, heavy-bottomed saucepan, heat oil or ghee over medium heat. Add thinly sliced onions and cook until they are golden brown and caramelized. This process brings out their natural sweetness and adds depth to the biryani.
  • Adding Spices and Aromatics: Stir in minced garlic and ginger, cooking for an additional minute until fragrant. Add the diced tomatoes and cook until softened, then sprinkle in the marinated shrimp, sautéing until they turn pink.

Layering the Shrimp Biryani

  • Building Flavors: Once the shrimp is partially cooked, it’s time to layer the dish. Spread half of the cooked basmati rice over the shrimp mixture in the pot. Sprinkle a layer of spices—such as garam masala, cumin, and coriander—along with fresh herbs like chopped cilantro and mint.
  • Finishing Touch: Add the remaining rice on top, creating an even layer. For added aroma and flavor, drizzle a little saffron-infused water or a few drops of lemon juice over the rice.

Simmer to Perfection

  • Cooking Together: Cover the pot with a tight-fitting lid to trap steam. Reduce the heat to low and let the biryani cook for about 20 minutes. This steam helps the flavors meld together and ensures that the rice cooks gently, allowing it to absorb the shrimp flavors while becoming fully tender.
  • Finalizing the Dish: After the cooking time, turn off the heat and let the pot sit with the lid on for an additional 10 minutes. This allows the rice to settle and absorb any remaining moisture.

Serve and Enjoy Shrimp Biryani

  • Fluff and Garnish: Carefully fluff the biryani with a fork, being mindful not to break the rice grains. Garnish with additional fresh herbs, crispy fried onions, or a dollop of raita (yogurt sauce) if desired.
  • Presentation: Serve your shrimp biryani hot, either directly in the pot or on a large serving platter. This dish pairs well with pickles, salad, or a refreshing cucumber raita, making it a complete meal.

By following these simple steps, you can create a fragrant and flavorful shrimp biryani that is sure to impress. Enjoy the process, and don’t hesitate to customize the recipe according to your preferences, whether it be with added vegetables or extra spices. Happy cooking !

An inviting spread of the recipe served in a brass bowl, garnished with fresh herbs and accompanied by raita and lime.

Experience the rich flavors of shrimp biryani, a delightful dish featuring aromatic spices and succulent shrimp.

Serving and Enjoying Your Shrimp Biryani

Once your Shrimp Biryani is perfectly cooked and ready to be served, it’s time to make it an unforgettable dining experience. Here are some tips on how to serve and enjoy this delightful dish.

1. Presentation Matters

  • Choose the Right Dish: Serve your Shrimp Biryani in a large, shallow dish to showcase the vibrant colors and textures. A traditional copper or ceramic pot can add an authentic touch.
  • Garnish: Enhance the visual appeal by garnishing your biryani with fresh chopped cilantro, mint leaves, and a sprinkle of fried onions. A few lemon wedges can add a zing of freshness.

2. Accompaniments

  • Raita: A cooling yogurt-based sauce, such as cucumber raita or mint yogurt, pairs beautifully with the spicy flavors of biryani. It provides a refreshing contrast and helps balance the heat.
  • Salad: Consider serving a simple salad of sliced cucumbers, tomatoes, and onions dressed with lemon juice and spices. This adds a crunchy texture and a burst of freshness to the meal.

3. Beverages

  • Pair your Shrimp Biryani with a refreshing drink. Traditional options include Mango Lassi or a chilled glass of Chaas (buttermilk). For a non-traditional pairing, try a light, crisp white wine or sparkling water with lemon.

4. Serving Style of Shrimp biryani

  • Family Style: Serve the biryani in the center of the table and let everyone help themselves. This creates a warm, communal atmosphere where guests can enjoy sharing.
  • Individual Portions: For a more formal setting, spoon the biryani into individual bowls or plates, ensuring each serving has a good mix of shrimp and rice.

5. Enjoying the Flavors of Shrimp Biryani

  • Encourage your guests to savor the dish slowly. The intricate layering of flavors in Shrimp Biryani is meant to be enjoyed. The combination of spices, the sweetness of the shrimp, and the fragrant rice create a delightful harmony that deserves attention.
  • Mindful Eating: Take a moment to appreciate the aromas before digging in. The rich scents of cooked spices and seafood can enhance the overall experience.

6. Leftovers and Storage for Shrimp Biryani

  • If you have any leftovers, store the biryani in an airtight container in the refrigerator. It can typically be enjoyed for up to 2-3 days. Reheat gently on the stovetop with a splash of water or in the microwave, covered, to maintain the moisture.
An inviting spread of biryani served in a brass bowl, garnished with fresh herbs and accompanied by raita and lime.

Experience the rich flavors of shrimp biryani, a delightful dish featuring aromatic spices and succulent shrimp.

Conclusion

In conclusion, Shrimp Biryani is more than just a meal; it is a culinary experience that brings together the richness of spices, the freshness of seafood, and the aromatic quality of basmati rice. This beloved dish reflects the vibrant flavors of Indian cuisine and can easily be prepared in the comfort of your own home, making it perfect for busy weeknights or special occasions.

1. Celebrating Simplicity and Elegance

  • One of the most appealing aspects of Shrimp Biryani is its simplicity. With just a few ingredients and a straightforward cooking process, you can create a dish that feels elegant and impressive. The layers of flavors develop beautifully, ensuring that even the most novice cooks can achieve restaurant-quality results.

2. Versatility and Customization

  • Shrimp Biryani is highly versatile, allowing you to customize the recipe to suit your taste preferences. Whether you prefer it mild or spicy, with additional vegetables or different types of seafood, the possibilities are endless. This adaptability makes it a great option for diverse palates, accommodating any dietary requirements or ingredient availability.

3. Creating Memories

  • Beyond the fantastic taste, Shrimp Biryani serves as a catalyst for gathering friends and family around the dining table. Sharing a meal is a cherished tradition that fosters connection and celebration. Enjoying a flavorful dish like Shrimp Biryani can lead to memorable moments that linger long after the last bite is taken.

4. Encouraging Culinary Exploration

  • This delightful recipe invites you to explore the rich world of spices used in Indian cooking. Understanding how different spices work together can enhance your culinary skills, encouraging you to experiment with other dishes in the cuisine. Each attempt at making Shrimp Biryani can bring newfound appreciation for the artistry behind these flavors.

5. Final Thoughts

  • As you prepare to serve your Shrimp Biryani, remember that the joy of cooking lies not only in the final outcome but also in the process itself. Whether you’re cooking for yourself, your family, or guests, the act of preparing and sharing this dish can be a fulfilling and rewarding experience. Embrace the simplicity, savor the flavors, and enjoy every moment spent in the kitchen.

In summary, Shrimp Biryani is a delightful dish that encapsulates the essence of comfort food while offering an opportunity for creativity and connection. So gather your ingredients, follow the steps, and embark on a delicious journey that will surely be enjoyed by all.

Chef’s Note

Creating a delicious shrimp biryani doesn’t have to be time-consuming! Here are a few tips to enhance your dish:

  1. Quality Ingredients: Use fresh or high-quality shrimp for the best flavor. Opt for sustainably sourced seafood whenever possible.
  2. Spice Level: Adjust the heat to your preference by adding more or fewer green chilies or using milder spices. Don’t hesitate to experiment!
  3. Rice Perfection: Rinse the basmati rice thoroughly to remove excess starch. This helps achieve fluffy, non-sticky rice.
  4. One-Pot Wonder: This recipe is designed to be a one-pot meal, saving you time on cleanup. Embrace the simplicity!
  5. Customization: Feel free to add vegetables like peas, carrots, or bell peppers for added nutrition and color.
  6. Resting Time: Allow the biryani to rest after cooking. This lets the flavors meld together beautifully and results in a more aromatic dish.
  7. Serving Suggestions: Serve with a refreshing cucumber raita or mixed salad to balance the spices and textures.

Enjoy experimenting with this recipe, and make it your own! Happy cooking !

By: Gastronome Recipes, January 13, 2025