Discover the Magic of Fall with Homemade Apple Cinnamon Cookies

A beautifully arranged plate of freshly baked apple cinnamon cookies, featuring warm colors and cinnamon sticks, set on a rustic wooden table with seasonal decor.

Discover the delightful world of apple cinnamon cookies—a perfect treat for cozy fall moments !

Welcome to the World of Apple Cinnamon Cookies

Apple cinnamon cookies are a delightful treat that embodies the warm flavors of fall. Combining fresh apples and fragrant cinnamon creates a cozy experience. These cookies evoke nostalgia for many and are perfect for any gathering. Whether enjoyed with a cup of tea or coffee, they provide comfort throughout the season. Get ready to discover how easy it is to make these delicious cookies!

Why Choose Apple Cinnamon Cookies ?

Choosing apple cinnamon cookies means embracing the essence of autumn. The harmonious blend of flavors offers a perfect balance of sweetness and spice. They’re ideal for celebrations, family gatherings, or simply as a sweet snack at home. These cookies can also be easily prepared ahead of time. Dive into this recipe for a seasonal delight that everyone will love !

An Easy Recipe to Try

Making apple cinnamon cookies is simple and rewarding. With just a few key ingredients, you can create a batch that fills your home with delightful aromas. From measuring ingredients to baking, the entire process is enjoyable. Follow this easy recipe to impress friends and family with your baking skills. Let’s explore how to create these cozy cookies together !

What Are Apple Cinnamon Cookies ?

The Delicious Combination of Flavors in Apple Cinnamon Cookies

Apple cinnamon cookies marry the sweet taste of apples with the warm spice of cinnamon. This delightful blend creates a flavorful treat perfect for any occasion. The natural sweetness of apples enhances the cookie, making it a popular choice among dessert lovers. With every bite, you’re met with contrasting textures that delight the senses. Enjoying these cookies evokes feelings of comfort and nostalgia, especially during autumn !

The Classic Ingredients

These cookies typically include essential ingredients like flour, sugar, eggs, and, of course, apples and cinnamon. The apples provide moisture and bounce, while cinnamon adds warmth. Butter contributes richness and depth to the flavor profile. Depending on the recipe, additional ingredients may include nuts or oats for extra crunch. The classic combination makes these cookies easy to customize and versatile for every occasion !

Why Apple Cinnamon Cookies Are Beloved

Apple cinnamon cookies are adored for their delicious flavor and comforting aroma. They evoke memories of cozy family gatherings and holiday celebrations. These cookies are perfect for sharing with friends or enjoying with a cup of tea or coffee. Their homemade charm makes them a favorite among both bakers and eaters. Baking a batch brings warmth and joy to any kitchen !

Versatility in Recipe Variations

One of the best features of apple cinnamon cookies is their versatility. They can be soft and chewy or crisp and crunchy, depending on your preference. You can also experiment with various types of apples, spices, and add-ins. Feel free to play with the recipe, making it your own! This adaptability allows for endless possibilities in creating the perfect cookie.

For a delightful variety of apple cookie recipes, check out this link to amazing apple cookies that will inspire your baking !

A plate of freshly baked apple cinnamon cookies, adorned with cinnamon sticks and apple slices, set on a rustic wooden countertop with warm seasonal decoration.

Discover the delightful world of apple cinnamon cookies—a perfect treat for cozy fall moments !

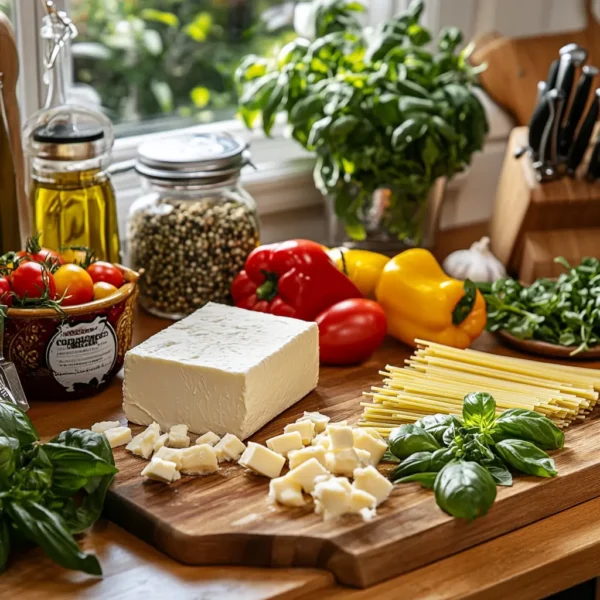
Key Ingredients for Apple Cinnamon Cookies

Apples : The Star of the Show

Fresh apples are the core ingredient in apple cinnamon cookies. They add natural sweetness and moisture, enhancing texture. For the best flavor, choose firm varieties like Granny Smith or Honeycrisp. The combination of tartness and sweetness balances wonderfully in cookies. With every bite, the delicious apple flavor shines through!

Cinnamon : The Warm Spice

Cinnamon is essential for infusing warm flavors into your cookies. This spice complements the sweetness of apples beautifully. Using ground cinnamon elevates the overall flavor profile, making each cookie irresistible. It also pairs well with other spices, such as nutmeg or allspice, for added complexity. A touch of cinnamon is vital for cozy, autumn-inspired treats !

Flour : The Structural Base

All-purpose flour serves as the foundation of cookie dough. It provides structure and stability, holding the cookies together. The right flour ratio ensures a pleasing texture, whether soft or chewy. Properly measuring flour is crucial to avoid dense cookies. This key ingredient balances flavors while allowing other ingredients to shine !

Sugar : Sweetening the Experience

Granulated sugar and brown sugar combine to provide sweetness and depth. Granulated sugar promotes spread during baking while brown sugar adds moisture. The caramel notes enhance the overall flavor, making each bite delectable. This sweetness is essential for creating memorable cookies. Adjusting sugar levels allows you to customize sweetness to your liking !

Butter : Adding Richness

Butter brings richness and flavor to apple cinnamon cookies. It contributes to a tender cookie texture and enhances the overall taste. Using unsalted butter allows better control of salt levels in recipes. Creaming butter with sugars helps incorporate air, resulting in a lighter cookie. Quality butter can make all the difference in your baking !

IngredientsPurposeFlavor Suggestions
Fresh ApplesAdds natural sweetness and moistureUse Granny Smith for tartness or Honeycrisp for sweetness
Ground CinnamonProvides warmth and spicinessCombine with nutmeg or allspice for complexity
All-Purpose FlourProvides structure and stabilityEnsure proper measurement for ideal texture
Granulated SugarSweetens the cookiesSubstitute with brown sugar for caramel notes
Brown SugarAdds moisture and depth to flavorEnhances chewiness and richness
Unsalted ButterContributes richness and tendernessCan use room temperature for easy mixing
EggsHelps bind ingredients togetherAdds moisture and stability
A beautifully arranged display of key ingredients for apple cinnamon cookies, including fresh apples, cinnamon, flour, sugar, and butter, set on a rustic wooden countertop.

Discover the delightful world of apple cinnamon cookies—a perfect treat for cozy fall moments !

How to Make Apple Cinnamon Cookies

Gather Your Ingredients for Apple Cinnamon Cookies

Start by gathering all your essential ingredients for apple cinnamon cookies. This includes fresh apples, ground cinnamon, flour, butter, and eggs. Having everything prepared makes the process smoother and more enjoyable. Measure each ingredient precisely to ensure the perfect balance of flavors. Proper preparation sets the stage for a successful baking experience!

Prepare the Dough

In a mixing bowl, cream together the softened butter and sugars until light and fluffy. This step is crucial for incorporating air, resulting in tender cookies. Next, add in the eggs and vanilla extract, mixing well to combine. Gradually incorporate the flour and cinnamon, ensuring a smooth dough. Fold in the chopped apples, creating a flavorful mixture that is ready to bake !

Chilling the Dough for Apple Cinnamon Cookies

After preparing the dough, it’s beneficial to chill it for 30 minutes to an hour. Chilling solidifies the fat, leading to less spread during baking. This step improves the cookie’s texture and shape. While the dough chills, preheat your oven to the proper temperature. Once chilled, scoop the dough onto a baking sheet lined with parchment paper.

Baking the Cookies

Bake the cookies in the preheated oven until edges are lightly golden. Keep an eye on the baking time, as overbaking can lead to dry cookies. The aroma of apples and cinnamon will fill your kitchen, creating an inviting atmosphere. Allow the cookies to cool on the baking sheet for a few minutes before transferring them to a wire rack to cool completely.

Enjoying Your Cookies

Once cooled, enjoy your delicious apple cinnamon cookies! These treats are perfect for sharing with family and friends. Serve them with a warm beverage or incorporate them into festive gatherings. Their warm spices and hearty texture make them a favorite in any household. Savor the cozy flavors and the joy of baking !

Common Mistakes to Avoid When Making Apple Cinnamon Cookies

Overmixing the Dough

One of the most common mistakes when making cookies is overmixing the dough. Overmixing can lead to tough cookies rather than soft and chewy ones. The gluten in flour develops with excessive mixing, affecting texture. Always mix until ingredients are just combined for the best results. Taking care during this stage ensures delicious apple cinnamon cookies !

Not Measuring Ingredients Accurately

Accurate measurements are essential for successful baking. Using too much flour can lead to dry cookies, while too little sugar may affect taste. Invest in a kitchen scale for precise measurements. Spoon flour into measuring cups lightly and level off to avoid packing. Proper measuring helps maintain the right balance of flavors and textures in your baking !

Not Chilling the Dough for Apple Cinnamon Cookies

Failing to chill the dough is another frequent mistake. Chilling solidifies the fats, helping apple cinnamon cookies maintain their shape during baking. Without chilling, cookies may spread too much and become flat. After preparing the dough, refrigerate for at least 30 minutes. This simple step makes a significant difference in cookie quality !

Ignoring Cooling Time for Apple Cinnamon Cookies

Lastly, ignoring the cooling time can impact texture and flavor. Allowing apple cinnamon cookies to cool on the baking sheet prevents them from becoming soggy. Transfer them to a wire rack after a few minutes. Cooling enhances texture while letting flavors develop. Patience makes all the difference in enjoying your delicious apple cinnamon cookies !

A visual representation of common baking mistakes, featuring mismeasured ingredients, overmixed dough, and improperly baked apple cinnamon cookies, set on a kitchen countertop.

Discover the delightful world of apple cinnamon cookies—a perfect treat for cozy fall moments !

Nutritional Benefits of Apples and Cinnamon

Apples : A Nutrient Powerhouse

Apples are a fantastic source of essential nutrients and dietary fiber. They are rich in vitamin C, which supports the immune system. Apples also contain antioxidants that promote heart health and reduce inflammation. The soluble fiber in apples aids digestion and helps regulate blood sugar levels. Incorporating apples into your diet contributes to overall wellness !

The Health Benefits of Cinnamon

Cinnamon is not only a flavorful spice but also offers numerous health benefits. It boasts anti-inflammatory properties that help combat chronic diseases. Cinnamon is known to improve insulin sensitivity, aiding in blood sugar control. Additionally, its rich antioxidant content can protect the body from oxidative stress. Adding cinnamon to your diet supports general health and vitality !

Heart Health and Weight Management with Apples and Cinnamon

Consuming apples and cinnamon together can enhance heart health and assist with weight management. Apples contain heart-healthy fiber, while cinnamon can help lower cholesterol levels. This combination promotes a healthy heart and can aid in weight loss. The satisfying flavor of apples and cinnamon makes it easy to enjoy as part of a balanced diet.

Digestive Health Boost with Apples and Cinnamon

Both apples and cinnamon play a role in supporting digestive health. The fiber in apples helps maintain regular bowel function. Cinnamon can soothe the digestive system and may help alleviate gas and bloating. These benefits make this duo an excellent choice for improving gut health. Incorporating apples and cinnamon into meals can contribute to better digestion !

Antioxidant Protection

Apples and cinnamon are rich in antioxidants that protect the body from free radicals. Antioxidants help reduce the risk of chronic diseases like cancer and diabetes. Regular consumption of these foods can enhance the body’s defense mechanisms. Including apples and cinnamon in your diet is a tasty way to boost antioxidant intake !

An infographic depicting the nutritional benefits of apples and cinnamon, highlighting vitamins, fiber, and antioxidants, with visually appealing images of both ingredients."

Discover the delightful world of apple cinnamon cookies—a perfect treat for cozy fall moments !

Chef’s Note

Welcome to the delightful world of apples and cinnamon! This flavorful duo not only elevates your recipes but also packs numerous health benefits. Here are a few tips to maximize their impact in your dishes :

  1. Choose Fresh and Seasonal: Always opt for fresh, seasonal apples for the best flavor and nutrition. Varieties like Granny Smith or Honeycrisp are perfect for baking and cooking. Fresh cinnamon sticks offer a stronger aroma and flavor compared to pre-ground cinnamon.
  2. Balance Your Flavors: When incorporating apples and cinnamon in your recipes, consider balancing sweetness with acidity. A little lemon juice can enhance the flavors while adding a refreshing note. This creates a well-rounded and harmonious taste profile.
  3. Experiment with Pairings: Don’t hesitate to pair apples and cinnamon with other ingredients. They complement flavors like nuts, oats, and even savory elements like pork or chicken. Experimenting with different combinations can lead to delicious new discoveries!
  4. Health Benefits: Remember that both apples and cinnamon offer incredible health benefits. Apples are high in fiber and antioxidants, while cinnamon has anti-inflammatory properties. Adding this duo to your meals can contribute to overall wellness.
  5. Enjoy Them Year-Round: While apples and cinnamon are often associated with fall, you can enjoy them year-round. Use them in salads, snacks, and desserts, or incorporate them into breakfast dishes like oatmeal and pancakes.

Indulging in the flavors of apples and cinnamon is a pleasurable experience, and their nutritional benefits make every bite worthwhile. Happy cooking

By: Gastronome Recipes, January 31, 2025

Unlocking Ice Cream Secrets : How Eggs Change the Game !

A visually appealing image representing the introduction to ice cream making, featuring bowls of ingredients such as eggs, cream, sugar, and ice cream in various flavors, arranged on a rustic kitchen countertop.

Explore the essential role of eggs in ice cream-making and their impact on flavor and texture !

Understanding the Significance of Eggs in Ice Cream

Eggs play a crucial role in ice cream recipes. Their unique properties contribute to the binding and stability of the final product. As an emulsifier, eggs help blend fat and water, creating a smooth texture. Their presence enhances creaminess, richness, and overall flavor. For many traditional recipes, eggs are an essential ingredient that defines quality.

Exploring the Function of Binders

Binders are vital for achieving the right texture in ice cream. They help hold ingredients together and prevent separation during freezing. Eggs, as a binder, contribute to the consistency and mouthfeel we love in ice cream. Understanding the function of eggs as binders adds depth to your ice cream-making knowledge. Analyzing their role helps improve recipes and ensure delicious results.

A Journey into Ice Cream Making

Delving into the science of ice cream offers insight into its delightful experience. From understanding ingredients to mastering techniques, making ice cream is an art. This exploration reveals the intricate balances that lead to perfect scoops. Knowing the roles that eggs play enriches your perspective on classic ice cream recipes. It encourages experimentation with flavors and textures.

The Rise of Eggless Ice Cream Alternatives

With evolving dietary trends, eggless and vegan ice cream options have gained popularity. These alternatives aim to replicate the creamy texture of traditional varieties. Understanding how eggs function helps create satisfying substitutes. This journey not only honors classic recipes but also embraces modern culinary creativity. Discovering eggless options opens avenues for more inclusive ice cream enjoyment.

The Role of Eggs in Ice Cream

Emulsification: The Secret to Smooth Texture in Eggs in Ice Cream

Eggs play a vital role in emulsifying ice cream mixtures. They help blend fat and water, which can separate easily. This emulsification process is key to achieving a smooth, creamy texture. Without eggs, ice cream may become icy or grainy. Emulsifiers like egg yolks stabilize the mixture for a delightful eating experience!

Enhancing Flavor and Richness with Eggs in Ice Cream

Incorporating eggs into ice cream recipes elevates flavor profiles and richness. Egg yolks add depth and a creamy mouthfeel that enhances overall taste. Their natural richness complements other ingredients beautifully. The unique flavor of eggs brings warmth to ice cream, making each scoop satisfying. This is especially true in custard-based recipes that rely on eggs for depth.

Contributing to Creaminess and Stability with Eggs in Ice Cream

Eggs significantly improve the creaminess and stability of ice cream. They help achieve the desired cream texture by trapping air during the churning process. This increases volume while preventing large ice crystals from forming. As a result, the final product is smooth and velvety. The stability eggs provide is crucial for maintaining quality during storage.

Nutritional Benefits of Eggs in Ice Cream

Beyond their culinary functions, eggs offer valuable nutrition in ice cream. They are a rich source of protein, vitamins, and healthy fats. Including eggs helps increase the nutritional content of ice cream, making it a more wholesome treat. Understanding these benefits allows ice cream makers to appreciate the dual purpose of eggs in recipes !

For a deeper understanding of the functions of eggs, check out this comprehensive guide on the functions of eggs.

An image showing egg yolks being whisked, surrounded by ice cream ingredients like cream and sugar, highlighting the essential role of eggs in creating ice cream.

Explore the essential role of eggs in ice cream-making and their impact on flavor and texture !

Key Ingredients Eggs in Ice Cream

The Importance of Dairy Products

Dairy products are the foundation of any ice cream. Milk and cream provide the necessary fat and texture. The fat content contributes to a creamy mouthfeel that everyone loves. Using high-quality dairy enhances the richness of the final product. A balanced combination of dairy is crucial for achieving optimal flavor.

Sugar : Sweetness and Texture

Sugar plays a vital role in ice cream recipes. It not only sweetens but also affects texture. Sugar lowers the freezing point, making ice cream smoother and less icy. Different sugars, like granulated or powdered, bring unique flavors to the dish. Balancing sweetness is essential to ensure a delightful treat.

Eggs : The Emulsifying Power

Eggs are essential for creating a custard base in many ice cream recipes. They emulsify the mixture, blending fat and water effortlessly. The presence of eggs enhances creaminess and richness, resulting in a luxurious texture. They also help stabilize ice cream to prevent ice crystals. Understanding their role is key to great ice cream !

Flavorings and Add-Ins

Flavorings and add-ins transform basic ice cream into delightful creations. Common flavorings include vanilla, chocolate, and fruit purees. Each adds unique notes to the overall taste. Additionally, mix-ins like nuts, chocolate chips, or cookie pieces provide exciting textures. Creativity with flavors can result in endless variations for everyone to enjoy.

Stabilizers : Maintaining Quality

Stabilizers are often included to improve the texture and shelf life of ice cream. Ingredients like gelatin or guar gum help maintain consistency. They prevent ice crystals from forming while keeping the ice cream creamy. Understanding stabilizers allows for the creation of high-quality ice cream at home. Achieving the right balance is critical !

IngredientsPurposeFlavor Suggestions
MilkProvides liquid base and creaminessWhole milk for richness; skim for lightness
Heavy CreamAdds fat for a rich, smooth textureUse organic cream for better flavor
SugarSweetens the ice cream and affects textureExperiment with brown sugar or honey
EggsEmulsifies and stabilizes the mixtureUse in custard-based ice creams
Vanilla ExtractEnhances flavor and adds aromatic depthTry other extracts like almond or coconut
Fruits (purees)Adds natural sweetness and unique flavorsBerries, mango, or banana work well
Chocolate (cocoa or chips)Introduces rich, sweet flavor to ice creamDark chocolate for intensity; white chocolate for sweetness
Stabilizers (e.g., gelatin)Improves texture and prevents ice crystallizationUse natural stabilizers for home recipes
An organized display of key ingredients for ice cream: milk, cream, sugar, eggs, and various flavorings, set on a wooden kitchen countertop.

Explore the essential role of eggs in ice cream-making and their impact on flavor and texture !

What Makes Ice Cream Creamy ?

The Role of Fat Content

The amount of fat in ice cream plays a crucial role in creaminess. High-fat dairy products like heavy cream contribute significantly to texture. Fat coats the palate, creating a smooth and rich mouthfeel. Ice cream with at least 10% fat achieves that desired creaminess. Balancing fat levels is essential for great ice cream !

Proper Incorporation of Air

Churning ice cream incorporates air into the mixture, a process known as overrun. This creates a lighter, fluffier texture that enhances creaminess. The air makes ice cream easier to scoop and maintains its shape. A well-churned mixture increases volume while avoiding icy textures. Understanding air incorporation is vital for perfect scoops !

Use of Emulsifiers

Emulsifiers, like egg yolks or lecithin, help blend fat and water. They create a stable mixture that prevents separation, resulting in a smoother consistency. Emulsifiers improve texture by minimizing ice crystal formation. The presence of egg yolks, commonly used in custard bases, enhances both creaminess and flavor. Emulsifiers are essential for high-quality ice cream !

Quality Ingredients Matter

Using high-quality ingredients impacts the creaminess of ice cream. Fresh, natural dairy products and pure flavorings yield better results. Avoiding artificial additives helps maintain a smooth texture. Investing in quality ingredients enhances flavor and overall experience. This attention to detail is what sets homemade ice cream apart !

The Right Freezing Process

The freezing method significantly affects ice cream’s creaminess. Rapid freezing reduces ice crystal size, leading to a smoother texture. Home ice cream makers can achieve this with proper churning and freezing techniques. Slow freezing results in larger crystals, which create an undesirable icy texture. Knowing the freezing process is key for creamy perfection !

Definitions and Functions of Binders

Understanding Binders in Culinary Terms

Binders are ingredients that help hold food together, creating a cohesive texture. In ice cream, binders prevent separation of fats and liquids. They enhance the overall structure and integrity of the dish. Common binders include eggs, gelatin, or cornstarch, depending on the recipe. Understanding their role is essential for successful cooking !

The Role of Binders in Ice Cream

In ice cream, binders play a crucial role in texture and stability. They prevent ice crystals from forming, ensuring a smooth consistency. Binders help emulsify fats and water, contributing to the creaminess of ice cream. Without binders, ice cream would become icy and unpleasant. Their presence is vital for achieving high-quality frozen desserts !

Types of Binders Used

Various binders can be used to achieve desired results in ice cream. Eggs are a common choice, providing emulsification and richness. Other options include gelatin, which adds stability, and cornstarch, which thickens the mixture. Each binder affects flavor, texture, and mouthfeel differently. Choosing the right binder is key for perfecting your recipe !

Benefits of Using Binders

Using binders in recipes offers multiple advantages. They improve the texture of ice cream, making it creamier and more enjoyable. Binders also help prevent ingredients from separating, maintaining stability. In addition, they can enhance flavors by allowing better incorporation of ingredients. Understanding these benefits can elevate your cooking game !

Creative Alternatives to Traditional Binders

With the popularity of dietary alternatives, many creative substitutes exist for traditional binders. Plant-based options like aquafaba or nut butters can replace eggs. Alternatives like arrowroot powder or agar-agar serve as vegan stabilizers. Embracing these options allows for diverse recipe adaptations while accommodating various dietary needs. The possibilities are endless !

An informative graphic illustrating different binders used in cooking, showcasing eggs, gelatin, and cornstarch, with a focus on their role in improving texture and stability in ice cream.

Explore the essential role of eggs in ice cream-making and their impact on flavor and texture !

Alternatives to Eggs in Ice Cream Recipes

The Rise of Egg-Free Ice Cream

As dietary preferences evolve, egg-free ice cream recipes are gaining popularity. Many people seek alternatives for allergies or vegan lifestyles. These recipes maintain creaminess without sacrificing flavor or texture. Innovative ingredients are now available to replace eggs effectively. Understanding these substitutes opens new avenues for delicious frozen desserts !

Aquafaba: The Magic of Chickpea Water

Aquafaba is the liquid from canned chickpeas, often used as an egg substitute. This versatile ingredient whips up beautifully, mimicking the texture of egg whites. It adds volume and creaminess to ice creams without altering flavor significantly. Using aquafaba allows for a lighter, airy texture. Explore this fabulous option for egg-free delights !

Nut Butters : Creamy and Flavorful Substitutes

Nut butters, such as almond or cashew butter, serve as excellent egg alternatives. They add healthy fats and a rich flavor profile to ice cream. Nut butters not only enhance creaminess but also boost nutrition. However, consider using them in moderation to avoid overpowering the dish. Their unique flavors can elevate any ice cream recipe !

Silken Tofu: A Protein-Rich Option

Silken tofu is a fantastic option for achieving smooth and creamy ice cream without eggs. Blending silken tofu gives a rich consistency that mimics custard bases. This protein-rich alternative adds thickness without compromising flavor. It’s an excellent choice for both vegan and non-vegan ice cream lovers. Experimenting with silken tofu can be rewarding !

Commercial Egg Replacers : Convenient Solutions

Commercial egg replacers are designed specifically for baking and cooking. These products usually contain starches and leavening agents. They provide an easy solution for creating egg-free ice cream. Their convenience allows for quick adaptations of traditional recipes without trial and error. Explore different brands to find the best fit for your ice cream creations !

A close-up image of fresh eggs on a wooden countertop, with a background featuring creamy ice cream scoops and ingredients like milk and vanilla, emphasizing the role of eggs in ice cream recipes.

Explore the essential role of eggs in ice cream-making and their impact on flavor and texture !

Chef’s Note :

As you dive into the world of making ice cream, understanding the role of eggs can elevate your creations significantly. Eggs are not just a filler; they serve crucial functions that contribute to the overall quality of your ice cream. Here are a few tips to keep in mind :

  1. Quality Matters: Always use fresh, high-quality eggs for the best flavor and texture. The richness of the yolks enhances the creaminess and depth of your ice cream.
  2. Cooking Techniques: When using eggs in your ice cream base, consider making a custard. This method involves gently heating the mixture to incorporate the eggs, ensuring a smooth and safe product. A custard base provides a luxurious mouthfeel that you and your guests will love.
  3. Temperature Control: Make sure to bring your ingredients to room temperature before mixing. This helps achieve a creamy texture and ensures even incorporation of the eggs into the mixture.
  4. Experiment with Different Styles: While traditional recipes often call for whole eggs or just yolks, don’t be afraid to experiment. You can try variations, like using only egg whites for a lighter texture, or blending with alternatives for a unique twist.
  5. Stabilize Wisely: If you’re looking to make egg-free versions, consider other stabilizers that replicate the creaminess and texture that eggs provide. This way, you can cater to various dietary preferences without sacrificing quality.

Enjoy the process of making your ice cream, and don’t hesitate to get creative. Whether you’re sticking to classic flavors or experimenting with new combinations, eggs can help you craft a delightful frozen treat !

By: Gastronome Recipes, January 31, 2025

Turkey Rollups Recipe with Pancakes : A Deliciously Unique Meal

Delicious turkey rollups made with pancakes, served on a colorful plate alongside fresh vegetables and dipping sauce.

Explore the delightful world of turkey rollups with pancakes—a healthy twist for your next meal !

A Unique Culinary Twist

Turkey rollups recipe with pancakes offer a delightful twist on traditional meals. Combining savory turkey and soft pancakes creates a satisfying experience. This unique meal is perfect for any occasion, from brunch to dinner. The versatility ensures that everyone will enjoy this dish. Discover how easy it is to elevate your cooking !

Perfect for Any Mealtime

These turkey rollups recipe with pancakes is suitable for breakfast, lunch, or dinner. Their flavor and presentation make them enticing at any time of day. The rolls can be customized, allowing for endless creativity in the kitchen. Serve with a side salad or favorite dipping sauce for a complete meal. Get ready to impress your family and friends !

Quick and Easy to Prepare

A key benefit of turkey rollups recipe with pancakes is their simplicity. With just a few ingredients, you can whip up a delicious meal in no time. Preparing turkey rollups is a fun activity for families or quick meal prep during busy days. These rollups are a fantastic option for those looking to save time while enjoying great flavors.

Healthier Meal Option for Turkey Rollups Recipe with Pancakes

Not only are these turkey rollups recipe delicious, but they’re also a healthier choice. Turkey is a lean protein that supports muscle growth and keeps you feeling full. Pairing turkey with fresh vegetables adds essential nutrients. Enjoy the satisfying flavors while making mindful choices about nutrition.

What Are Turkey Rollups recipe with Pancakes ?

A Delicious Fusion of Flavors

Turkey rollups recipe with pancakes combine savory and sweet elements into one delightful dish. This fusion brings together tender turkey slices and soft pancakes. The contrast in textures enhances the overall dining experience. They provide a unique alternative to traditional sandwiches or wraps. This innovative meal is sure to please everyone at the table !

The Perfect Portable Meal

These rollups are not only delicious but also incredibly portable. Turkey rollups can be easily packed for lunches or picnics. The convenient size makes them ideal for on-the-go eating. With a variety of fillings and sauces, each rollup can be unique. Enjoy them at work, school, or outdoor gatherings !

Customizable for All Tastes

One of the best features of turkey rollups recipe is their versatility. You can customize the ingredients to suit your preferences. Add cheese, fresh vegetables, or sauces to enhance the flavor profile. This adaptability makes it an excellent choice for families with varying tastes. Experimenting with different combinations keeps mealtime exciting !

Healthy and Satisfying

Turkey is a lean protein that contributes to a balanced diet. By incorporating fresh ingredients, you increase the nutritional value of the meal. This dish is filling yet light, making it suitable for any time of day. Enjoying turkey rollups is a smart choice for health-conscious eaters. Savor the flavors without compromising health goals !

Ideal for Any Occasion

Turkey rollups with pancakes are perfect for various occasions. Whether you’re hosting a brunch, picnic, or casual dinner, these rollups fit right in. Their delightful presentation and taste impress guests of all ages. They also make great snacks for parties or gatherings, ensuring everyone gets something they love !

A Creative Cooking Project of Turkey Rollups recipe with Pancakes

Making turkey rollups can also be a fun cooking activity for families. Get the kids involved in rolling their own creations. It’s a fantastic way to introduce cooking skills and healthy eating habits. Enjoy the process of creating a unique meal together. This interactive experience makes mealtime more enjoyable for everyone !

For a delicious and unique twist on turkey rollups, check out this turkey cornmeal pancake recipe for inspiration !

Turkey rollups made with pancakes, featuring fresh vegetables and sauce, beautifully arranged on a plate for serving.

Explore the delightful world of turkey rollups with pancakes—a healthy twist for your next meal !

Key Ingredients for Turkey Rollups recipe with pancakes

Fresh Turkey

Fresh turkey is the star ingredient in turkey rollups. It provides lean protein that’s healthy and satisfying. Choosing high-quality turkey ensures great flavor and texture. Deli turkey or cooked turkey breast works well for this recipe. Enjoy its savory taste wrapped in pancakes, adding to overall deliciousness !

Soft Pancakes

Soft pancakes act as the perfect vessel for turkey and fillings. They add a subtle sweetness that complements the savory turkey. You can use store-bought or homemade pancakes for added freshness. Their fluffy texture makes the rollups delightful to eat. Pancakes create a unique twist that sets this dish apart !

Flavorful Fillings

Adding flavorful fillings enhances the taste of turkey rollups. You can include cheese, lettuce, or sliced vegetables. Fresh herbs like basil or cilantro also elevate the flavor profile. Experimenting with different combinations keeps the meal exciting and fresh. These fillings add nutrition and vibrant colors to the dish!

Tasty Sauces

Tasty sauces are essential for dipping and drizzling over turkey rollups. Sauce options like ranch dressing, hummus, or salsa add deliciousness. The right sauce elevates the overall experience and brings everything together. Choose sauces that complement the flavors of turkey and pancakes perfectly. Customize your sauces to suit personal taste !

Fresh Vegetables

Including fresh vegetables provides added crunch and nutrition. You can use spinach, bell peppers, or shredded carrots. Vegetables enhance the visual appeal and make the meal healthier. They balance the dish, creating a satisfying flavor contrast. Fresh veggies make turkey rollups both delightful and nourishing !

IngredientsPurposeFlavor Suggestions
Fresh TurkeyProvides lean protein and savory flavorUse smoked turkey for a deeper flavor
Soft PancakesActs as the base; adds textureTry buttermilk pancakes for extra fluffiness
Cheese (e.g., cheddar)Adds creaminess and richnessExperiment with pepper jack for spice
Fresh VegetablesIncreases nutrition and crunchUse spinach, bell peppers, or shredded carrots
Tasty Sauces (e.g., ranch)Enhances flavor and adds moistureTry hummus for a creamy, healthy option
Fresh HerbsAdds freshness and vibrant flavorConsider basil or cilantro for brightness
Key ingredients for turkey rollups: fresh turkey, soft pancakes, colorful vegetables, and tasty sauces, neatly arranged on a wooden countertop.

Explore the delightful world of turkey rollups with pancakes—a healthy twist for your next meal !

How to Prepare Turkey Rollups recipe with pancakes in Easy Steps

Gather Your Ingredients

Before starting, ensure you have all your ingredients ready. Fresh turkey, soft pancakes, tasty fillings, and sauces are essential. Having everything organized makes preparation straightforward. Gather utensils like a cutting board and knife for ease. This initial step sets you up for success while creating delicious rollups !

Prepare the Pancakes

If you’re making pancakes from scratch, mix flour, eggs, and milk in a bowl. Alternatively, use store-bought pancakes for convenience. Cook pancakes on a hot skillet until golden brown. Make sure they are soft and pliable for easy rolling. Allow them to cool slightly before assembling the rollups!

Layer the Ingredients

Lay a pancake flat on a clean surface and place a slice of turkey on top. Add your choice of cheese, fresh vegetables, and sauces. Be creative with your layering, as different combinations can elevate flavors. Ensure not to overload; keep it manageable for rolling. This step is critical for delicious and neat rollups !

Roll It Up

Gently roll the pancake around the turkey and fillings, creating a tight roll. Tuck in the sides to minimize spillage while rolling. Use your hands to ensure a secure wrap without breaking the pancake. A solid roll keeps everything intact during cooking and serving. This technique is key for presentation !

Cook and Serve Turkey Rollups recipe with pancakes

Heat a non-stick skillet over medium heat and lightly toast the rolled-up pancake seam-side down. Cook until golden brown on all sides, ensuring the cheese melts. Slice the rollups into smaller pieces for easier serving. Arrange beautifully on a platter and serve with your preferred dipping sauces. Enjoy your flavorful turkey rollups !

Creative Ways to Serve Turkey Rollups recipe with pancakes

Elegant Appetizer Platter : Turkey Rollups recipe with Pancakes

Create a stunning appetizer platter with turkey rollups as the star. Arrange sliced rollups on a decorative serving tray. Add fresh vegetables, cheese cubes, and dips for variety. This visually appealing presentation wows guests at parties and gatherings. An elegant platter showcases your creativity and enhances guest enjoyment !

Pair with Dipping Sauces

Serving turkey rollups with a variety of dipping sauces elevates the experience. Consider ranch, hummus, or spicy mustard for options. The right sauce complements the flavors of the rollups beautifully. Provide small bowls for each sauce to encourage dipping. This interactive element adds fun to any meal setting !

Wrap in Lettuce for Healthy Bites

For a low-carb twist, wrap turkey rollups in lettuce instead of pancakes. Leafy greens add a fresh and crunchy texture. This alternative is perfect for health-conscious eaters looking for a lighter option. Serve with a squeeze of lemon or your favorite light dressing for extra flavor. It’s a refreshing way to enjoy turkey !

Create a Fun Rollup Bar

Set up a DIY rollup bar during your next gathering. Provide various fillings, pancakes, sauces, and fresh toppings for guests to customize. Allowing everyone to create their version adds interaction and excitement. This fun setup makes for a memorable experience. Enjoy the variety and creativity at your meal !

Serve as a Quick Lunch with Turkey Rollups recipe with Pancakes

Turkey rollups are a perfect option for packing lunchboxes. Prepare them ahead of time and refrigerate for easy access. Pair with fresh fruit, nuts, or yogurt for a balanced meal. The convenience and flavor make them a favorite. Enjoying turkey rollups for lunch keeps things simple and satisfying !

Creative presentation of turkey rollups served on a platter with various dipping sauces, fresh vegetables, and a colorful arrangement.

Explore the delightful world of turkey rollups with pancakes—a healthy twist for your next meal !

Nutritional Benefits of Turkey Rollups recipe with pancakes

Lean Protein Powerhouse

Turkey is a fantastic source of lean protein. It helps build and repair muscles, supporting overall health and fitness. Incorporating turkey into meals contributes to satiety and energy levels. This lean meat has lower fat compared to other protein sources, making it a smart choice. Delicious and nutritious, turkey rollups fuel your body well !

Low in Calories

Turkey rollups recipe can be a low-calorie option, especially when paired with fresh vegetables. By using whole-grain pancakes or lettuce wraps, you can further reduce calories. Maintaining a healthy weight becomes easier with this satisfying meal. Their filling nature helps curb hunger effectively. Enjoy a delicious meal without guilt or compromise !

Rich in Vitamins and Minerals

Turkey is packed with essential vitamins and minerals. It contains B vitamins, especially B6 and B12, which support energy and metabolism. Nutrients found in turkey promote brain function and cardiovascular health. Additionally, vegetables provide fiber and antioxidants, enhancing overall nutrition. Consuming turkey rollups means getting a variety of essential nutrients in one dish !

Balanced Nutrition of Turkey Rollups recipe with Pancakes

Turkey rollups recipe with pancakes offer a balanced meal option that combines protein, healthy fats, and carbohydrates. By adding cheese and vegetables, you create a well-rounded dish that satisfies nutritional needs. This combination supports energy levels and fuels daily activities. Striking a balance in meals is crucial for long-term health. Enjoying turkey rollups contributes to a healthy lifestyle !

Versatile for Dietary Needs

Turkey rollups recipe with pancakes can easily accommodate various dietary preferences and restrictions. They can be made gluten-free with alternative wraps or used as a low-carb option. Vegetarian variations can include different fillings while maintaining delicious flavors. This versatility makes turkey rollups enjoyable for everyone. A great meal option for family and friends with diverse diets !

Healthy turkey rollups on a plate, highlighting their nutritional components, including fresh veggies and lean turkey slices, presented appealingly.

Explore the delightful world of turkey rollups with pancakes—a healthy twist for your next meal !

Chef’s Note :

As you embark on creating these delightful turkey rollups recipe with pancakes, remember that cooking is an art that allows for creativity. This recipe not only combines flavors but also invites you to experiment with your favorite ingredients. Here are a few tips to ensure your turkey rollups are a hit:

  1. Ingredient Quality Matters: For the best flavor, choose fresh, high-quality turkey and fresh vegetables. The taste will be significantly enhanced when you use premium ingredients.
  2. Pancake Perfection: If making pancakes from scratch, ensure they are soft and pliable. This will allow for easy rolling and prevent breakage. Let them cool slightly before assembling to make handling easier.
  3. Customize Your Fillings: Don’t hesitate to get creative with your fillings! You can add flavors like avocado, different cheeses, or even fruits, depending on your preference. This recipe is versatile, so try out your own combinations!
  4. Sauce Selection: The right dipping sauce can elevate your turkey rollups to the next level. Consider a variety of options for serving, such as tangy sauces, creamy dips, or spicy salsas to suit everyone’s taste.
  5. Great for Meal Prep: These turkey rollups are perfect for meal prepping. Make a batch ahead of time and store them in the fridge for quick and easy lunches throughout the week.

Enjoy the process of making these turkey rollups, and don’t forget to share your creations with friends and family. Happy cooking !

By: Gastronome Recipes, January 30, 2025

Indulge in Pina Colada Cupcakes : Your Next Dessert Obsession

Delicious Pina Colada cupcakes decorated with pineapple and coconut flakes, served on a bright beach-themed table.

Discover the sweet joy of Pina Colada cupcakes – a refreshing dessert bursting with summer flavors !

Welcome to a Tropical Delight !

Pina colada cupcakes are a tropical treat bursting with flavor. These cupcakes combine the classic flavors of coconut and pineapple, creating a refreshing dessert. Their sweet aroma fills the kitchen while baking, attracting everyone around. Perfect for parties, these cupcakes add fun to any dessert table. Get ready to indulge in this delightful twist!

A Celebration of Flavor

Imagine sinking your teeth into a soft cupcake. The taste of fresh pineapple perfectly complements the creamy coconut frosting. With every bite, you’re transported to a sunny beach with swaying palm trees. This dessert is not just a cupcake; it’s an experience! Enjoy these delightful flavors at any festive gathering or beach-themed party.

Perfect for Any Occasion

These Pina Colada cupcakes are ideal for various occasions. Whether it’s a summer barbecue or a birthday party, they shine on dessert tables. Guests will admire their vibrant look and delicious flavor. As a unique treat, they can surprise and delight your family and friends. Elevate your celebrations with these tropical treats !

Easy to Make Pina Colada Cupcakes at Home

You don’t need to be a professional baker to make these cupcakes. With simple ingredients and straightforward steps, anyone can whip them up. Following the right recipe ensures delicious results every time. Gather your ingredients, and let’s embark on this tropical baking journey together !

The Joy of Baking Together

Baking Pina Colada cupcakes can be a fun family activity. Involve your loved ones in the process, fostering happy moments. Children can help measure ingredients, and everyone can enjoy tasting the batter. This shared experience creates lasting memories while enjoying delicious tropical flavors. Start a new tradition by baking these cupcakes together !

What Are Pina Colada Cupcakes ?

A Tropical Gourmet Experience

Pina colada cupcakes offer a unique twist on the classic cocktail. These cupcakes feature delicious coconut and pineapple flavors in every bite. Inspired by the beloved tropical drink, they bring joy to dessert tables. With a light, fluffy texture, these cupcakes evoke the essence of summer. Enjoy these delightful treats during warm weather and celebrations !

Perfectly Flavored Pina Colada Cupcakes Batter

The cupcake batter usually consists of essential ingredients such as flour, sugar, eggs, and baking powder. However, the star ingredients are fresh pineapple and creamy coconut. This combination creates a moist cupcake that’s bursting with flavor. The hint of rum can enhance the tropical vibe, making it even more enjoyable. Experience the magic of these flavors blending together !

Creamy Frosting to Top It Off

One of the key elements of Pina Colada cupcakes is the frosting. Typically made with cream cheese, butter, and powdered sugar, the frosting is heavenly. Incorporating coconut cream and pineapple juice makes it even more tropical. This irresistible frosting complements the cupcake perfectly, adding a creamy texture. Decorate with coconut flakes for a stunning visual appeal !

Ideal for Any Celebration

Pina colada cupcakes are perfect for various occasions, from summer parties to birthdays. Their vibrant flavors make them a crowd favorite, appealing to both adults and children. Guests will be enchanted by their tropical flair and delectable taste. Presenting these cupcakes adds a festive touch to any dessert table. Celebrate special moments with these delightful treats !

Easy to Customize and Adapt

These cupcakes offer a fantastic base for customization. You can adjust the sweetness or incorporate additional flavors like lime or rum. Add fun decorations such as mini pineapple toppers or colorful sprinkles. Vegan and gluten-free adaptations are easy to achieve as well. The possibilities for a Pina Colada cupcake are endless, allowing for creativity !

For a delightful and easy-to-follow Pina Colada Cupcake recipe, you can check out this resource from Betty Crocker. The recipe provides clear instructions and tips to create these tropical treats perfectly !

Delicious Pina Colada cupcakes with coconut frosting, garnished with pineapple slices and coconut flakes, displayed on a festive table.

Discover the sweet joy of Pina Colada cupcakes – a refreshing dessert bursting with summer flavors !

Key Ingredients for Delicious Tropical Cupcakes

Flour : The Foundation of Delicious Tropical Cupcakes

All-purpose flour forms the base of these delightful cupcakes. It creates a sturdy structure while keeping the texture light. Flour absorbs moisture and helps the other ingredients combine seamlessly. Choosing the right flour is essential for achieving the ideal cupcake consistency. Don’t forget to sift it for a finer texture !

Coconut : A Key Ingredient for Delicious Pina Colada Cupcakes

Coconut is the star ingredient for Pina Colada cupcakes. You can use shredded coconut, coconut milk, or coconut cream. It brings a rich, tropical flavor that complements pineapple beautifully. The addition of coconut adds moisture and texture to the cupcake. With coconut, every bite transports you to a beach paradise!

Pineapple : The Fresh Element in Delicious Pina Colada Cupcakes

Fresh pineapple chunks or crushed pineapple infuse the cupcakes with vibrant flavor. They add natural sweetness and juiciness to each bite. Pineapple also provides a refreshing contrast to the richness of coconut. Make sure to drain excess juice for balanced cupcakes. Enjoy the delightful combination of sweetness and zest !

Cream Cheese Frosting : The Perfect Topping

A rich cream cheese frosting elevates these cupcakes to perfection. Made with cream cheese, butter, and powdered sugar, it’s creamy and luscious. Adding pineapple juice or coconut cream enhances the tropical flavor. This irresistible frosting complements the cupcakes beautifully. Don’t forget to garnish them with coconut flakes or pineapple slices !

IngredientsPurposeFlavor Suggestions
All-Purpose FlourProvides structure and textureUse cake flour for a lighter texture
Granulated SugarSweetens the cupcakes; aids in browningExperiment with brown sugar for depth
Shredded CoconutAdds rich tropical flavorUse toasted coconut for a nutty taste
Fresh PineappleInfuses freshness and moistureIncorporate crushed pineapple for more flavor
Cream CheeseCreates rich, creamy frostingBlend with coconut cream for extra tropical flavor
Ingredients for Pina Colada cupcakes: flour, sugar, coconut, pineapple, and cream cheese, arranged on a wooden countertop.

Discover the sweet joy of Pina Colada cupcakes – a refreshing dessert bursting with summer flavors !

Step-by-Step Guide to Baking Pina Colada Cupcakes

Gather Your Tropical Ingredients

Begin by collecting all your essential ingredients for Pina Colada cupcakes. You’ll need flour, sugar, shredded coconut, and fresh pineapple. Ensure that you have eggs, baking powder, and cream cheese for luscious frosting. Having everything ready simplifies the baking process significantly. Fresh ingredients are key to delicious flavors in every bite !

Prepare Your Cupcake Batter

In a large mixing bowl, combine the dry ingredients: flour, baking powder, and sugar. In a separate bowl, mix wet ingredients: eggs, coconut milk, and melted butter. Gradually combine the dry and wet mixtures while stirring gently. Add shredded coconut and crushed pineapple for extra flavor. Ensure the batter is smooth and lump-free before baking !

Fill the Cupcake Liners

Line a cupcake tin with vibrant cupcake liners, adding a tropical flair. Use a cookie scoop or spoon to fill each liner about two-thirds full. This allows room for the cupcakes to rise perfectly without spilling over. Bake in a preheated oven for about 18-20 minutes. Keep an eye on the tops—they should be golden brown and springy to the touch !

Test for Doneness

Once the baking time is up, it’s essential to check if the cupcakes are done. Insert a toothpick into the center of a cupcake—it should come out clean. If there’s batter sticking to the toothpick, return the cupcakes to the oven for a few more minutes. Perfectly baked cupcakes will have a light, springy texture.

Make Cream Cheese Frosting

While the cupcakes are baking, whip up a delicious cream cheese frosting. In a mixing bowl, combine softened cream cheese and butter, beating until smooth. Gradually add powdered sugar and a splash of pineapple juice for tropical flavor. Mix until the frosting is fluffy and creamy. Taste and adjust sweetness as needed before decorating !

Cool the Cupcakes

Once baked, remove the cupcakes from the oven and let them cool in the tin for about 5 minutes. Carefully transfer them to a wire rack to cool completely. Cooling is essential for preventing the frosting from melting. Ensure the cupcakes are completely cool before applying the frosting for the best results.

Decorate and Enjoy Your Pina Colada Cupcakes

Once the cupcakes are completely cool, it’s time to decorate! Generously pipe the cream cheese frosting onto each cupcake using a piping bag. Sprinkle shredded coconut on top for a beautiful finish. Optionally, add pineapple chunks or slices for a festive touch. Enjoy these Pina Colada cupcakes with friends and family for a tropical celebration !

Store Leftover Cupcakes Properly

If you have leftover cupcakes, store them in an airtight container at room temperature. For longer freshness, refrigerate them, especially with cream cheese frosting. Cupcakes are best enjoyed within a few days, but they can also be frozen for later. Enjoy your tropical delights whenever the craving strikes !

A step-by-step process of baking Pina Colada cupcakes, featuring fresh ingredients, mixing bowls, and beautifully decorated cupcakes.

Discover the sweet joy of Pina Colada cupcakes – a refreshing dessert bursting with summer flavors !

Decorating Your Pina Colada Cupcakes for a Tropical Vibe

Choosing the Right Frosting

The frosting is essential for achieving a tropical vibe. Use a creamy and smooth cream cheese frosting, flavored with pineapple juice. This adds a delightful tropical flavor that complements the cupcakes. Ensure the frosting is light and airy for perfect piping. A beautiful frosting enhances the overall appearance of your tropical cupcakes !

Creative Piping Techniques for Pina Colada Cupcakes

Get creative with your piping techniques to elevate the cupcake’s look. Use different piping tips, such as star or petal tips, for beautiful designs. Create swirls, rosettes, or even waves reminiscent of ocean tides. Experimenting with colors can also enhance the tropical theme. Beautifully piped frosting makes your cupcakes stand out on any dessert table !

Adding Tropical Garnishes

Garnishing your cupcakes can enhance their tropical presentation. Sprinkle toasted coconut flakes on top for added texture. Use colorful sprinkles that resemble beach sand or ocean waves. Fresh pineapple chunks or slices make stunning and delicious decorations. Embellishments not only look great but also entice your guests to enjoy these tropical treats !

Incorporating Fun Toppers

Add fun and whimsical cupcake toppers that enhance the tropical theme. Consider using paper umbrellas, edible flowers, or tropical fruit picks. These add a playful touch and make your cupcakes look festive. Creative toppers can catch the eye and bring smiles to everyone. It’s all about creating a delightful experience with your cupcakes !

Presentation for a Tropical Touch

Finally, consider the presentation when serving your decorated cupcakes. Arrange them on colorful platters that match your tropical theme. Use palm leaves or vibrant tablecloths to enhance the ambiance. Individual cupcake boxes are perfect for gifts or take-home treats. A beautiful presentation makes all the difference in showcasing your tropical cupcakes !

Why Pina Colada Cupcakes Are a Must-Try for Your Dessert Table

A Flavorful Tropical Escape with Pina Colada Cupcakes

Pina Colada cupcakes offer a delightful escape to tropical paradises. With every bite, you experience luscious coconut and sweet pineapple flavors. The combination creates a refreshing treat that transports you to sunny beaches. Whether you love fruity desserts or tropical vibes, these cupcakes satisfy your cravings beautifully. Their unique flavor profile makes them unforgettable !

Pina Colada Cupcakes Are Perfect for Any Occasion

These cupcakes are versatile and perfect for any gathering. Whether it’s a summer barbecue, birthday celebration, or tropical-themed party, they fit right in. Their vibrant colors and enticing flavors attract guests of all ages. Delight your friends and family with this unique twist on traditional cupcakes. Pina Colada cupcakes enhance any dessert table dramatically !

Visually Stunning Presentation of Pina Colada Cupcakes

Visually, Pina Colada cupcakes are a feast for the eyes. Their creamy frosting and tropical garnishes create beautiful presentations. Adding fun decorations, like mini umbrellas or edible flowers, enhances their appeal. A stunning cupcake display catches attention at any event. A well-presented dessert table leaves a lasting impression on your guests !

Easy to Make and Customize

Baking Pina Colada cupcakes is simple and enjoyable. With straightforward steps, you don’t need to be a seasoned baker. These cupcakes are also incredibly customizable; consider adding your favorite flavors or adjusting sweetness. Making them vegan or gluten-free is also achievable, ensuring everyone can enjoy these delicious treats. The possibilities are endless !

A Crowd-Pleasing Delight

Finally, Pina Colada cupcakes are loved by many. Their delightful taste and festive presentation make them crowd-pleasers. Guests will rave about their unique flavors and beautiful appearance. They are sure to become a hit at your next gathering. Treat your friends and family to these tropical delights, and watch them disappear quickly !

Delicious Pina Colada cupcakes with coconut frosting and tropical garnishes presented on a festive dessert table.

Discover the sweet joy of Pina Colada cupcakes – a refreshing dessert bursting with summer flavors !

Chef’s Note:

As you dive into the delightful world of Pina Colada cupcakes, remember that baking is both an art and a science. These tropical treats are inspired by the classic cocktail, combining the beloved flavors of coconut and pineapple into a luscious cupcake format. Here are a few tips to ensure your baking adventure is a success !

  1. Ingredient Quality Matters: For the best flavor, opt for high-quality coconut and fresh pineapple. Real ingredients will enhance the overall taste and texture of your cupcakes, making them truly special.
  2. Baking Time is Key: Keep a close eye on your cupcakes while they bake. Overbaking can lead to dry results, while perfectly baked cupcakes are soft and moist. A toothpick inserted in the center should come out clean or with a few moist crumbs.
  3. Customizing Flavors: Feel free to personalize your Pina Colada cupcakes! You can add a splash of rum to the batter for an authentic cocktail flavor or incorporate lime zest for a zesty twist. The beauty of baking is that you can make it your own!
  4. Frosting Techniques: Don’t be afraid to experiment with different piping tips when decorating your cupcakes. A simple swirl can look elegant, and a little sprinkle of toasted coconut or a slice of fresh pineapple on top adds the perfect finishing touch.
  5. The Joy of Sharing: These cupcakes are ideal for gatherings, parties, or as a sweet surprise for loved ones. The joy of sharing delicious treats often makes them taste even better, so enjoy the smiles they bring !

Embrace the process, and have fun baking your Pina Colada cupcakes. May they bring a burst of tropical sunshine to your kitchen and delight everyone who gets to indulge in their sweetness !

By: Gastronome Recipes, January 30, 2025

Eggnog Cookies Recipe : A Festive Twist on a Classic Treat

Festive eggnog cookies with spiced flavor, soft texture, and holiday sprinkles on a rustic wooden table.

Festive eggnog cookies—soft, spiced, and perfect for the holidays !

Why Eggnog Cookies recipe Are the Ultimate Holiday Treat

The Magic of Eggnog in Baking

Eggnog cookies recipe bring the rich, creamy flavor of eggnog into every bite. The combination of nutmeg, cinnamon, and vanilla creates a warm, spiced aroma. These cookies are soft, chewy, and perfect for holiday gatherings. They capture the essence of festive drinks in a delightful dessert. Everyone loves how they taste like Christmas in cookie form.

A Festive Twist on Classic Sugar Cookies

Eggnog cookies recipe are a creative upgrade to traditional sugar cookies. They incorporate the creamy texture and spiced flavor of eggnog. This twist makes them stand out at holiday parties and cookie exchanges. They’re easy to make and even easier to enjoy. Perfect for adding a unique touch to your dessert table.

Perfect for Christmas, Thanksgiving, and New Year’s

These cookies are versatile and fit any holiday occasion. Whether it’s Christmas morning or a New Year’s Eve party, they’re always a hit. Their festive flavor pairs well with hot cocoa, coffee, or even more eggnog. They’re a must-have for your holiday baking list. A treat that brings joy to every celebration.

Why Everyone Loves This Festive Dessert

Eggnog cookies recipe are loved for their nostalgic flavor and soft texture. They remind people of cozy winter nights and family traditions. Kids and adults alike enjoy their sweet, spiced taste. They’re also fun to decorate with icing and sprinkles. A dessert that truly embodies the holiday spirit.

What Are Eggnog Cookies recipe ?

A Festive Flavor Combination

Eggnog cookies recipe are delightful treats blending the creamy richness of eggnog with the satisfying chew of a classic cookie. These cookies often incorporate warm spices, like cinnamon and nutmeg, reminiscent of the holiday beverage itself. The result? A festive and delicious cookie perfect for the holiday season. Expect a soft, comforting texture. Homemade cookies are best.

The Magic of Eggnog in Cookie Form

The essence of eggnog—that unique blend of cream, eggs, and spices—infuses these cookies with unmistakable flavor. This festive spirit shines through in every bite. Many recipes include rum extract for extra holiday cheer. Think creamy, comforting, and delicious. Try a new recipe this year.

Beyond the Classic Christmas Cookie

While often associated with Christmas baking, eggnog cookies recipe can be enjoyed any time of year. Their rich flavor profile transcends seasonal limitations. Their versatility makes them enjoyable year-round. This dessert brings holiday joy all year. Enjoy these cookies anytime!

Texture and Taste : A Perfect Blend

Eggnog cookies recipe typically boast a soft, chewy texture. This contrasts beautifully with the warming spices. They are a perfect blend of soft and chewy. The creamy eggnog adds delightful richness. These cookies are a sweet delight. They’re utterly irresistible.

Variations on a Theme for Eggnog cookies recipe

From simple drop cookies to more elaborate designs, eggnog cookie recipes offer endless possibilities. You can experiment with different shapes and additions. Add nuts or chocolate chips. Customize them to your liking. They’re versatile and adaptable. Easy recipes abound online.

Try the BEST eggnog cookies recipe! They’re soft, chewy, and full of amazing holiday flavor. Check out this delicious recipe here !

A close-up shot of delicious, soft eggnog cookies, sprinkled with cinnamon.

Festive eggnog cookies—soft, spiced, and perfect for the holidays !

Key Ingredients for the Perfect Eggnog Cookies recipe

The Star of the Show : Eggnog

The foundation of these delightful cookies, eggnog brings its signature creamy texture and warm spices. Use store-bought or homemade eggnog. Quality eggnog matters. Rich eggnog is key. Experiment with different brands.

Buttery Goodness : Unsalted Butter

Unsalted butter contributes richness and helps create a tender crumb. Control the salt level. Use high-quality butter. Soft butter is essential. Butter adds to the flavor.

Sweetness and Structure : Sugar

Granulated sugar provides sweetness and helps bind the ingredients. Brown sugar adds moisture. Balance sweetness carefully. Sugar aids texture. Adjust sugar to your taste.

The Binding Agent : Flour

All-purpose flour provides structure and helps hold the cookies together. Avoid overmixing. Flour impacts texture. Use good quality flour. The right flour matters.

Warming Spices : A Flavor Symphony

Cinnamon, nutmeg, and allspice complement the eggnog’s flavors. Ground spices are best. Add a dash of ginger. Spices enhance the taste. Experiment with spice levels.

IngredientsPurposeFlavor Suggestions
EggnogFlavor base, creaminess, moistureUse a high-quality eggnog; consider adding rum extract
Unsalted ButterTenderness, richnessUse high-quality butter for best flavor
Granulated SugarSweetness, structureAdjust to preference; brown sugar adds moisture
All-Purpose FlourStructure, binding agentUse good quality flour
CinnamonWarm spice, holiday flavorAdjust to preference; use freshly ground cinnamon if possible
NutmegWarm spice, holiday flavorAdjust to preference; use freshly grated nutmeg if possible
AllspiceWarm spice, complex flavorAdjust to preference; use freshly ground allspice if possible
A close-up shot of key eggnog cookie ingredients: eggnog, butter, sugar, flour, and spices, arranged attractively

Festive eggnog cookies—soft, spiced, and perfect for the holidays !

Step-by-Step Guide to Making Eggnog Cookies recipe

Prep Work : Gathering Your Ingredients

Before you begin baking, ensure you have all your ingredients prepped and ready. This includes measuring out your flour, sugar, and spices. Soften your butter. Crack your eggs. Read the recipe carefully. Gather all baking supplies.

Creaming Butter and Sugar : A Sweet Start

Begin by creaming together the softened butter and sugar until light and fluffy. This incorporates air. Use an electric mixer. Cream until pale and fluffy. This step is crucial.

Blending the Wet Ingredients : Eggnog Magic

Gradually add the eggnog to the creamed mixture. Mix until combined. Don’t overmix the batter. Add vanilla extract here. Combine wet ingredients well.

Incorporating Dry Ingredients : Gentle Folding

Gradually add the dry ingredients (flour and spices) to the wet ingredients. Fold gently until just combined. Overmixing leads to tough cookies. Mix until fully combined. Avoid overmixing the batter.

Serving and Storing Your Eggnog Cookies recipe

Serving Suggestions for Eggnog Cookies recipe

Serve your eggnog cookies recipe on a pretty platter or in a festive tin. A sprinkle of powdered sugar adds elegance; cinnamon complements the spices. Consider a tiered stand for an impressive display, or arrange them around a small Christmas village. Serve with coffee, hot cocoa, or even a glass of eggnog for a complete holiday experience. Sharing them with loved ones enhances the enjoyment.

Room Temperature Delight : Best Served Fresh

Eggnog cookies recipe are best enjoyed at room temperature. Let them cool completely on a wire rack for optimal texture and flavor. Room temperature allows the flavors to fully develop and prevents a soggy bottom. While a quick microwave warm-up might soften them, room temperature offers the best balance of texture and taste. Enjoy them fresh for the ultimate experience.

Storage Solutions : Keeping Them Fresh

Store leftover cookies in an airtight container at room temperature for up to three days. This prevents moisture loss and keeps them soft. Choose a well-sealed container and store it in a cool, dry place away from heat and direct sunlight. If they start to stale, a brief microwave warm-up might help.

Freezing for Future Indulgence : Long-Term Storage

Freeze cookies in a freezer-safe container or bag for up to two months. For easier portioning, freeze them individually before placing them in a larger container. Thaw at room temperature or gently warm in the microwave. Freezing helps preserve their flavor and texture for later enjoyment.

Gifting Your Creations : Sharing the Joy

Package cookies attractively for gifting—festive bags tied with ribbons make charming presents. A handwritten card adds a personal touch. These homemade cookies are a thoughtful and delicious gift for friends, family, or colleagues, spreading holiday cheer.

A step-by-step photo collage showing the process of making eggnog cookies, from creaming butter and sugar to baking and cooling.

Festive eggnog cookies—soft, spiced, and perfect for the holidays !

Common Mistakes to Avoid when preparing Eggnog Cookies recipe

Overmixing the Dough : A Texture Tragedy

Overmixing develops gluten, resulting in tough cookies. Gently fold dry ingredients into wet ingredients until just combined. Avoid over-creaming the butter and sugar. A slightly undermixed batter is better than an overmixed one. Aim for a slightly lumpy, evenly moistened consistency.

Incorrect Baking Time : Soggy or Burnt Cookies

Underbaking produces soft, unbaked cookies; overbaking creates dry, hard ones. Monitor cookies closely during the last few minutes. Use a toothpick test: a few moist crumbs, not wet batter, indicate doneness. Oven temperatures vary, adjust baking time accordingly.

Using Cold Ingredients : A Consistency Catastrophe

Cold butter and eggs hinder proper creaming and emulsification. Soften butter completely and use room-temperature eggs for optimal results. This ensures a lighter, fluffier dough and better texture.

Neglecting Cooling : A Structural Failure

Let cookies cool completely on the baking sheet before transferring them to a wire rack. Hot cookies are fragile and prone to breakage. Cooling allows them to firm up and retain their shape.

Improper Storage : A Freshness Faux Pas

Store cookies in an airtight container at room temperature to maintain freshness. Avoid refrigeration, which can dry them out. Proper storage prevents staleness and preserves their delicious texture.

Eggnog Cookie Baking Mistakes

Festive eggnog cookies—soft, spiced, and perfect for the holidays !

Chef’s Note

As you embark on the delightful journey of baking these Eggnog Cookies, remember that this recipe is not just about the ingredients, but also about the festive spirit that comes with it. Eggnog, a cherished holiday beverage, brings its rich, creamy flavor and seasonal spices into these cookies, making them a perfect treat for gatherings and celebrations.

For the best flavor, use high-quality eggnog and fresh spices like nutmeg and cinnamon. Freshly grated nutmeg can elevate the taste significantly. These small choices can make a big difference in the overall quality of your cookies.

To achieve soft, chewy cookies, be mindful of your baking time. Overbaking can lead to dryness. The cookies should be slightly golden at the edges but still soft in the center when you take them out of the oven. If you have the time, consider chilling the cookie dough for about 30 minutes before baking. This helps the cookies maintain their shape and enhances the flavors.

Feel free to customize your eggnog cookies by incorporating add-ins like chocolate chips, chopped nuts, or dried fruits for added texture and flavor. This is a chance to put your own twist on the classic recipe!

These cookies pair wonderfully with a warm cup of eggnog or a rich hot chocolate. They also make a great gift when packaged in festive boxes for friends and family. Enjoy creating a batch of these scrumptious Eggnog Cookies, and may they add a touch of joy and warmth to your holiday festivities !

By: Gastronome Recipes, January 30, 2025

Your Ultimate Peach Blossom Cookie Recipe for Joyful Celebrations

A delightful assortment of peach blossom cookies arranged on a plate, showcasing their flower-like shape and peach color, garnished with fresh peaches.

Explore the delightful world of peach blossom cookies, a perfect blend of flavor and tradition !

A Sweet Delicacy for Every Occasion

Peach blossom cookies are a beloved pastry that blends tradition and flavor. Their unique appearance resembles delicate peach blossoms, making them visually appealing. These cookies combine the sweetness of peaches with buttery richness. Perfect for holidays, celebrations, or simply indulging, these treats are versatile. Their charm lies not only in taste but also in presentation.

The Joy of Baking with Peaches

Using fresh peaches adds a delightful flavor to each cookie. These fruits not only enhance the sweetness but provide moisture. Incorporating seasonal ingredients creates a fun and fresh experience. Baking with peaches is a fantastic way to celebrate summer flavors. The joy of blending fruity goodness with cookie dough results in extraordinary treats.

Discovering Cultural Roots

Peach blossom cookies hold cultural significance in many communities. Traditionally, they are made to symbolize prosperity and good fortune. Exploring their origins reveals delightful stories and customs. Sharing these cookies connects people and traditions during festive gatherings. They’re more than just sweets; they represent love and celebration.

Easy to Make and Enjoy

One of the best aspects of peach blossom cookies is their ease of preparation. With a few simple ingredients, you can create delightful treats. Whether you’re a seasoned baker or a novice, the process is straightforward. Tackling this recipe allows for creativity and customization. Enjoying your homemade peach blossom cookies will delight both family and friends.

What Are Peach Blossom Cookies ?

A Delightful Pastry with a Unique Shape

Peach blossom cookies are a charming dessert that mimics the look of real peach blossoms. These cookies feature a soft, chewy texture that melts in your mouth. Traditionally, they are made with flour, sugar, and fresh peaches. The distinct floral shape makes them visually appealing and perfect for celebrations. Their lovely presentation adds an extra touch to any dessert table.

Ingredients That Make a Difference

The primary ingredients in peach blossom cookies include flour, butter, and fresh peaches. The use of ripe, sweet peaches enhances the flavor and moisture of the cookies. Other ingredients may include eggs, sugar, and baking powder. Combining these elements creates a deliciously rich dough full of flavor. The right balance of ingredients is crucial for achieving the perfect texture and taste.

Cultural Significance and Traditions of Peach Blossom Cookies

Peach blossom cookies are not just tasty treats; they hold cultural significance in many regions. They are often served during festive occasions, symbolizing good luck and prosperity. Baking and sharing these cookies is a delightful tradition in various cultures. It fosters community, connecting friends and family through sweet experiences. The cookie’s popularity during holidays highlights its importance in culinary heritage.

Versatile and Customizable Peach Blossom Cookies

One of the best features of peach blossom cookies is their versatility. Bakers can experiment with different flavors, such as almonds or honey, to create unique variations. These cookies can be decorated with icing or sprinkles for special occasions. They also pair wonderfully with a variety of beverages, such as tea or coffee. Customizing peach blossom cookies ensures that they cater to personal preferences and tastes.

For optimal Peach Blossom Toppings in Cookie Run: Kingdom, check out this guide: Gamerant Peach Blossom Guide

A plate of beautifully shaped peach blossom cookies, decorated with delicate icing, and garnished with fresh peach slices, showcasing their unique floral design.

Explore the delightful world of peach blossom cookies, a perfect blend of flavor and tradition !

Key Ingredients for Peach Blossom Cookies

Fresh Peaches : The Star Ingredient

Fresh peaches are the heart of peach blossom cookies. They add natural sweetness and moisture to the dough. Choosing ripe, juicy peaches enhances the overall flavor profile. Their vibrant color also contributes to the visual appeal of the cookies. For the best results, use seasonal peaches when they are at their peak.

Flour : Building the Foundation

All-purpose flour is essential for achieving the right texture in peach blossom cookies. It provides structure and stability, allowing the cookies to hold their shape. The right flour helps create a tender, chewy bite. Combining flour with other ingredients ensures a balanced dough. It’s important to measure accurately for consistent results.

Butter : Adding Richness

Butter plays a crucial role in the flavor and texture of the cookies. Using high-quality unsalted butter enhances richness without overpowering other flavors. The fat content helps create a soft and tender cookie. Cold butter is often used to control dough consistency. Properly creaming the butter with sugar yields a fluffy texture.

Sugar : Sweetening the Deal

Granulated sugar is the key sweetener in blossom cookies. It helps balance the natural sweetness of the peaches while adding its own flavor. The type and amount of sugar used can affect the cookie’s color and texture. For additional flavor, consider using brown sugar or honey. Adjust the sweetness according to personal preference.

Styled Table

IngredientsPurposeFlavor Suggestions
Fresh PeachesProvides sweetness and moisture to the cookies.Use ripe, seasonal peaches for best flavor.
All-Purpose FlourGives structure and stability, ensuring cookies hold shape.Consider cake flour for a softer texture.
Unsalted ButterAdds richness and tenderness to the cookie dough.Use high-quality butter for the best taste.
Granulated SugarSweetens the cookies, balancing peach flavor.Substitute part with brown sugar for complexity.
A collection of key ingredients for peach blossom cookies, including fresh peaches, flour, butter, and sugar, beautifully arranged on a rustic kitchen countertop.

Explore the delightful world of peach blossom cookies, a perfect blend of flavor and tradition !

Step-by-Step Recipe for Peach Blossom Cookies

Delicate Dough Creation

First, cream together the softened butter and sugar until light and fluffy. Then, gradually add in the eggs, one at a time, mixing well after each addition. Slowly incorporate the flour, baking powder, and salt, mixing until just combined. The dough should be soft and pliable; avoid overmixing. Keywords: butter, sugar, eggs, flour, dough.

Shaping the Blossoms

Divide the dough into small balls. Roll each ball into a thin oval, creating a petal-like shape. Gently press a small indentation in the center of each oval to give it a more authentic blossom appearance. Use a tiny amount of pink food coloring to accentuate the blossom effect. Keywords: dough balls, petals, oval shape, indentation, food coloring.

Baking to Perfection

Place the shaped cookies onto a baking sheet lined with parchment paper. Bake in a preheated oven for 10-12 minutes, or until the edges are lightly golden brown. Let them cool completely on a wire rack before decorating. The result should be a light and delicate cookie. Keywords: baking sheet, parchment, golden brown, cooling rack, delicate.

Sweet Finishing Touches of Peach Blossom Cookies

Once cooled, decorate your cookies with a simple glaze. Drizzle with white chocolate, and add a touch of edible glitter or a delicate pink icing for extra whimsy. These cookies are best served fresh but will last for several days in an airtight container. Keywords: glaze, chocolate, glitter, icing, airtight.

Prepping for Baking Success

Before you begin, ensure all your ingredients are at room temperature. This will help them blend smoothly, resulting in a consistent dough. Having your baking sheet and parchment paper ready will streamline the process. Keywords: room temperature, ingredients, smooth dough, baking sheet, parchment.

Storage and Serving Suggestions for Peach Blossom Cookies

Store your cooled cookies in an airtight container at room temperature for up to a week. They’re delightful served with a cup of tea or coffee. Consider adding them to a gift basket or using them to decorate a cake. Keywords: airtight container, room temperature, tea, coffee, gift basket.

A close-up shot of delicately shaped peach blossom cookies, freshly baked and beautifully decorated.

Explore the delightful world of peach blossom cookies, a perfect blend of flavor and tradition !

Variations and Serving Suggestions for Peach Blossom Cookies

Flavor Twists for Your Peach Blossom Cookies

Add a dash of almond extract for a subtle nutty flavor alongside the peaches. Consider using different types of peaches; white peaches offer a unique sweetness. Experiment with adding chopped pistachios or pecans for added crunch and texture. A hint of lemon zest brightens the peach flavor. Infuse your dough with vanilla bean paste.

Creative Decorating Ideas for your Peach Blossom Cookies

Use different colored sugars for a shimmering effect on your cookies. Royal icing provides opportunities for intricate designs. Try using edible glitter for a festive sparkle. Fresh peach slices add a vibrant touch. Consider adding a drizzle of melted white chocolate.

Serving Peach Blossom Cookies with Flair

Serve them on a beautiful cake stand for an elegant presentation. Arrange them on a pretty platter alongside fresh fruit. Pair them with a scoop of vanilla ice cream. A light dusting of powdered sugar adds a touch of elegance. Peach tea or iced tea complements the cookies well.

Storage and Make-Ahead Tips

Store cookies in an airtight container at room temperature for up to three days. Freeze unbaked dough for later baking convenience. Freeze baked cookies for longer storage, up to a month. Thaw frozen cookies at room temperature before serving. Always handle cookies gently to prevent breakage.

Health Benefits and Considerations for Peach Blossom Cookies

Peachy Keen Nutrition

Peaches offer vitamin C and fiber. Our cookies contain some of these nutrients. However, added sugar impacts the overall nutritional profile. Moderate consumption is key for balanced eating. Enjoy as an occasional treat.

Allergy Alert !

Check ingredients for allergens. Common culprits are nuts, eggs, and dairy. Always read labels carefully before baking. Consider using alternatives for dietary restrictions. Inform guests of any potential allergens. Ensure safe preparation practices.

Sweet Treats in Moderation

Cookies are high in sugar and fat. Limit consumption to maintain a healthy diet. Balance treats with nutritious meals and snacks. Enjoy these cookies sparingly. Prioritize overall health and well-being.

Ingredient Spotlight

Use high-quality ingredients when possible. Organic peaches offer extra benefits. Source ingredients responsibly and ethically. Consider seasonal produce for optimal flavor. Sustainable baking practices matter.

Variations and serving suggestions for delicious peach blossom cookies

Explore the delightful world of peach blossom cookies, a perfect blend of flavor and tradition !

Chef’s note

These peach blossom cookies are a delightful treat, perfect for spring celebrations or any occasion that calls for a touch of delicate sweetness. The recipe is designed to be relatively straightforward, even for beginner bakers. The key to success lies in using ripe, flavorful peaches – whether fresh or canned – to achieve that vibrant peach essence throughout the cookies. Don’t be afraid to experiment with the amount of almond extract; a touch more will amplify the delicate nuttiness, complementing the sweetness of the peaches beautifully.

One common pitfall when baking cookies is overmixing the dough. Overmixing develops the gluten in the flour, resulting in tough cookies. Gently mix the wet and dry ingredients until just combined; a few small lumps of flour are perfectly acceptable. Similarly, be mindful of the baking time. Slightly underbaked cookies will be soft and chewy, while overbaked cookies will be dry and crisp. Start checking for doneness a minute or two before the recommended time to avoid overbaking.

Finally, the presentation of these cookies is just as important as their taste. While simple dusting with powdered sugar is lovely, feel free to get creative with the decorating! A simple drizzle of melted white chocolate or a touch of royal icing can elevate these delicate cookies to a truly stunning centerpiece. Consider using a variety of pink and white shades for an extra touch of elegance. Enjoy the process, and most importantly, enjoy the delicious results !

By: Gastronome Recipes, January 30, 2025

Kirkland Salmon: The Best Quality Salmon for Your Table

Introduction: Discover the Quality of Kirkland Salmon

Discover the quality and nutrition of Kirkland Salmon, a perfect addition to your table !

The Appeal of Kirkland Salmon

Kirkland Salmon is a favorite among seafood lovers. Its exceptional quality and freshness make it a standout choice. Sourced from sustainable fisheries, this salmon is both delicious and environmentally friendly. With a variety of options, Kirkland salmon caters to everyone’s taste preferences. Discover why this product consistently earns rave reviews from customers.

Nutritional Powerhouse on Your Plate

Salmon is renowned for its impressive nutritional benefits. Packed with omega-3 fatty acids, it supports heart health and brain function. Additionally, it’s a great source of high-quality protein essential for muscle maintenance. Incorporating Kirkland salmon into your diet can lead to various health advantages. Make healthy eating easy and enjoyable with this versatile seafood option.

Culinary Versatility

One of the best things about Kirkland Salmon is its culinary versatility. It can be grilled, baked, or poached, adapting to different cooking styles. Enjoy it in tacos, salads, or with a side of vegetables for a balanced meal. The rich flavor complements various seasonings and marinades. Elevate your dining experience with delicious salmon-centered recipes.

Definition of Kirkland Salmon

Overview of Kirkland Signature Products

Kirkland Salmon is one of the standout offerings from Costco’s Kirkland Signature line. This private-label brand is known for its commitment to quality and value. Kirkland products undergo rigorous testing to ensure customer satisfaction. The salmon is sourced from reliable fisheries, emphasizing sustainability practices. Customers appreciate Kirkland for providing premium products at accessible prices.

Types of Salmon Available at Costco

Costco offers various types of Kirkland Salmon to meet diverse tastes. Common options include Atlantic, Sockeye, and Coho salmon. Each type has its own unique flavor and texture profile. Kirkland sources its salmon responsibly, promoting eco-friendly practices. Shoppers can easily find fresh or frozen options, catering to all culinary preferences.

Understanding Fillets vs. Whole Fish

When purchasing Kirkland Salmon, customers can choose between fillets and whole fish. Salmon fillets offer convenience and ease of preparation for busy cooks. Whole fish presents a traditional cooking option, ideal for gatherings. Understanding these choices ensures you select the best product for your cooking needs. It allows for flexibility in how you prepare and serve the salmon.

Fresh vs. Frozen: What to Expect

Kirkland Salmon is available in both fresh and frozen formats. Fresh salmon is perfect for immediate preparation and serves as a delightful centerpiece. Frozen salmon locks in flavor and nutrients, making it a convenient choice for meal prep. Both options deliver high-quality taste and nutrition. Shoppers can feel confident in choosing either variety for their kitchen.

To read a detailed review of Kirkland Salmon, check out this informative article here.

A variety of Kirkland Salmon products displayed on a table, showcasing fresh fillets, frozen options, and different types of salmon for purchase.

Discover the quality and nutrition of Kirkland Salmon, a perfect addition to your table !

Nutritional Benefits of Kirkland Salmon

Rich in Omega-3 Fatty Acids

Salmon is one of the best sources of omega-3 fatty acids. These healthy fats promote heart health and reduce inflammation. Omega-3s are critical for brain function and cognitive health. Regular consumption of salmon may lower the risk of chronic diseases. Including salmon in your diet supports overall well-being.

High-Quality Protein Source

Salmon is an excellent source of high-quality protein. Protein is essential for muscle growth, repair, and overall health. It helps maintain a healthy weight by promoting satiety. Incorporating salmon into meals can boost your daily protein intake. Enjoying salmon supports an active lifestyle and physical fitness.

Packed with Essential Vitamins

Kirkland Salmon is loaded with essential vitamins and minerals. Vitamin D supports bone health and immune function. B vitamins, including B12, promote energy production and brain health. The array of nutrients in salmon contributes to a balanced diet. Enjoying salmon means you’re nourishing your body effectively.

Promotes Heart Health

Salmon consumption is strongly linked to improved heart health. The omega-3 fatty acids help lower blood pressure and cholesterol levels. Regularly eating salmon can reduce the risk of heart disease and stroke. Its anti-inflammatory properties also contribute to cardiovascular health. Prioritizing salmon in your diet fosters long-term heart wellness.

Supports Eye Health

Salmon is beneficial for maintaining healthy vision. The antioxidants found in salmon, such as astaxanthin, promote eye health. Consuming salmon can help reduce the risk of macular degeneration. Healthy fats in salmon provide nourishment for the eyes. Including salmon in meals contributes to overall eye care.

Aids in Weight Management

Salmon is effective for those looking to manage their weight. High protein content promotes feelings of fullness and reduces cravings. Including salmon in meals can lead to healthier eating patterns. Its healthy fats support metabolic processes in the body. Incorporating salmon can aid weight loss or maintenance goals.

Supports Brain Health

The nutrients found in salmon are vital for brain health. Omega-3 fatty acids enhance cognitive function and memory. Regular consumption may reduce the risk of neurodegenerative diseases. The presence of antioxidants protects brain cells from damage. Choosing salmon encourages optimal brain health and function throughout life.

Enhances Skin Health

Salmon is beneficial for skin health due to its nutrient profile. Omega-3s help maintain moisture and elasticity in the skin. The antioxidants in salmon mitigate the effects of aging. Consuming salmon supports a healthy, glowing complexion. This seafood option contributes positively to your beauty regimen.

Strengthens Immune System

Salmon supports a strong immune system through its rich nutrient composition. Vitamins and minerals, such as vitamins D and A, enhance immunity. Regularly eating salmon can help ward off seasonal illnesses. Its anti-inflammatory properties also contribute to overall health. Including salmon in your diet boosts your body’s defenses.

May Reduce Inflammation

Consumption of salmon is linked to reduced inflammation in the body. The omega-3 fatty acids help lower chronic inflammation levels. This can significantly benefit individuals with inflammatory conditions. Eating salmon can promote overall health and recovery. Prioritizing salmon promotes a balanced, anti-inflammatory diet.

A nutritious plate featuring grilled salmon fillet, colorful vegetables, and lemon slices, exemplifying the health benefits of salmon.

Discover the quality and nutrition of Kirkland Salmon, a perfect addition to your table !

Key Ingredients of a Delicious Kirkland Salmon

Essential Ingredients to Pair with Salmon

Creating a delicious salmon dish starts with high-quality ingredients. Fresh herbs enhance the flavor and aroma of the dish. Citrus, such as lemon or lime, adds brightness and acidity. Complementary ingredients, including garlic and olive oil, enrich the taste profile. Using fresh, seasonal produce elevates your salmon meal.

Seasonings that Elevate Flavor Profiles

Seasoning is critical to bringing out the best in salmon. Salt and pepper are fundamental for flavor enhancement. Additional spices, like paprika or dill, create unique twists on classic recipes. Marinades can add depth, incorporating elements like honey or soy sauce. Experimenting with seasonings unlocks endless flavor possibilities for your salmon dish.

Fresh Vegetables: Enhancing Nutrition and Taste

Incorporating fresh vegetables adds nutritional value and texture to your salmon dish. Choose colorful options like asparagus, spinach, or bell peppers for balance. The natural sweetness of grilled or roasted vegetables complements salmon beautifully. Accompanying veggies provide essential vitamins and minerals. This creates a well-rounded and satisfying plate.

Suggested Side Dishes: Completing Your Meal

Pairing salmon with appropriate side dishes rounds out the meal. Options include quinoa, rice, or roasted potatoes for hearty additions. Light salads can provide freshness and crunch alongside the main dish. Consider adding whole grains for added fiber and nutrition. Thoughtfully chosen sides enhance the dining experience and make meals delightful.

IngredientsPurposeFlavor Suggestions
Fresh SalmonMain protein source; offers rich flavor and nutrition.Season with lemon zest for brightness.
Olive OilEnhances flavor and helps with cooking process.Infuse with garlic for extra depth.
Fresh HerbsProvides vibrant flavor and aroma to the dish.Use dill, parsley, or basil for best results.
Citrus (Lemon/Lime)Adds acidity and freshness to balance rich flavors.Squeeze juice just before serving.
GarlicAdds depth and enhances the overall flavor profile.Roasted garlic creates a milder, sweet taste.
Colorful VegetablesBoosts nutrition and adds color and texture to the dish.Grill or roast for enhanced flavor.
Seasoning (Salt/Pepper)Essential for enhancing natural flavors of ingredients.Try smoked salt for a unique taste.
A beautifully plated salmon dish garnished with fresh herbs, lemon slices, and colorful vegetables, showcasing key ingredients for flavor.

Discover the quality and nutrition of Kirkland Salmon, a perfect addition to your table !

Common Mistakes to Avoid with Kirkland Salmon

Overcooking Kirkland Salmon

One of the most common mistakes when cooking Kirkland Salmon is overcooking. This results in dry, flaky fish that lacks flavor and moisture. Salmon should be cooked until just opaque and flaky to the touch. Using a reliable cooking thermometer ensures perfect doneness. Keeping an eye on cooking times will lead to a more delicious meal.

Skipping the Marinade for Kirkland Salmon

Failing to marinate Kirkland Salmon can lead to bland dishes. A good marinade enhances the flavor and tenderness of the fish. Utilize ingredients like lemon juice, garlic, and herbs for optimal taste. Allowing the salmon to marinate for at least 30 minutes makes a difference. Never underestimate the power of simple marinades to elevate your dish.

Ignoring Skin When Cooking Kirkland Salmon

Many cooks mistakenly remove the skin from Kirkland Salmon before cooking. Salmon skin is packed with nutrients and adds flavor during cooking. Leaving the skin on helps retain moisture and prevents the fish from falling apart. Searing the skin creates a crispy texture that enhances the overall dish. Remember, cooking with the skin can yield a tastier experience.

Not Using Fresh Ingredients with Kirkland Salmon

Using ingredients that are not fresh can ruin your Kirkland Salmon dish. Fresh herbs and quality produce significantly enhance flavors. Always choose vibrant vegetables and zestful citrus when cooking. Investing in quality ingredients will lead to better-tasting meals. Don’t compromise on freshness if you aim for a delicious salmon experience.

Neglecting Proper Storage for Leftover Kirkland Salmon

Neglecting proper storage can lead to spoilage and waste. Leftover Kirkland Salmon should be stored in an airtight container to maintain freshness. Refrigerate promptly to prevent bacterial growth and ensure safety. If you’re not cooking salmon right away, consider freezing it. Proper storage practices extend the life of your ingredients and reduce waste.

Cooking Methods for Kirkland Salmon

Grilling Kirkland Salmon: Adding Smoky Flavor

Grilling is a popular method for cooking salmon, providing a delicious smoky flavor. Begin by preheating your grill to medium-high heat. Lightly oil the grill grates to prevent sticking. Place the salmon skin-side down to lock in moisture while cooking. Grilling time typically ranges from 6 to 8 minutes, ensuring a tender, flavorful result.

Baking Kirkland Salmon: A Simple and Healthy Option

Baking is an easy and healthy way to prepare salmon. Preheat the oven to 375°F (190°C) for optimal cooking temperature. Season the salmon with herbs, lemon, and olive oil to enhance its taste. Place it in a baking dish to ensure even cooking. Baking for 15 to 20 minutes yields perfectly flaky salmon that retains moisture.

Pan-Seering: Achieving Crispiness

Pan-searing salmon creates a crispy crust while keeping the inside tender. Start with a hot skillet and add a small amount of oil for cooking. Sear the salmon skin-side down for approximately 4 to 5 minutes. Carefully flip the salmon, cooking for an additional 3 to 4 minutes. This method results in a delightful contrast of textures.

Poaching: A Gentle Cooking Method

Poaching is a gentle method that infuses flavors while keeping salmon moist. Fill a saucepan with water, broth, or wine and heat to a simmer. Add aromas like herbs, garlic, or lemon for flavor enhancement. Cook the salmon for about 10 to 15 minutes, ensuring it flakes easily. Poaching yields tender, flavorful salmon perfect for salads or light dishes.

Broiling : Quick and Effective

Broiling is another excellent cooking method that cooks salmon quickly. Preheat your broiler and place the salmon on a baking sheet. Season the fish with your favorite spices before broiling. Cook for about 6 to 8 minutes, allowing the top to brown beautifully. This method is great for busy weeks, providing fast and delicious results.

A perfectly cooked salmon fillet grilled to perfection, garnished with fresh herbs and lemon, showcasing various cooking methods for salmon.

Discover the quality and nutrition of Kirkland Salmon, a perfect addition to your table !

Chef’s Note

Cooking Kirkland Salmon can be a delightful experience, but even the most seasoned chefs can make mistakes. First and foremost, remember that fresh ingredients are crucial for enhancing flavor. When preparing your Kirkland Salmon, avoid skimping on quality materials. Utilizing fresh herbs, vibrant vegetables, and high-quality oils can truly elevate your dish and make a noticeable difference in taste.

Take the time to properly marinate and season your salmon, as this preparation can dramatically enhance flavor. Try using mixtures that include citrus, garlic, and herbs to infuse the fish with rich undertones. A well-balanced marinade not only adds depth but also contributes moisture, ensuring that your salmon stays juicy and tender throughout the cooking process.

Be mindful of your cooking method; each technique offers unique flavors and textures that alter the salmon’s profile. Whether you’re grilling, baking, or pan-searing, always keep a close eye on the doneness. Salmon should be cooked until it is just opaque and flakes easily with a fork. Overcooking can lead to dry, unappetizing fish, so invest in a reliable cooking thermometer to ensure perfect results.

Lastly, don’t overlook storage. Properly refrigerating or freezing any leftovers is essential to maintain freshness and prevent spoilage. Use airtight containers to lock in flavor and quality. Understanding how to store your Kirkland Salmon will not only extend its shelf life but will also provide you with future delicious meals.

With a little attention to detail and a willingness to experiment, you can transform your Kirkland Salmon into a memorable and delicious meal every time. Enjoy the wonderful culinary journey that salmon offers, and don’t hesitate to get creative in your kitchen. Happy cooking !

By: Gastronome Recipes, January 29, 2025

Why JR Bacon Cheeseburgers Should Be Your Next Guilty Pleasure

Delicious JR Bacon Cheeseburger with crispy bacon, melted cheese, and fresh greens, presented in a stylish fast food setting.

Discover the exciting 1-cent deal on the JR Bacon Cheeseburger !

A Delicious Opportunity Awaits for JR Bacon Cheeseburgers

The JR Bacon Cheeseburger is a beloved fast-food option. Its mouthwatering combination of flavors tantalizes taste buds. Recently, the chance to grab one for just 1 cent has created excitement. This limited-time offer is ideal for burger enthusiasts on a budget. Don’t miss out on this incredible deal that delivers satisfaction.

Why Choose the JR Bacon Cheeseburger ?

This JR Bacon cheeseburger stands out for various reasons. Fresh, quality ingredients elevate the flavor profile significantly. Juicy patties topped with crispy bacon create a delightful contrast. Melted cheese adds creaminess, making every bite unforgettable. Whether it’s a casual lunch or a late-night snack, this burger fits all occasions.

The Fast Food Landscape Today

Fast food promotions are a powerful marketing strategy. With numerous choices available, diners seek the best deals. This promotion highlights how chains attract customers with captivating offers. The JR Bacon Cheeseburger deal is both wallet-friendly and delicious. It’s a testament to the evolving fast-food dining experience.

Join the Flavor Revolution of JR Bacon Cheeseburgers

Burgers are timeless and continually evolving. New combinations and unique ingredients keep the menu interesting. The JR Bacon Cheeseburger showcases this delicious trend through simplicity. As fast food continues to innovate, offers like this keep customers engaged. Embrace the opportunity to indulge in this tempting option.

Unlocking the JR Bacon Cheeseburger Deal

How to Take Advantage of JR Bacon Cheeseburgers

To enjoy this incredible deal, visit participating locations during the promotion. Check the chain’s website or app for specific terms and conditions. Ordering through the app may provide additional benefits or options. Be sure to arrive early, as popularity can lead to sellouts quickly. Following these tips will ensure you secure your delicious JR Bacon Cheeseburger.

Timing Is Key: Best Days to Buy JR Bacon Cheeseburgers

Taking advantage of the deal requires strategic planning. Weekdays may experience less crowding, allowing quicker service. Additionally, consider visiting during off-peak hours for shorter wait times. Staying informed about the promotion’s duration is essential. Plan your visit accordingly to avoid disappointment and enjoy your meal with ease.

Customer Experiences: What People Are Saying

Customers have widely embraced this fantastic offer, sharing their excitement online. Many reviews praise the irresistible combination of flavors and quality. Social media buzz amplifies the enthusiasm surrounding the JR Bacon Cheeseburger. Join others in savoring this quick meal while enjoying significant savings. Your feedback can help spread the word about this delicious deal !

Delicious JR Bacon Cheeseburger placed on a vibrant table, showcasing the 1-cent promotional offer

Discover the exciting 1-cent deal on the JR Bacon Cheeseburger !

What Makes the JR Bacon Cheeseburger Unique ?

Signature Ingredients That Stand Out

The JR Bacon Cheeseburger features high-quality ingredients that set it apart. Juicy beef patties provide a rich, savory flavor. Crispy bacon adds a satisfying crunch and irresistible taste. Melted cheese brings creaminess that enhances overall enjoyment. Fresh lettuce and tomato add a refreshing touch, balancing the burger perfectly.

Flavor Profile: What to Expect

This cheeseburger offers a delightful symphony of flavors. The combination of savory beef, salty bacon, and creamy cheese creates an explosion of taste. Bite into the freshness of vegetables, adding a crisp texture. The perfect seasoning elevates each component, making it memorable. Overall, the JR Bacon Cheeseburger delivers a satisfying experience.

Comparing It to Other Fast Food Burgers

When compared to competitors, the JR Bacon Cheeseburger stands out distinctly. Its combination of ingredients creates a unique flavor profile. Many fast food offerings lack the same level of quality and taste. The balance of textures makes it a favorite among burger enthusiasts. It consistently outshines rivals, ensuring repeat customers.

Why JR Bacon Cheeseburgers with Bacon Make a Difference

Bacon is an essential component of the JR Bacon Cheeseburger. It adds an undeniable depth of flavor that elevates the burger experience. Crispy bacon bits provide a satisfying contrast to the tender beef. This ingredient enhances overall satisfaction and enjoyment. For bacon lovers, this burger is a must-try delight!

Freshness Matters: Sourcing Quality Ingredients

The quality of ingredients plays a crucial role in the JR Bacon Cheeseburger’s appeal. Fresh produce ensures that each bite is crisp and flavorful. The beef is sourced for optimal taste and texture, making every burger fulfilling. Using quality ingredients fosters customer loyalty and satisfaction. This commitment to freshness sets the chain apart in the competitive landscape.

Customization: Make It Your Own

One of the unique aspects of the JR Bacon Cheeseburger is its customization options. Customers can tailor their burgers to suit personal tastes. Add extra toppings like pickles or onions for an individualized flavor. You can choose various condiments to enhance the taste further. This flexibility makes each burger experience unique and enjoyable.

Ideal Size for Any Meal

The JR Bacon Cheeseburger is designed to be the perfect size for any occasion. Its portion is ideal for a satisfying lunch or snack. This balanced size allows for enjoyment without feeling overly full. It caters to those looking for a quick meal on the go. Versatility in size makes it a favorite among fast food patrons.

The Allure of Fast Food Branding

The popularity of the JR Bacon Cheeseburger is also due to effective branding. The fast-food chain’s strong identity attracts loyal customers. Clever marketing campaigns and promotions keep it front-of-mind. Challenging competitors in this market boosts visibility and sales. This strategic approach enhances the appeal of their signature burger.

To learn more about the amazing 1-cent deal on JR Bacon Cheeseburgers, check out the details here.

A delicious JR Bacon Cheeseburger showcasing juicy beef patty, crispy bacon, melted cheese, fresh lettuce, and tomato, highlighting each key ingredient.

Discover the exciting 1-cent deal on the JR Bacon Cheeseburger !

Key Ingredients of a JR Bacon Cheeseburger

Freshness Counts: Sourcing Quality Ingredients

The quality of ingredients significantly impacts the JR Bacon Cheeseburger. Freshly sourced beef ensures optimal taste and texture. Ingredients like lettuce and tomatoes should be crisp and vibrant. Quality bacon, ideally smoked, enhances flavor and adds a satisfying crunch. This commitment to fresh ingredients elevates the overall burger experience.

The Perfect Balance: Patty, Bacon, and Cheese

A well-cooked beef patty is the cornerstone of the JR Bacon Cheeseburger. It provides savory, hearty flavors that satisfy cravings. Crispy bacon adds a textural contrast, while melted cheese brings creaminess. The balance of these three ingredients creates a delightful harmony. Each bite delivers a memorable taste that keeps customers coming back.

Optional Add-Ons: Customize Your JR Bacon Cheeseburgers

Customization is a key feature of the JR Bacon Cheeseburger. Customers can choose additional toppings to personalize their meal. Options include pickles, onions, and various sauces for diverse flavor profiles. Adding extra cheese creates an even richer experience. This versatility ensures that everyone can enjoy their ideal burger.

Handling and Storing Ingredients for Quality

Proper handling and storage of ingredients are essential for maintaining quality. Fresh produce should be kept refrigerated to preserve crispness and flavor. Cooked patties and bacon should be stored separately in airtight containers. Keeping ingredients organized minimizes waste and ensures the best taste. Following these guidelines promotes the highest quality dining experience

IngredientsPurposeFlavor Suggestions
Juicy Beef PattyProvides protein and savory flavor; the burger’s core.Season with pepper or garlic for added taste.
Crispy BaconAdds a crunchy texture and savory, salty flavor.Pair with maple syrup for a sweet twist.
Melted CheeseCreates creaminess and richness; enhances flavor profile.Try different cheeses like pepper jack.
Fresh LettuceAdds crunch and freshness; balances richer ingredients.Opt for arugula for a peppery kick.
Slices of TomatoBrings juiciness and acidity; brightens the overall flavor.Use heirloom tomatoes for superior taste.
PicklesProvides tartness and crunch, adding complexity.Experiment with dill or sweet pickles.
OnionsOffers sharpness and depth; enhances overall flavor.Caramelized onions for sweetness.
Various SaucesAdds moisture and distinct flavor; complements ingredients.Ketchup, mustard, or special sauce.
Key Ingredients of a JR Bacon Cheeseburger: What You Need to Know

Discover the exciting 1-cent deal on the JR Bacon Cheeseburger !

Fast Food Savings : JR Bacon Cheeseburgers

Other Promotions to Look Out For JR Bacon Cheeseburgers

Fast food chains frequently run various exciting promotions. Keep an eye on limited-time offers featuring discounted meals. Seasonal promotions often include unique menu items at reduced prices. Regularly checking restaurant apps can reveal exclusive deals and savings. Don’t miss figuring out how to maximize your fast-food budget!

Budget-Friendly Dining Tips for Families

Eating out doesn’t have to break the bank, even with a family. Look for combo meals that offer significant savings compared to individual items. Consider sharing larger portions among family members to cut costs. Always check for coupons or promotions available online before ordering. Planning meals around deals can save time and money.

Making the Most of Fast Food Loyalty Programs

Loyalty programs often reward frequent customers with exclusive deals. By signing up, you can earn points for every purchase made. Accumulated points can be redeemed for free food items or discounts. Various fast food chains offer unique perks through their loyalty apps. Taking advantage of these programs enhances your overall dining experience.

Exploring Cheap Eats Beyond burgers

While burgers are popular, many other fast food options can be affordable. Tacos, sandwiches, and salads often feature discounts as well. Expanding your menu choices can lead to delicious discoveries without overspending. Explore local fast food chains for unique offerings at great prices. Embracing variety can keep your dining experiences fresh and exciting.

Common Mistakes when making JR Bacon Cheeseburgers

Skipping the Fresh Ingredients

One of the most common mistakes is using low-quality or old ingredients. Freshness directly affects flavor, texture, and overall satisfaction. Opting for fresh produce elevates your dishes significantly. Always check the expiration dates on meats and dairy. Prioritizing quality ensures a delicious meal every time.

Overcomplicating the Recipe of JR Bacon Cheeseburgers

Many home cooks make the mistake of overcomplicating their recipes. Simple meals often yield the best flavors and experiences. Adding too many ingredients can confuse the palate. Stick to a few high-quality components for maximum impact. Embrace simplicity to create delicious and satisfying dishes.

Ignoring Cooking Times

Another frequent error is not paying attention to cooking times. Under or overcooking can ruin the texture of your meal. Using a thermometer helps ensure meats are perfectly cooked. Following recommended cooking times leads to better results. Invest in timers for precise cooking and better meals.

Not Tasting While Cooking the JR Bacon Cheeseburgers

Failing to taste your food during preparation is a common misstep. Tasting allows adjustments to be made for seasoning and flavor. Noting when ingredients need more salt or acidity is essential. Trust your palate to guide adjustments throughout the cooking process. Taste-testing leads to better-balanced and flavorful dishes.

Neglecting Proper Storage

Lastly, neglecting proper storage can lead to wasted food and money. Understanding how to store ingredients and leftovers prevents spoilage. Using airtight containers helps maintain freshness and quality. Labeling items with dates ensures timely consumption. Proper storage practices maximize the longevity of your ingredients.

A graphic showing common cooking mistakes, including spoiled ingredients, overcomplicated recipes, and improper storage methods.

Discover the exciting 1-cent deal on the JR Bacon Cheeseburger !

Chef’s Note

Cooking is both an art and a science, and it’s perfectly normal to make mistakes along the way. Remember, every chef, whether novice or expert, has faced challenges in the kitchen. The key is to learn from these experiences and refine your techniques.

Always prioritize quality ingredients—freshness is paramount for flavor. Don’t be afraid to keep your dishes simple; sometimes less is more. Get into the habit of tasting your food as you cook; it’s the best way to ensure balanced flavors. And finally, embrace the importance of proper storage to avoid wasting your hard-earned ingredients.

Cooking should be enjoyable, so don’t get discouraged by missteps. With practice and patience, you will develop confidence and improve your skills over time. Happy cooking !

By: Gastronome Recipes, January 29, 2025

How to Make Candied Orange Peels : A Sweet and Simple Delight !

Introduction to Candied Orange Peel: showcasing vibrant orange peels and sugar mixture.

Uncover the delightful process of transforming fresh oranges into delicious homemade treats.

Candied Orange Peel

Candied orange peel transforms a simple fruit into an exquisite treat. This delightful process creates sweet, chewy snacks bursting with citrus flavor. Homemade versions offer unique tastes compared to store-bought options. Making candied orange peel is an enjoyable activity for all ages. It also uses scraps, minimizing waste and maximizing flavors.

The Art of Candying Citrus

Candying citrus fruits is an ancient culinary technique. The process involves boiling fruit peels in sugar and water. This method not only preserves the fruit but also enhances its natural sweetness. Using fresh, vibrant oranges creates a colorful and tasty result. The art of candying turns everyday ingredients into gourmet delights.

Health Benefits of Candied Orange Peel

Oranges are not just delicious; they offer numerous health benefits. Rich in vitamin C, they boost immunity and enhance skin health. Additionally, they provide dietary fiber, promoting good digestion. The antioxidants present in oranges help combat free radicals. Incorporating candied orange peel allows you to enjoy these benefits in a sweet form.

Versatility in Culinary Creations

Candied orange peel is versatile and can elevate various dishes. Use it as a garnish for desserts, cakes, or pastries. It can also enhance the flavor of savory dishes, adding a unique twist. Furthermore, it pairs beautifully with chocolate or nuts, creating gourmet combinations. Let your creativity shine by experimenting with this tasty treat.

What is Candied Orange Peel ?

Understanding Candied Orange Peel

Candied orange peel is a delectable confection made from orange rinds. The process involves boiling the peels in sugar syrup. This method preserves the fruit while adding sweetness and flavor. Candied peels are chewy, sweet, and bursting with citrusy goodness. They make excellent snacks or additions to various dishes.

The Candying Process Explained

Creating candied orange peel is surprisingly simple and fun. First, the orange peels are cut into strips, removing any bitter pith. Next, they are boiled in sugar syrup until translucent and tender. Once cooled, the peels are rolled in sugar for a delightful finish. This candying method transforms ordinary ingredients into gourmet delights.

Culinary Uses and Versatility for Candied Orange Peel

Candied orange peel is versatile in culinary applications. It can be used as a garnish for cakes, pastries, or desserts. Additionally, it enhances savory dishes with a touch of sweetness. Chocolate lovers enjoy combining candied peel with their favorite treats. This ingredient elevates many recipes, adding a unique twist.

A Brief History of Candied Citrus

Candied orange peel has a rich history dating back centuries. It’s been enjoyed in various cultures around the world. This treat originally served as a method of food preservation. Candied citrus became popular in European confections, showcasing culinary creativity. Its timeless appeal continues to delight dessert lovers today.

To learn a delightful recipe for creating candied orange peel, check out this detailed guide here.

An illustration of candied orange peel strips coated in sugar, showcasing their vibrant color and texture.

Uncover the delightful process of transforming fresh oranges into delicious homemade treats.

Key Ingredients for Making Candied Orange Peel

Fresh Oranges: The Star Ingredient

Fresh oranges are essential for making candied orange peel. The zest and natural sweetness contribute rich flavors. Choose vibrant, organic oranges for the best results. The peels should be firm, glossy, and free from blemishes. Utilizing the entire fruit reduces waste and maximizes enjoyment.

Granulated Sugar for Sweetness

Granulated sugar is crucial in the candying process. It transforms the peels into a sweet, chewy delight. Sugar helps preserve the orange peels, enhancing their flavor. Using standard granulated sugar is most common, but variations exist. Experimenting with alternatives adds interesting notes to the final product.

Water: The Binding Element

Water serves as a binding element in the candying process. It is mixed with sugar to create a syrup. The right balance of water ensures excellent texture and consistency. Boiling the peels in syrup allows for optimal absorption of sweetness. This step is vital for achieving that chewy, irresistible quality.

Optional Ingredients for Flavor Boost

While oranges and sugar are the main ingredients, optional flavors can enhance the taste. Adding lemon juice brightens the citrus profile significantly. A splash of vanilla extract can complement the sweetness beautifully. Spice options like cinnamon or ginger add warmth and depth. Feel free to get creative with flavors!

Storage Ingredients: Ensuring Freshness

To maximize freshness, consider using ingredients for storage. Airtight containers maintain quality over time. Desiccant packs can prevent excess moisture. A cool, dark place works best for preserving candy. Proper storage guarantees that your homemade treats stay delicious longer.

IngredientsPurposeFlavor Suggestions
Fresh OrangesThe star ingredient; provides sweetness and zest.Lemon juice for brightness and tang.
Granulated SugarSweetens the peels and aids in preservation.Vanilla extract for a warm, aromatic note.
WaterCreates a syrup for candying the peels.A hint of cinnamon for added warmth.
Lemon JuiceEnhances citrus flavor and balances sweetness.Ginger for a spicy kick.
Vanilla ExtractAdds depth and warmth to the overall flavor.Orange zest for an extra citrus punch.
CinnamonAdds a cozy, comforting touch to the candy.Nutmeg for a holiday feel.
GingerProvides a spicy contrast to the sweet flavor.Cloves for a warm, aromatic blend.
An assortment of key ingredients for making candied orange peel: fresh oranges, granulated sugar, and a jar of syrup.

Uncover the delightful process of transforming fresh oranges into delicious homemade treats.

Step-by-Step Guide to Candying Orange Peel

Gather Your Ingredients and Tools for Candied Orange Peel

Before starting, gather all necessary ingredients and tools. Fresh oranges are crucial for this recipe. Ensure you have granulated sugar and water on hand. A sharp knife will help cut the peels evenly. Additionally, prepare a pot, spoon, and baking sheet for convenience.

Prepare the Oranges for Candying

Begin by washing the oranges thoroughly to remove any wax. Next, carefully peel the oranges, trying to keep strips intact. Aim for minimal pith, as it could add bitterness. Cut the peels into uniform strips for even cooking. This preparation sets the stage for delicious candied treats.

Boil the Orange Peels

In a pot, combine the orange peels with water. Bring the mixture to a boil, then reduce heat for simmering. Allow the peels to cook for about 10-15 minutes. This process helps soften the peels and reduce bitterness. Drain the water before moving on to the next step.

Create the Sugar Syrup

In the same pot, mix granulated sugar with water to create a syrup. Use a ratio of 2:1 sugar to water for optimal sweetness. Heat the mixture until the sugar dissolves completely. Once the syrup reaches a gentle simmer, add the cooked orange peels. Coat them in the syrup, infusing sweet flavors.

Candy the Orange Peels

Simmer the orange peels in the sugar syrup for about 45 minutes. Stir occasionally to ensure even coating and prevent sticking. You’ll notice the peels becoming translucent and sticky. After cooking, remove them from the pot and place them on a lined baking sheet. Allow the peels to cool completely.

Coat the Peels in Sugar

Once cooled, coat the sticky orange peels in granulated sugar. This final step enhances sweetness and adds texture. Spread the sugared peels on a wire rack or parchment paper to dry. Allow them to sit for several hours or overnight for best results. Enjoy your candied orange peels as a treat !

Step-by-step photos showing the process of candying orange peel, including ingredient preparation, cooking, and sugaring.

Uncover the delightful process of transforming fresh oranges into delicious homemade treats.

Creative Ways to Use Candied Orange Peel

Elevate Your Baking Adventures of Candied Orange Peel

Candied orange peel can transform your baking recipes into gourmet creations. Incorporate it into cakes, cookies, or muffins for added flavor. The sweet, chewy texture complements various baked goods perfectly. Additionally, it pairs wonderfully with chocolate, enhancing your favorite desserts. Experimenting with candied peel opens up delightful baking possibilities.

Flavorful Garnishes for Desserts

Using candied orange peel as a garnish adds elegance to desserts. Place strips atop cakes, tarts, or ice cream for a stunning presentation. The vibrant color contrasts beautifully with creamy textures. Moreover, it dials up the flavor in each bite, creating a memorable experience. Impress guests with this simple yet effective touch.

Savory Dishes with a Twist

Candied orange peel isn’t just for sweets; it’s perfect for savory dishes too. Add chopped peels to salads for a burst of sweetness and citrus flavor. They also complement grilled meats, particularly duck or chicken. Incorporating candied peel into sauces adds depth and complexity. It’s a creative way to elevate everyday meals.

Homemade Candies and Snacks

Make your own candies and snacks using candied orange peel as a base ingredient. Chop it into small pieces and combine with nuts or chocolate. Create energy bites or trail mix with an exciting twist. Additionally, mixing it with granola adds sweetness and zest. Healthy snacking can be both delicious and exciting.

Unique Holiday Treats

During the holiday season, candied orange peel makes a special addition to festive treats. Use it in holiday cookies or cakes for a nostalgic flavor. Pair it with spices like cinnamon and nutmeg for a wintery vibe. It can even be given as a thoughtful homemade gift. Celebrate the season with this delightful, handcrafted treat !

Nutritional Benefits of Candied Orange Peel

Rich in Dietary Fiber

Orange peels are an excellent source of dietary fiber. Fiber is essential for digestive health and regularity. Consuming fiber helps maintain a healthy gut microbiome. Additionally, it aids in weight management by promoting a feeling of fullness. Including orange peels in your diet supports overall digestive well-being.

High in Vitamin C

Orange peels contain a significant amount of vitamin C. This vitamin is critical for immune system support and fight diseases. Vitamin C also promotes healthy skin and collagen production. Eating orange peels can help you meet your daily vitamin C needs. They serve as an added nutritional boost alongside the fruit itself.

Packed with Antioxidants

Antioxidants in orange peels help combat oxidative stress in the body. This protective benefit contributes to overall health and wellness. Flavonoids and polyphenols are abundant in the peels, offering anti-inflammatory effects. Consuming antioxidants can support heart health by reducing cholesterol levels. Incorporating orange peels into your diet is a simple way to enhance your antioxidant intake.

Essential Oils and Their Benefits

Orange peels contain essential oils that provide unique health benefits. These oils have antimicrobial and anti-inflammatory properties. Additionally, they can enhance mood and alleviate stress when inhaled. The aromatic nature of orange peels makes them perfect for various culinary uses. Embracing orange peels means enjoying both flavor and wellness benefits.

Nutrient Absorption Boost

The presence of essential oils in orange peels can aid in nutrient absorption. These compounds help the body better utilize vitamins and minerals from foods. Improved absorption supports overall health, enhancing energy levels and vitality. Eating orange peels ensures you gain the full benefits from nutrients. They serve as both food and functional health support.

Visual representation of the nutritional benefits of orange peels, highlighting fiber, vitamin C, and antioxidants in vibrant orange slices.

Uncover the delightful process of transforming fresh oranges into delicious homemade treats.

Chef’s Note

When making candied orange peel, remember that the quality of your oranges significantly impacts the final product. Opt for organic oranges if possible, as they are free from pesticides and have a more vibrant flavor. The freshness of the oranges will enhance the sweetness and zest of your candied peel.

Also, don’t hesitate to get creative with flavors! Feel free to experiment by adding spices like cinnamon or ginger to your syrup. A touch of lemon juice can brighten the overall flavor profile. You can also try using different citrus fruits such as lemons, limes, or grapefruits for a unique twist.

Lastly, be patient during the drying process after candying. Allow the peels to dry thoroughly to achieve the right texture. Properly dried candied orange peel will be chewy yet not overly sticky, making it perfect for snacking or incorporating into recipes. Enjoy this delightful treat in various dishes or savor it on its own !

By: Gastronome Recipes, January 29, 2025

Heavenly Cream Cheese Pasta : Your New Dinner Staple

A cozy kitchen scene featuring a rich bowl of creamy pasta, highlighted with garnishes, showcasing the inviting nature of homemade comfort food.

Discover why cream cheese pasta is the ultimate comfort dish and how to make it at home.

The Comfort of Cream Cheese Pasta

Cream cheese pasta is a delightful dish that brings comfort and warmth to any meal. This rich and creamy recipe combines pasta with luscious cream cheese for a delectable experience. Ideal for busy weeknights or elegant gatherings, it’s a versatile option that appeals to all tastes. Featuring simple ingredients, it’s an easy dish to prepare, allowing everyone to enjoy gourmet flavors without hassle.

Why You Should Try This Recipe

This pasta recipe is perfect for those seeking comfort food that’s also satisfying. The creamy texture of the cream cheese melds beautifully with al dente pasta. It serves as a blank canvas for various additional ingredients, allowing for creativity in the kitchen. Not only is this dish delicious, but it is also quick to prepare, making it ideal for those with busy schedules. Trying this recipe will delight your taste buds and impress your guests.

Elevate Your Culinary Skills

Making thie recipe allows you to explore culinary skills with simple yet effective techniques. From sautéing vegetables to perfecting a creamy sauce, each step enhances your cooking repertoire. The dish exemplifies how easy it can be to create restaurant-quality meals at home. Embracing this recipe invites experimentation with flavors and textures, paving the way for your culinary journey.

What is Cream Cheese Pasta ?

Defining Cream Cheese Pasta

Cream cheese pasta is a rich and creamy dish that incorporates cream cheese as a key ingredient. This delightful meal combines pasta with a velvety sauce made from softened cream cheese, ensuring each bite is indulgent. Typically served with various flavors, it can be tailored to suit personal preferences. Whether you enjoy classic flavors or prefer something unique, cream cheese pasta is a versatile option that satisfies diverse tastes.

The Appeal of Creamy Texture

One of the main attractions of cream cheese pasta is its luxurious, creamy texture. The cream cheese melts seamlessly into the warm pasta, creating a luscious, cohesive dish. This creaminess complements a range of pasta shapes, from fettuccine to penne, making it suitable for various culinary styles. The smooth consistency elevates the dish, transforming simple pasta into a gourmet experience that’s easy to prepare.

Popular Variations and Flavor Profiles

Cream cheese pasta offers endless possibilities for variations and flavor profiles. You can easily customize this dish by adding vegetables like spinach, mushrooms, or roasted red peppers. Incorporating proteins such as chicken, shrimp, or chickpeas introduces heartiness while enhancing the overall flavor. Additionally, spices and herbs like garlic, fresh basil, or black pepper can amplify taste. These variations create a unique dining experience every time.

Why It’s a Perfect Dinner Choice

Cream cheese pasta is ideal for dinners due to its ease of preparation and comforting flavors. This dish is quick to make, often requiring minimal cooking time for busy weeknight meals. It pairs beautifully with salads, garlic bread, or your favorite side dishes. The rich flavor profile and satisfying nature of cream cheese pasta make it a favorite among families and guests alike.

For an easy and quick recipe, check out this 10-Minute Cream Cheese Pasta that you can whip up in no time !

A delectable bowl of creamy pasta made with cream cheese, garnished with fresh herbs and presented in a cozy kitchen setting.

Discover why cream cheese pasta is the ultimate comfort dish and how to make it at home.

Essential Components for Cream Cheese Pasta

Key Ingredients for Flavor Excellence

To create a delicious cream cheese pasta dish, choosing the right ingredients is essential. Cream cheese serves as the base, providing a rich and creamy texture. Pasta varieties like fettuccine, penne, or spaghetti are ideal for holding the sauce, making each bite satisfying. Incorporating additional ingredients such as garlic, onion, or fresh herbs enhances the overall flavor profile, resulting in a delightful culinary experience. High-quality ingredients elevate the dish and guarantee delicious results every time.

Nutritional Elements to Consider

Including nutritious elements in your cream cheese pasta enhances its overall health benefits. Fresh vegetables like spinach, bell peppers, or broccoli add essential vitamins and fiber. Using whole grain or gluten-free pasta can cater to dietary preferences while maintaining nutritional value. Additionally, lean proteins like chicken or shrimp can be incorporated for added sustenance. Balancing flavors with nutritious choices makes your pasta dish not only tasty but also satisfying and wholesome.

Flavor Enhancements for Variety

Experimenting with various flavor enhancements can keep your recipe exciting. Adding spices like red pepper flakes, black pepper, or nutmeg can elevate the dish to new heights. Consider incorporating sun-dried tomatoes or olives for depth and richness. You can also create a creamy sauce by mixing in vegetable broth or coconut cream, depending on personal preferences. Discovering different flavor combinations ensures that you enjoy a new version of your favorite dish each time you prepare it.

IngredientsPurposeFlavor Suggestions
Cream CheeseProvides the base for a creamy texture.Use whipped cream cheese for ease of mixing.
Pasta VarietiesBase of the dish, holds the sauce.Fettuccine or penne for varied textures.
GarlicEnhances flavor with aromatic richness.Use roasted garlic for added sweetness.
Fresh HerbsAdds brightness and an aromatic touch.Basil or parsley to elevate the dish.
VegetablesIntroduces nutrients and color.Spinach, mushrooms, or cherry tomatoes.
A beautifully arranged selection of ingredients for cream cheese pasta, including cream cheese, fresh vegetables, and herbs, emphasizing quality and flavor.

Discover why cream cheese pasta is the ultimate comfort dish and how to make it at home.

Easy Steps to Prepare Cream Cheese Pasta

Gathering Your Ingredients

Before starting your cream cheese pasta, gather all essential ingredients for cooking success. High-quality pasta varieties, cream cheese, and fresh vegetables are vital for flavor. Ensure that you have garlic, herbs, and seasonings ready to enhance the dish further. Proper preparation allows for a smooth cooking experience, making the process enjoyable and efficient.

Cooking the Pasta Perfectly

To achieve the best results, cook your pasta according to package instructions for al dente texture. Bring a large pot of salted water to a boil before adding the pasta. Stir occasionally to prevent sticking and ensure even cooking. Once cooked, drain and reserve some pasta water for later use to achieve the perfect sauce consistency. This step ensures that your pasta has texture and flavor.

Preparing the Creamy Sauce

Making the sauce is a key step in achieving creamy goodness in your dish. In a large skillet, melt butter or heat olive oil over medium heat. Add minced garlic and sauté until fragrant, ensuring not to burn. Gradually add cream cheese to the skillet, stirring until melted and smooth. Incorporate a splash of the reserved pasta water for creaminess, creating a luxurious sauce that perfectly coats the pasta.

Combining and Serving

Once your sauce is ready, add the cooked pasta to the skillet, mixing everything thoroughly. This allows the sauce to cling to each noodle, enhancing flavor and texture. If desired, add cooked vegetables to the mix for added nutrition and flavor. Serve immediately while hot, garnishing with fresh herbs or grated cheese as a delightful finishing touch.

A step-by-step visual guide showing a bowl of creamy pasta being prepared, with fresh ingredients and cooking utensils beautifully arranged.

Discover why cream cheese pasta is the ultimate comfort dish and how to make it at home.

Variations of Cream Cheese Pasta

Creamy Garlic and Spinach Pasta

One delightful variation of cream cheese pasta incorporates fresh spinach and garlic. Sautéing garlic in olive oil enhances flavor while adding a rich aroma. The addition of spinach contributes vibrant color and nutritional value. This combination creates a wonderful balance of flavors that complements the creamy sauce. Enjoying this variation offers a nutritious and satisfying meal that showcases seasonal ingredients.

Sun-Dried Tomato and Basil Twist

A sun-dried tomato and basil variation adds a burst of flavor to cream cheese pasta. The tangy sweetness of sun-dried tomatoes pairs excellently with the creamy texture. Adding fresh basil not only enhances taste but also introduces aromatic elements. This vibrant combination creates a delightful Italian-inspired dish. Experimenting with this variation brings a fresh perspective to your pasta experience.

Mushroom and Thyme Delight

For mushroom lovers, incorporating sautéed mushrooms and thyme into cream cheese pasta is irresistible. The earthy flavors of Baby Bella mushrooms add depth and complexity to the dish. Fresh thyme enhances the overall aroma, making it comforting and delicious. This variation pairs wonderfully with a light salad for a complete meal. It’s perfect for cozy dinners or casual gatherings with friends.

Spicy Chipotle Cream Pasta

If you enjoy a kick of heat, try a spicy chipotle cream pasta variation. Adding chipotle peppers in adobo sauce introduces smokiness and bold flavors. The creamy texture of the sauce balances the spice beautifully, creating a satisfying dish. Consider topping with green onions or fresh cilantro to elevate the presentation and flavor. This variation is for those who crave a little extra spice in their meals.

Nut-Free Option for Cream Cheese Pasta

For a nut-free variation, consider using seeds instead of nuts or further enhancing the creamy base. Sunflower seeds blended into the sauce can create a rich texture without allergens. Adding additional veggies, like carrots or zucchini, also maintains flavor while keeping it light and healthy. This option is perfect for gatherings with various dietary needs, ensuring everyone can enjoy delicious cream cheese pasta.

Common Mistakes to Avoid When Making Cream Cheese Pasta

Overcooking the Pasta

One of the most frequent mistakes is overcooking the pasta. Overcooked pasta becomes mushy, losing its desired texture. Always follow package instructions for cooking times for best results. Aim for al dente, which means slightly firm. This texture allows the pasta to hold sauces beautifully, enhancing the whole experience. Monitoring cooking time prevents disappointment in your creamy dish.

Using Cold Ingredients

Using cold ingredients can lead to undesirable results in your cream cheese pasta. Cold cream cheese does not mix well with warm pasta, resulting in lumps. To achieve a smooth sauce, use room temperature cream cheese. Allowing it to soften promotes better blending, ensuring a creamy, luxurious consistency. This small detail can make a significant difference in the final dish.

Neglecting Seasoning

Many home cooks overlook the importance of seasoning their dishes properly. Cream cheese can be bland on its own, so adjusting seasoning ensures rich flavor. Always taste your dish as you prepare it; this lets you identify whether it needs more salt or spices. Experiment with garlic powder, black pepper, or herbs to enhance the overall profile. Proper seasoning adds depth and enhances the enjoyment of the pasta.

Skipping the Taste Test

Skipping a taste test during preparation can lead to an unbalanced dish. Take the time to sample the creamy sauce before serving. This step helps you evaluate flavor and consistency, allowing adjustments for sweetness or saltiness. By tasting throughout the cooking process, you gain control over the final outcome of your dish. Enjoying the cooking journey is as important as the result.

Rushing the Cooking Process

Rushing through the cooking process often leads to poor texture or flavor. Taking your time allows for proper caramelization of onions or the rich melting of cream cheese. Avoid cutting corners, as a leisurely pace yields better results, enhancing both flavors and satisfaction. Enjoying the process encourages experimentation, leading to culinary discoveries that make cooking enjoyable.

An array of enticing cream cheese pasta variations displayed in elegant bowls, including vibrant spinach pasta and spicy chipotle cream pasta.

Discover why cream cheese pasta is the ultimate comfort dish and how to make it at home.

Chef’s Note

When making cream cheese pasta, the key to achieving an exceptional dish lies in preparation and ingredient quality. Start with high-quality pasta; shapes like fettuccine or penne work particularly well for holding rich sauces. For the cream cheese, choose a full-fat version to ensure creaminess and flavor. Always allow the cream cheese to come to room temperature before incorporating it into your dish, as this will prevent lumps and create a smooth texture.

Sautéing aromatics, such as garlic or onion, before adding other ingredients enhances overall flavor depth. Don’t rush this step—allowing the aromatics to develop properly will elevate your dish. Maintaining balance in seasoning is crucial; tasting as you go helps you adjust flavors for the perfect outcome. Consider using fresh herbs like basil or parsley for a burst of color and taste.

Experimentation is encouraged! Adding vegetables like spinach or mushrooms can introduce various nutrients and flavors that complement the creamy texture beautifully. Finally, don’t hesitate to drizzle a little olive oil or sprinkle some cheese on top before serving to enhance visual appeal and flavor. Enjoy the process and have fun creating a delightful pasta dish that everyone will love! Happy cooking !

By: Gastronome Recipes, January 28, 2025